Getting Started
In this lab, you will create an Azure Cosmos DB account.
Log-in to the Azure Portal
-
In a new window, sign in to the Azure Portal (http://portal.azure.com).
-
Once you have logged in, you may be prompted to start a tour of the Azure portal. You can safely skip this step.
Create Azure Cosmos DB Resource
You will now create an Azure Cosmos DB account to use in the remaining labs.
Create Azure Cosmos DB Account
-
On the left side of the portal, click the Create a resource link.

-
At the top of the New blade, locate the Search the Marketplace field.

-
Enter the text Cosmos into the search field and press Enter.
-
In the Everything search results blade, select the Azure Cosmos DB result.

-
In the Azure Cosmos DB blade, click the Create button.

-
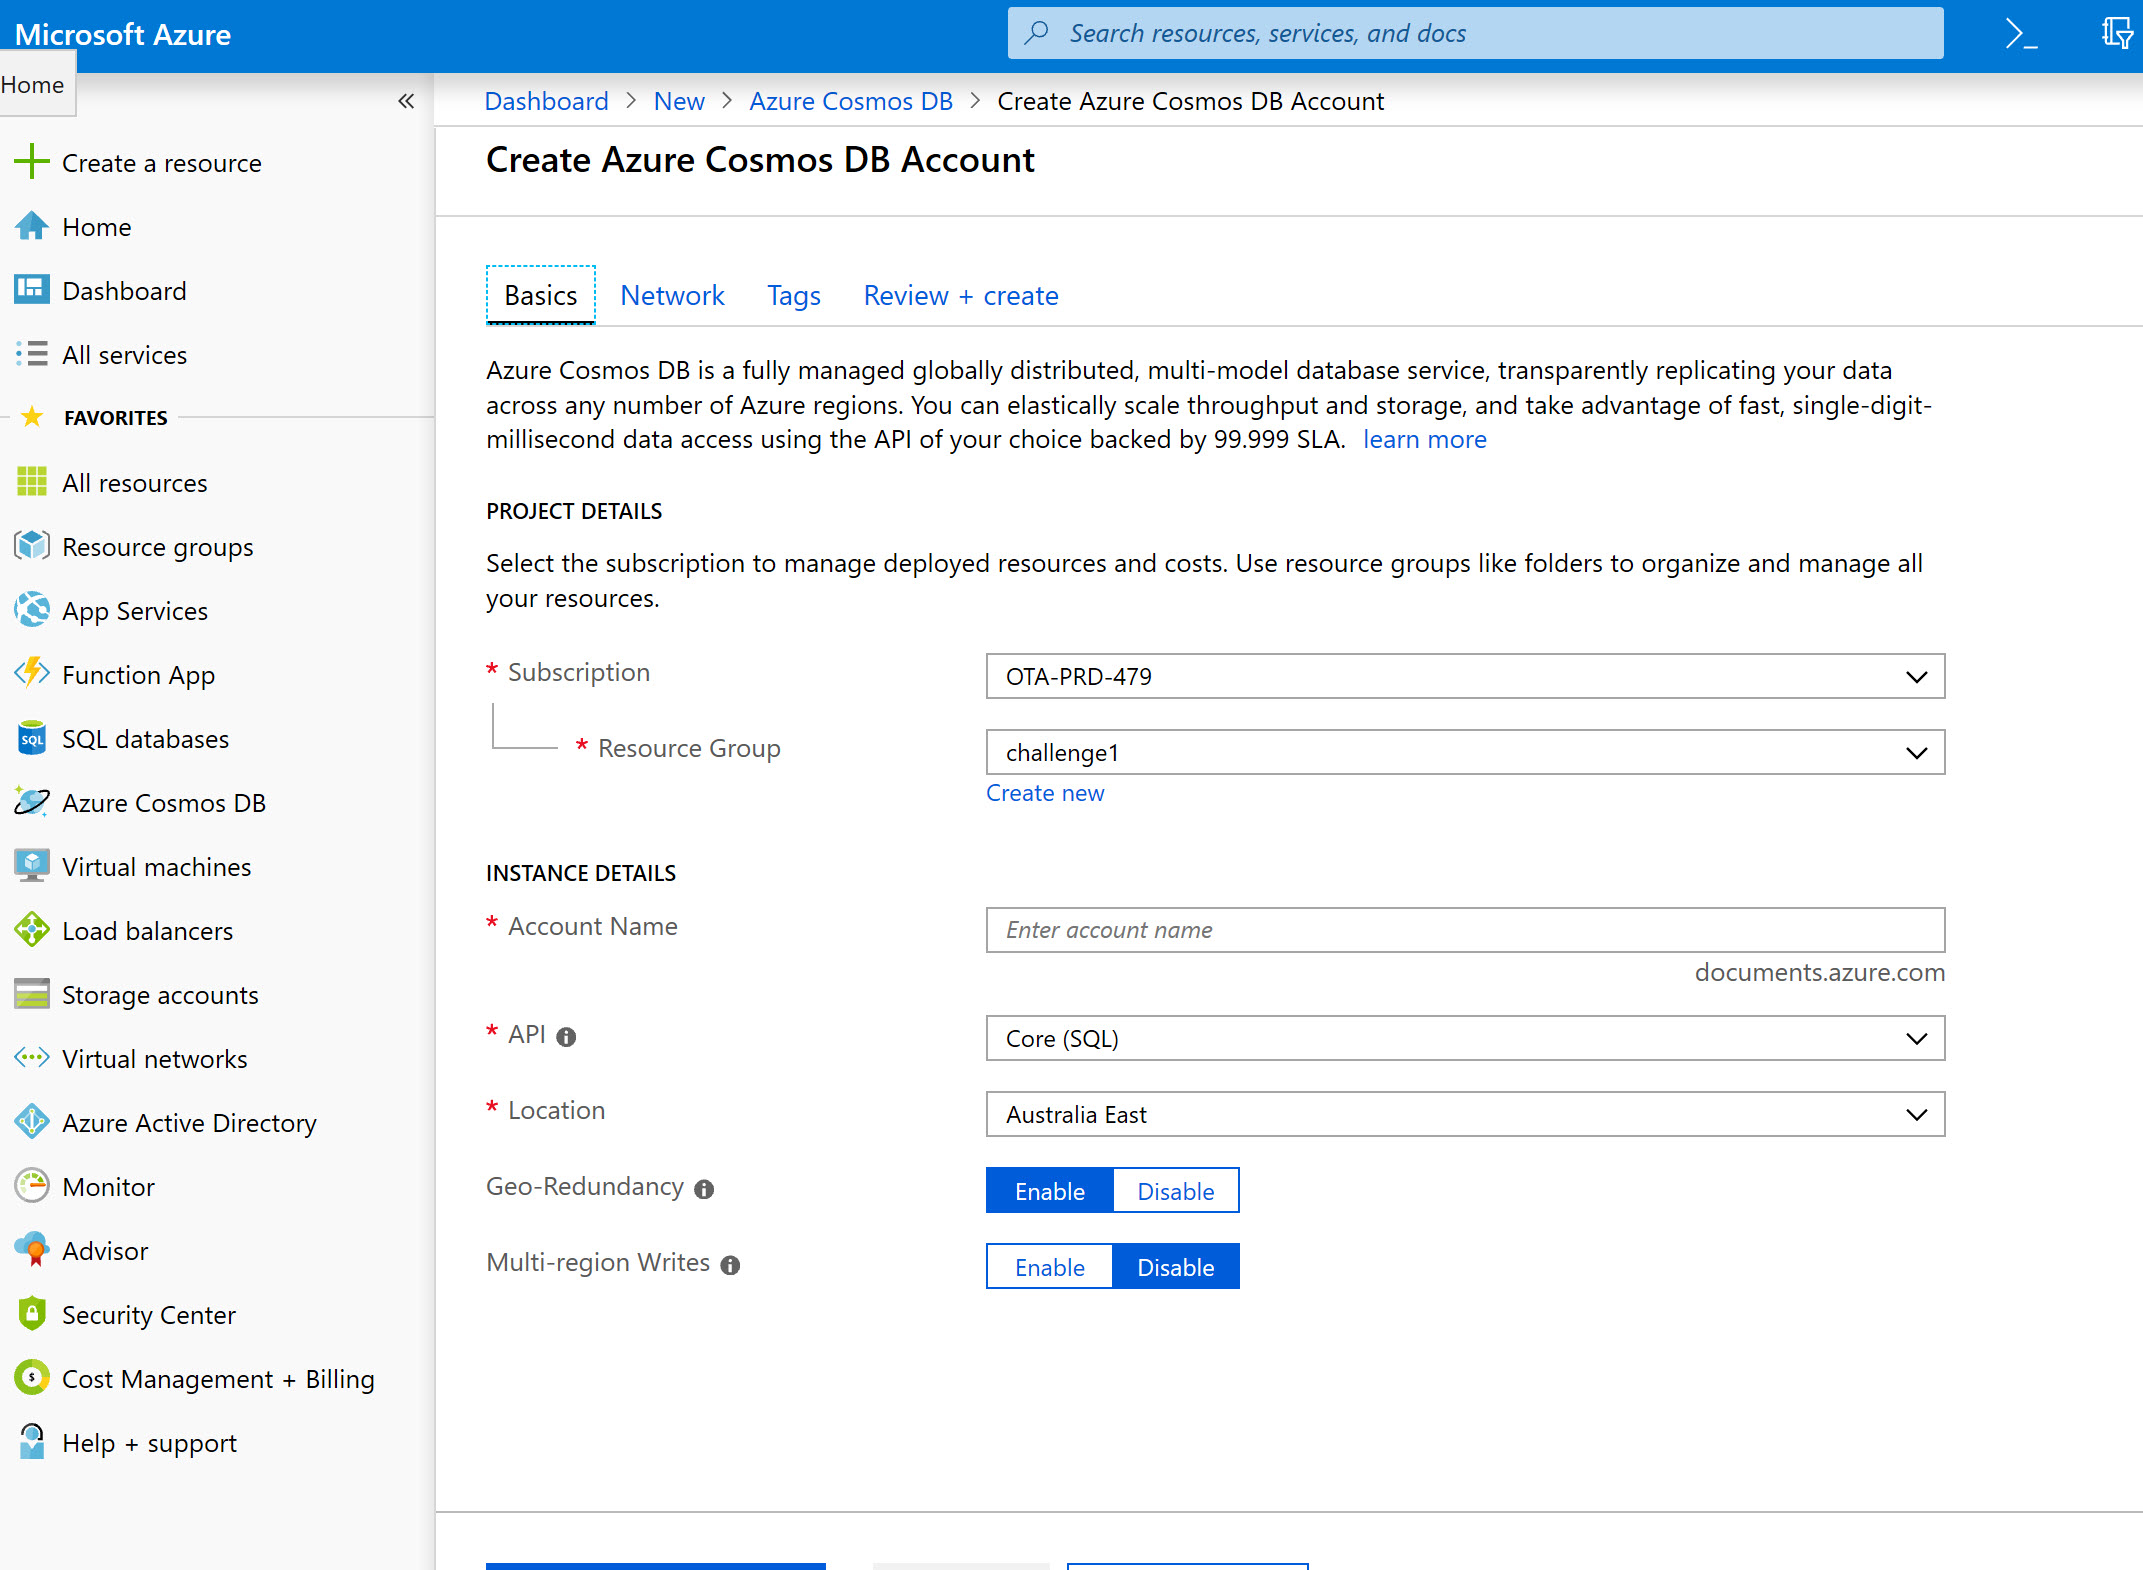
In the new Create Azure Cosmos DB Account blade, perform the following actions:
-
Leave the Subscription list set to its default value.
-
In the Resource group section, click the Create new button.
-
In the Resource group section, enter the value cosmosgroup-lab into the field.
-
In the Account Name field, enter a globally unique value. This will be used to create the URI endpoint for your account.
-
In the API list, select the Core (SQL)) option.
-
In the Location list, select the West US option.
-
Ensure the Geo-redundancy option is set to Enable.
This option creates a replicated version of your database in a second (paired) region.
-
Ensure the Multi-region Writes option is set to Disable.
With Azure Cosmos DB multi-master support, you can perform writes on containers of data (for example, collections, graphs, tables) distributed anywhere in the world. You can update data in any region that is associated with your database account. These data updates can propagate asynchronously.
-
Click the Review + create button.
-
After your settings are validated, click the Create button to begin the deployment of an Azure Cosmos DB account resource.

-
-
The deployment blade will appear with details about your deployment.

-
Wait for the deployment task to complete before completing this lab.
Deployment can take up to ten minutes.
