Creating a Multi-Partition Solution using Azure Cosmos DB
In this lab, you will create multiple Azure Cosmos DB containers. Some of the containers will be unlimited and configured with a partition key, while others will be fixed-sized. You will then use the SQL API and Java Async SDK to query specific containers using a single partition key or across multiple partition keys.
Log-in to the Azure Portal
-
In a new window, sign in to the Azure Portal (http://portal.azure.com).
-
Once you have logged in, you may be prompted to start a tour of the Azure portal. You can safely skip this step.
Setup
Before you start this lab, you will need to create an Azure Cosmos DB database and collection that you will use throughout the lab. The Java Async SDK requires credentials to connect to your Azure Cosmos DB account. You will collect and store these credentials for use throughout the lab.
Retrieve Account Credentials
-
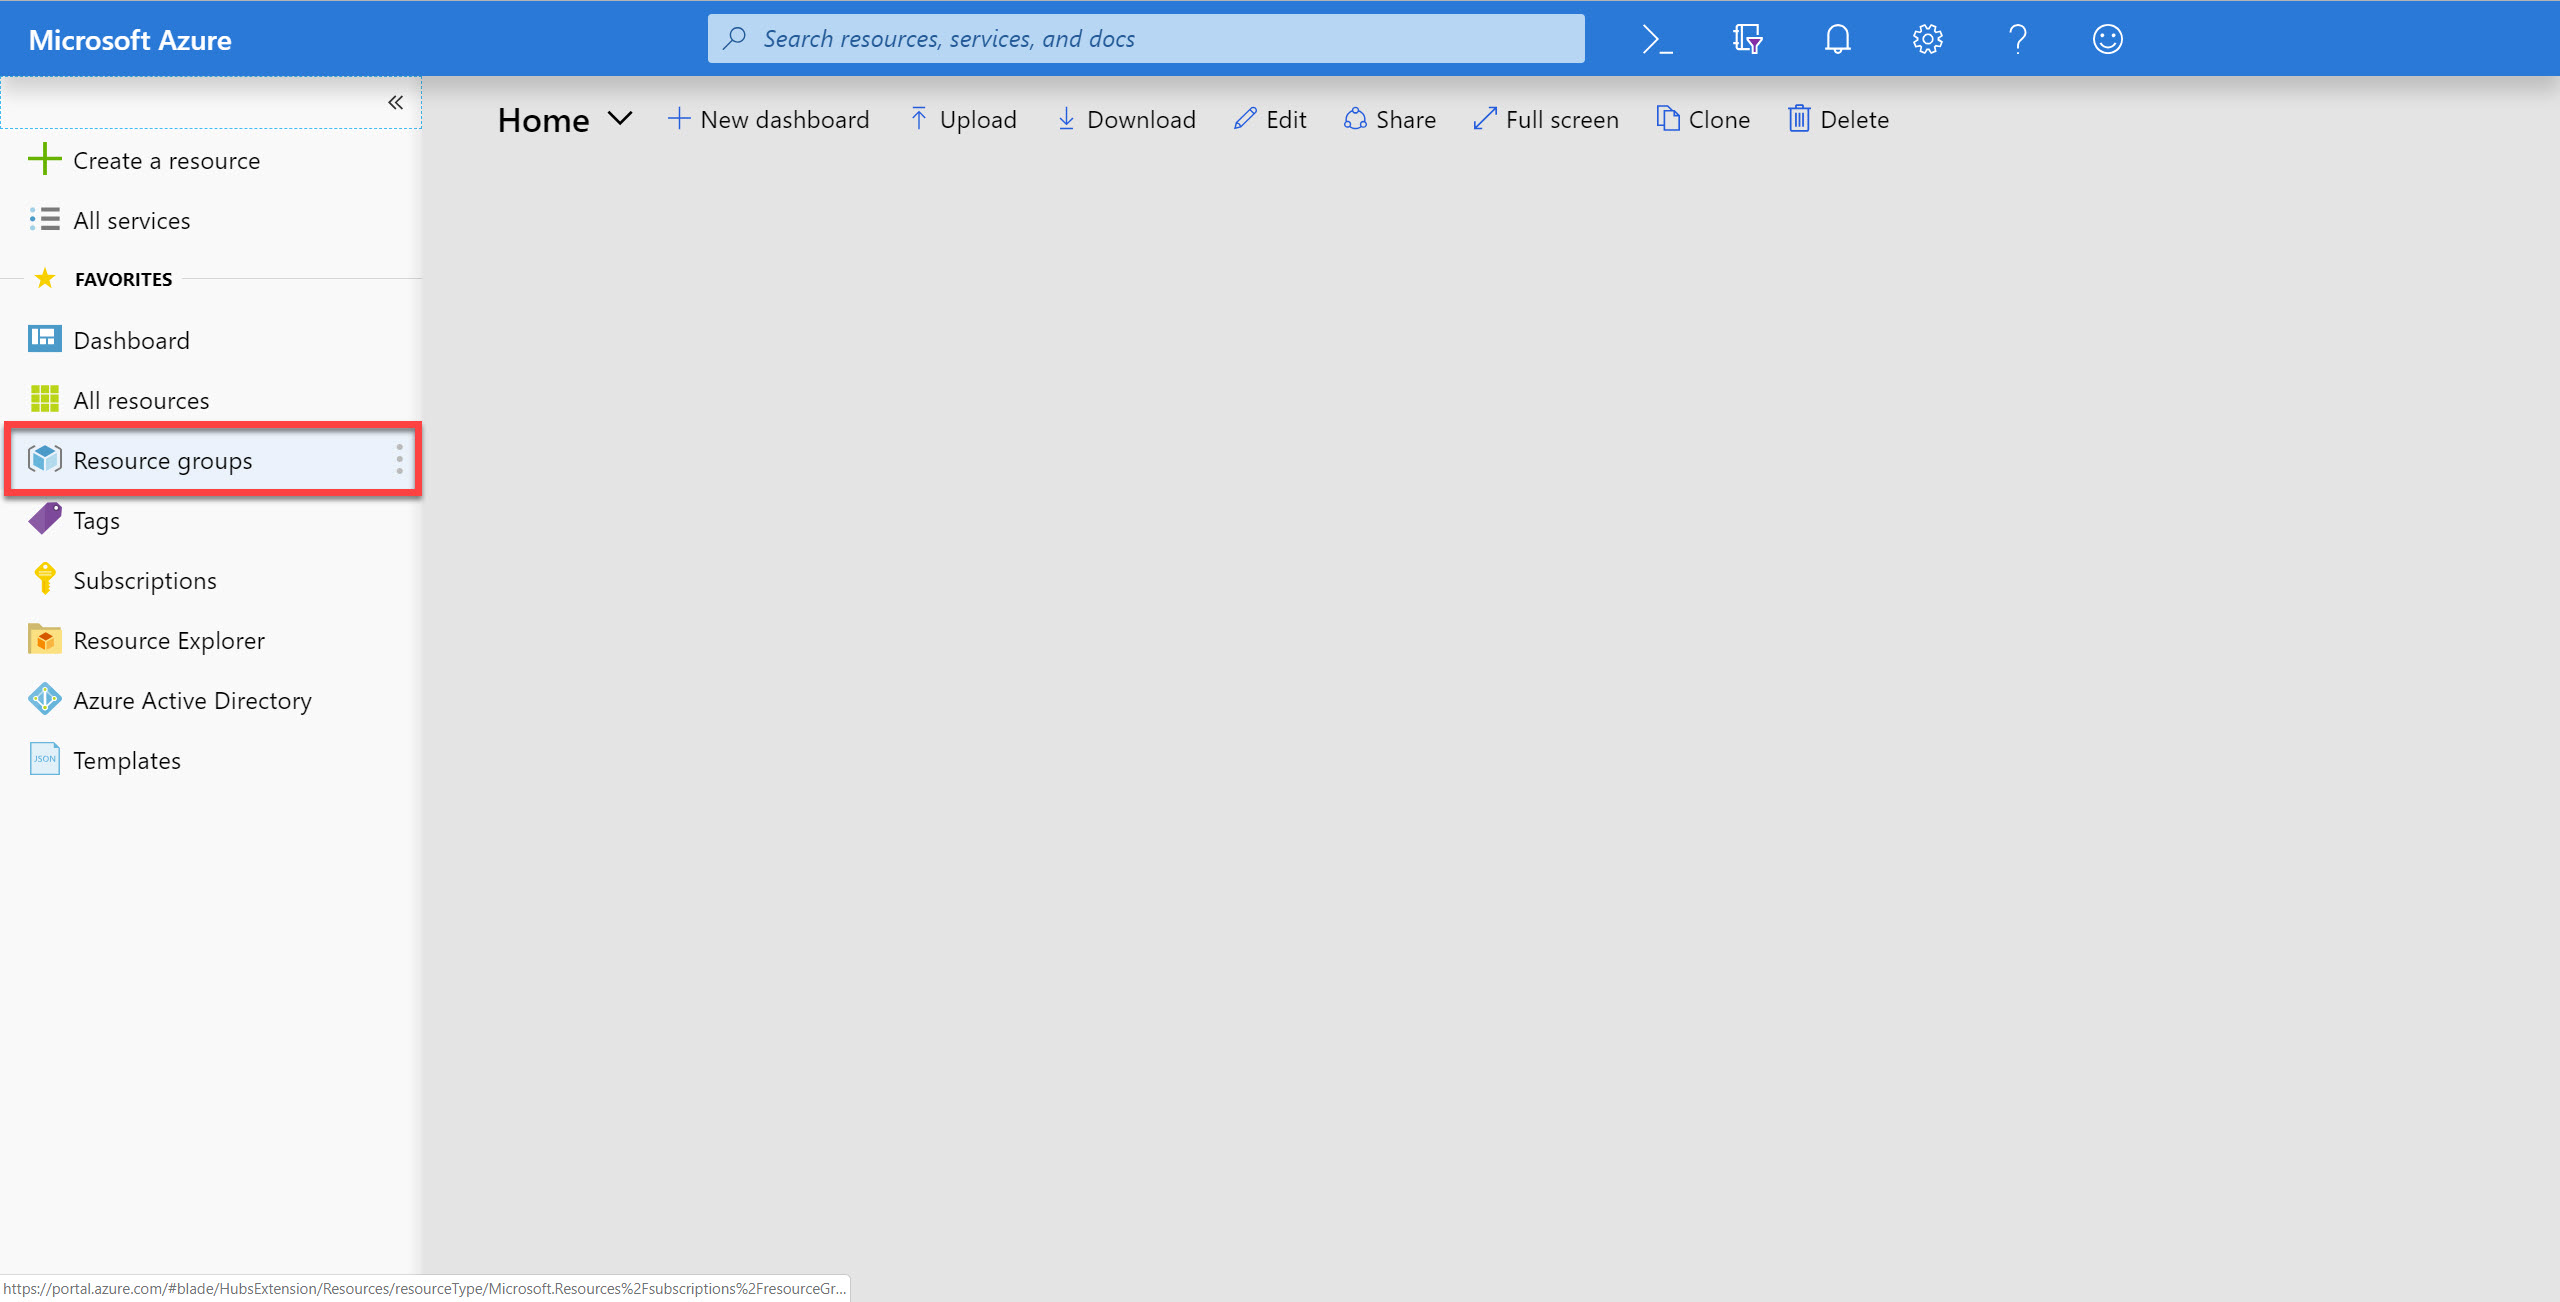
On the left side of the portal, click the Resource groups link.
-
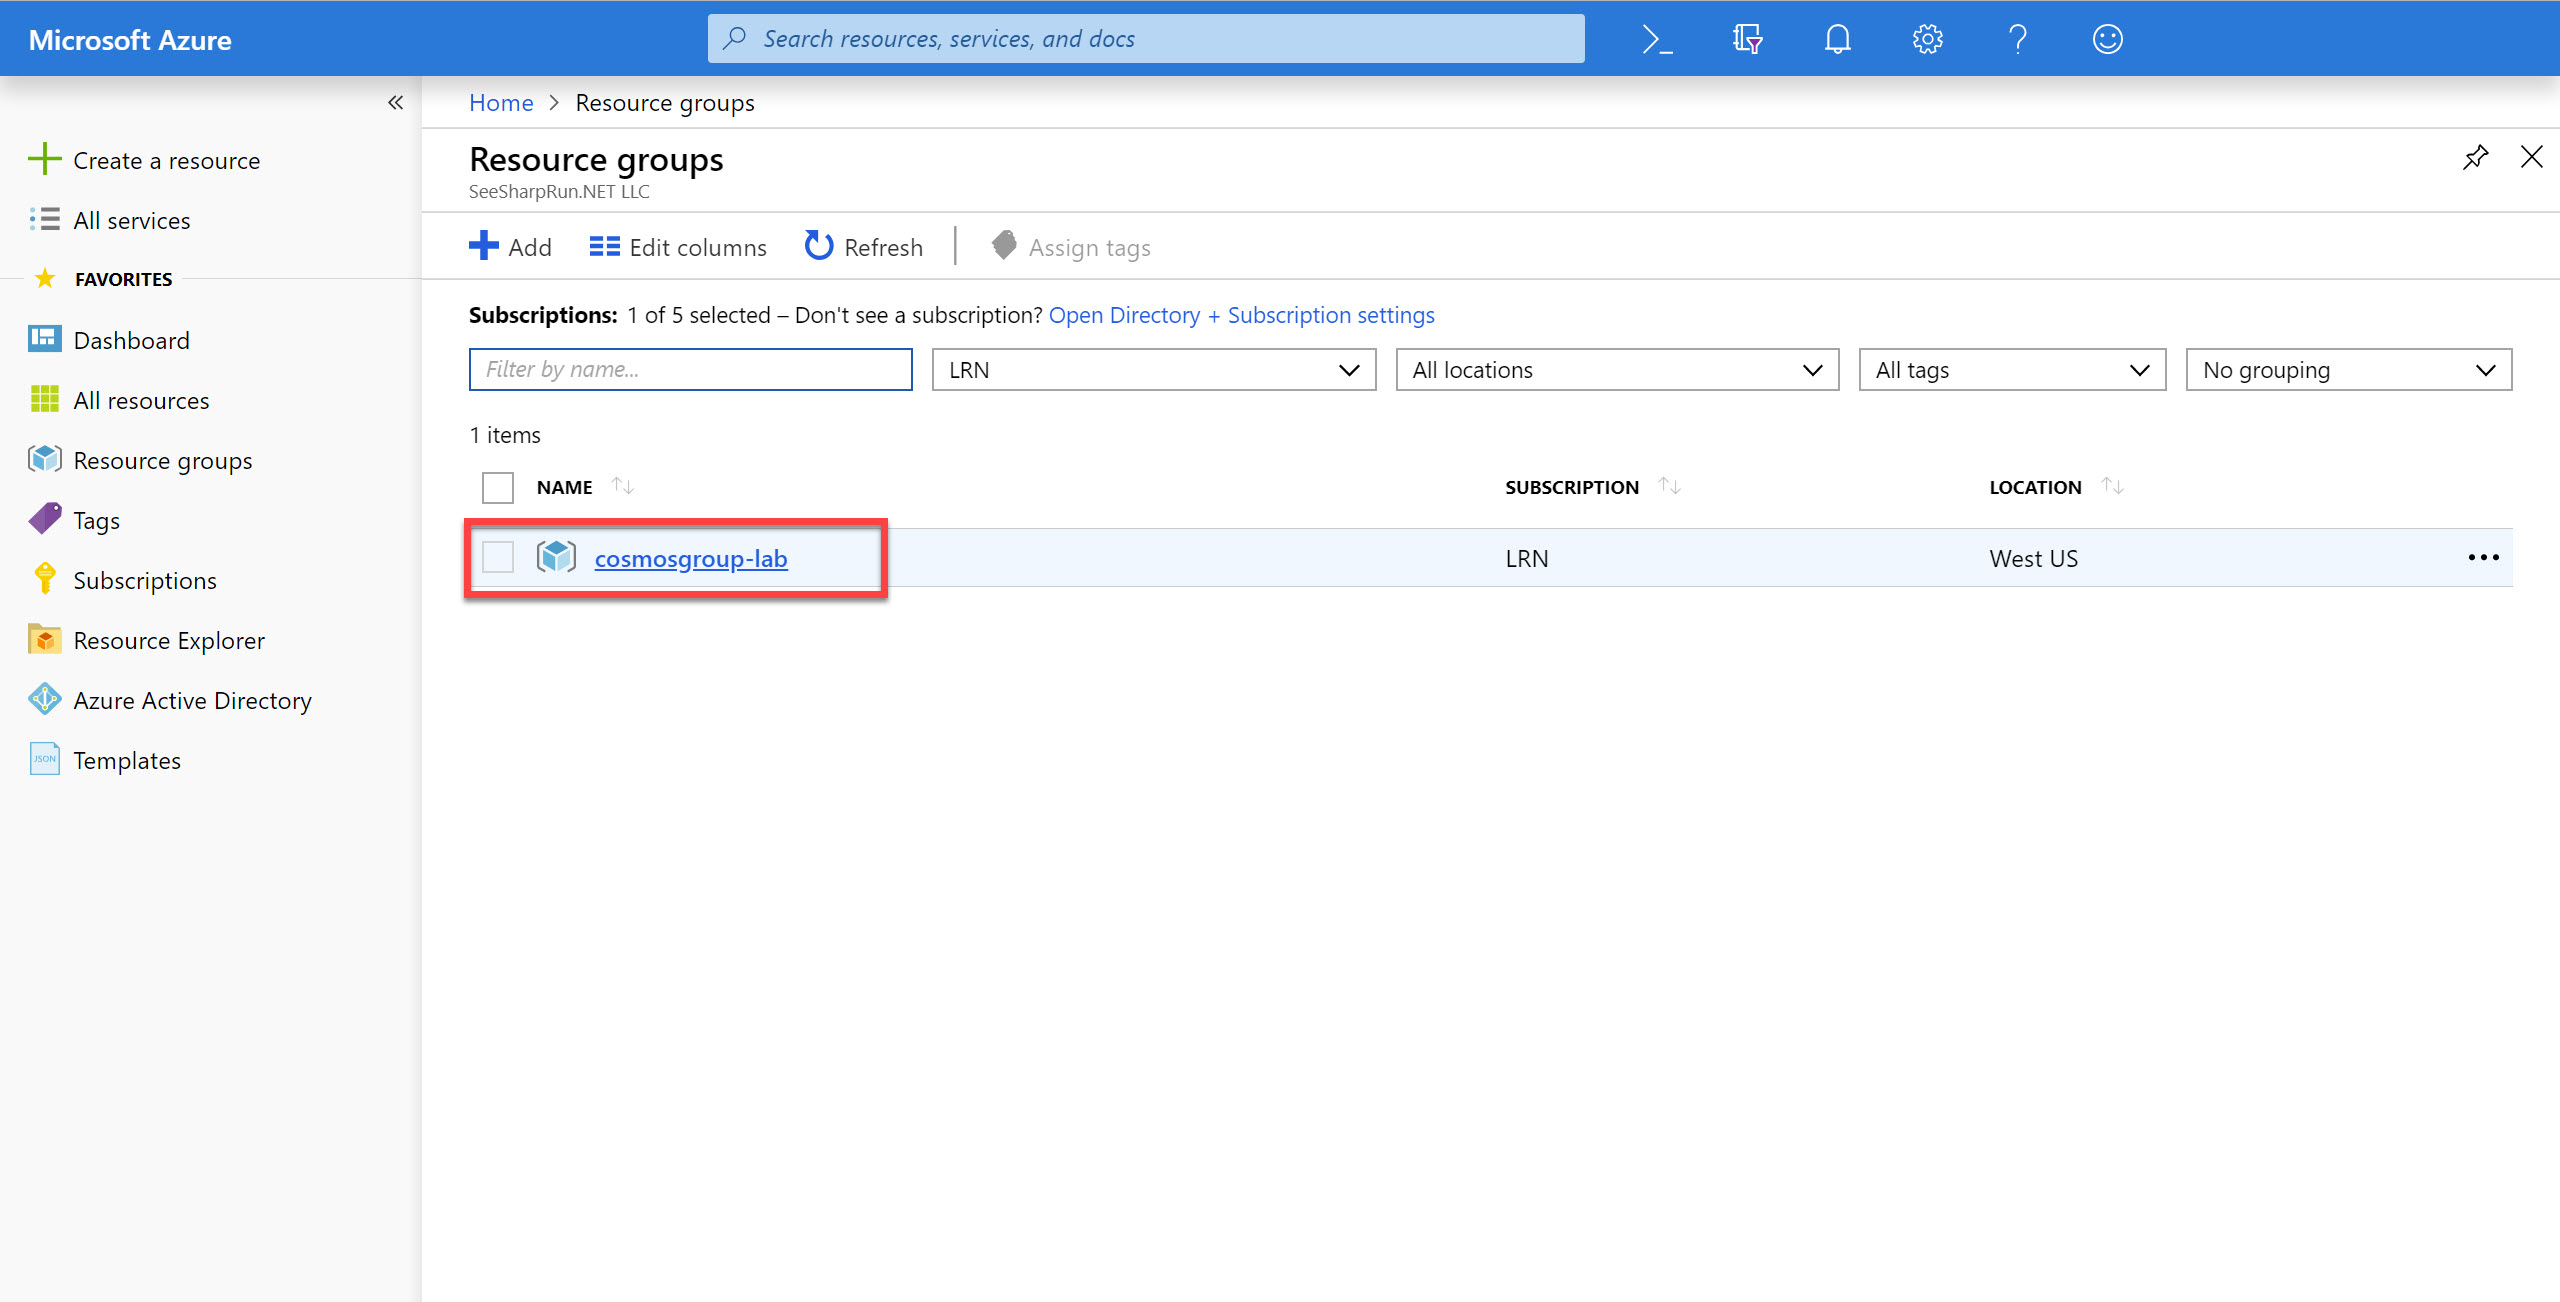
In the Resource groups blade, locate and select the cosmosgroup-lab Resource Group.
-
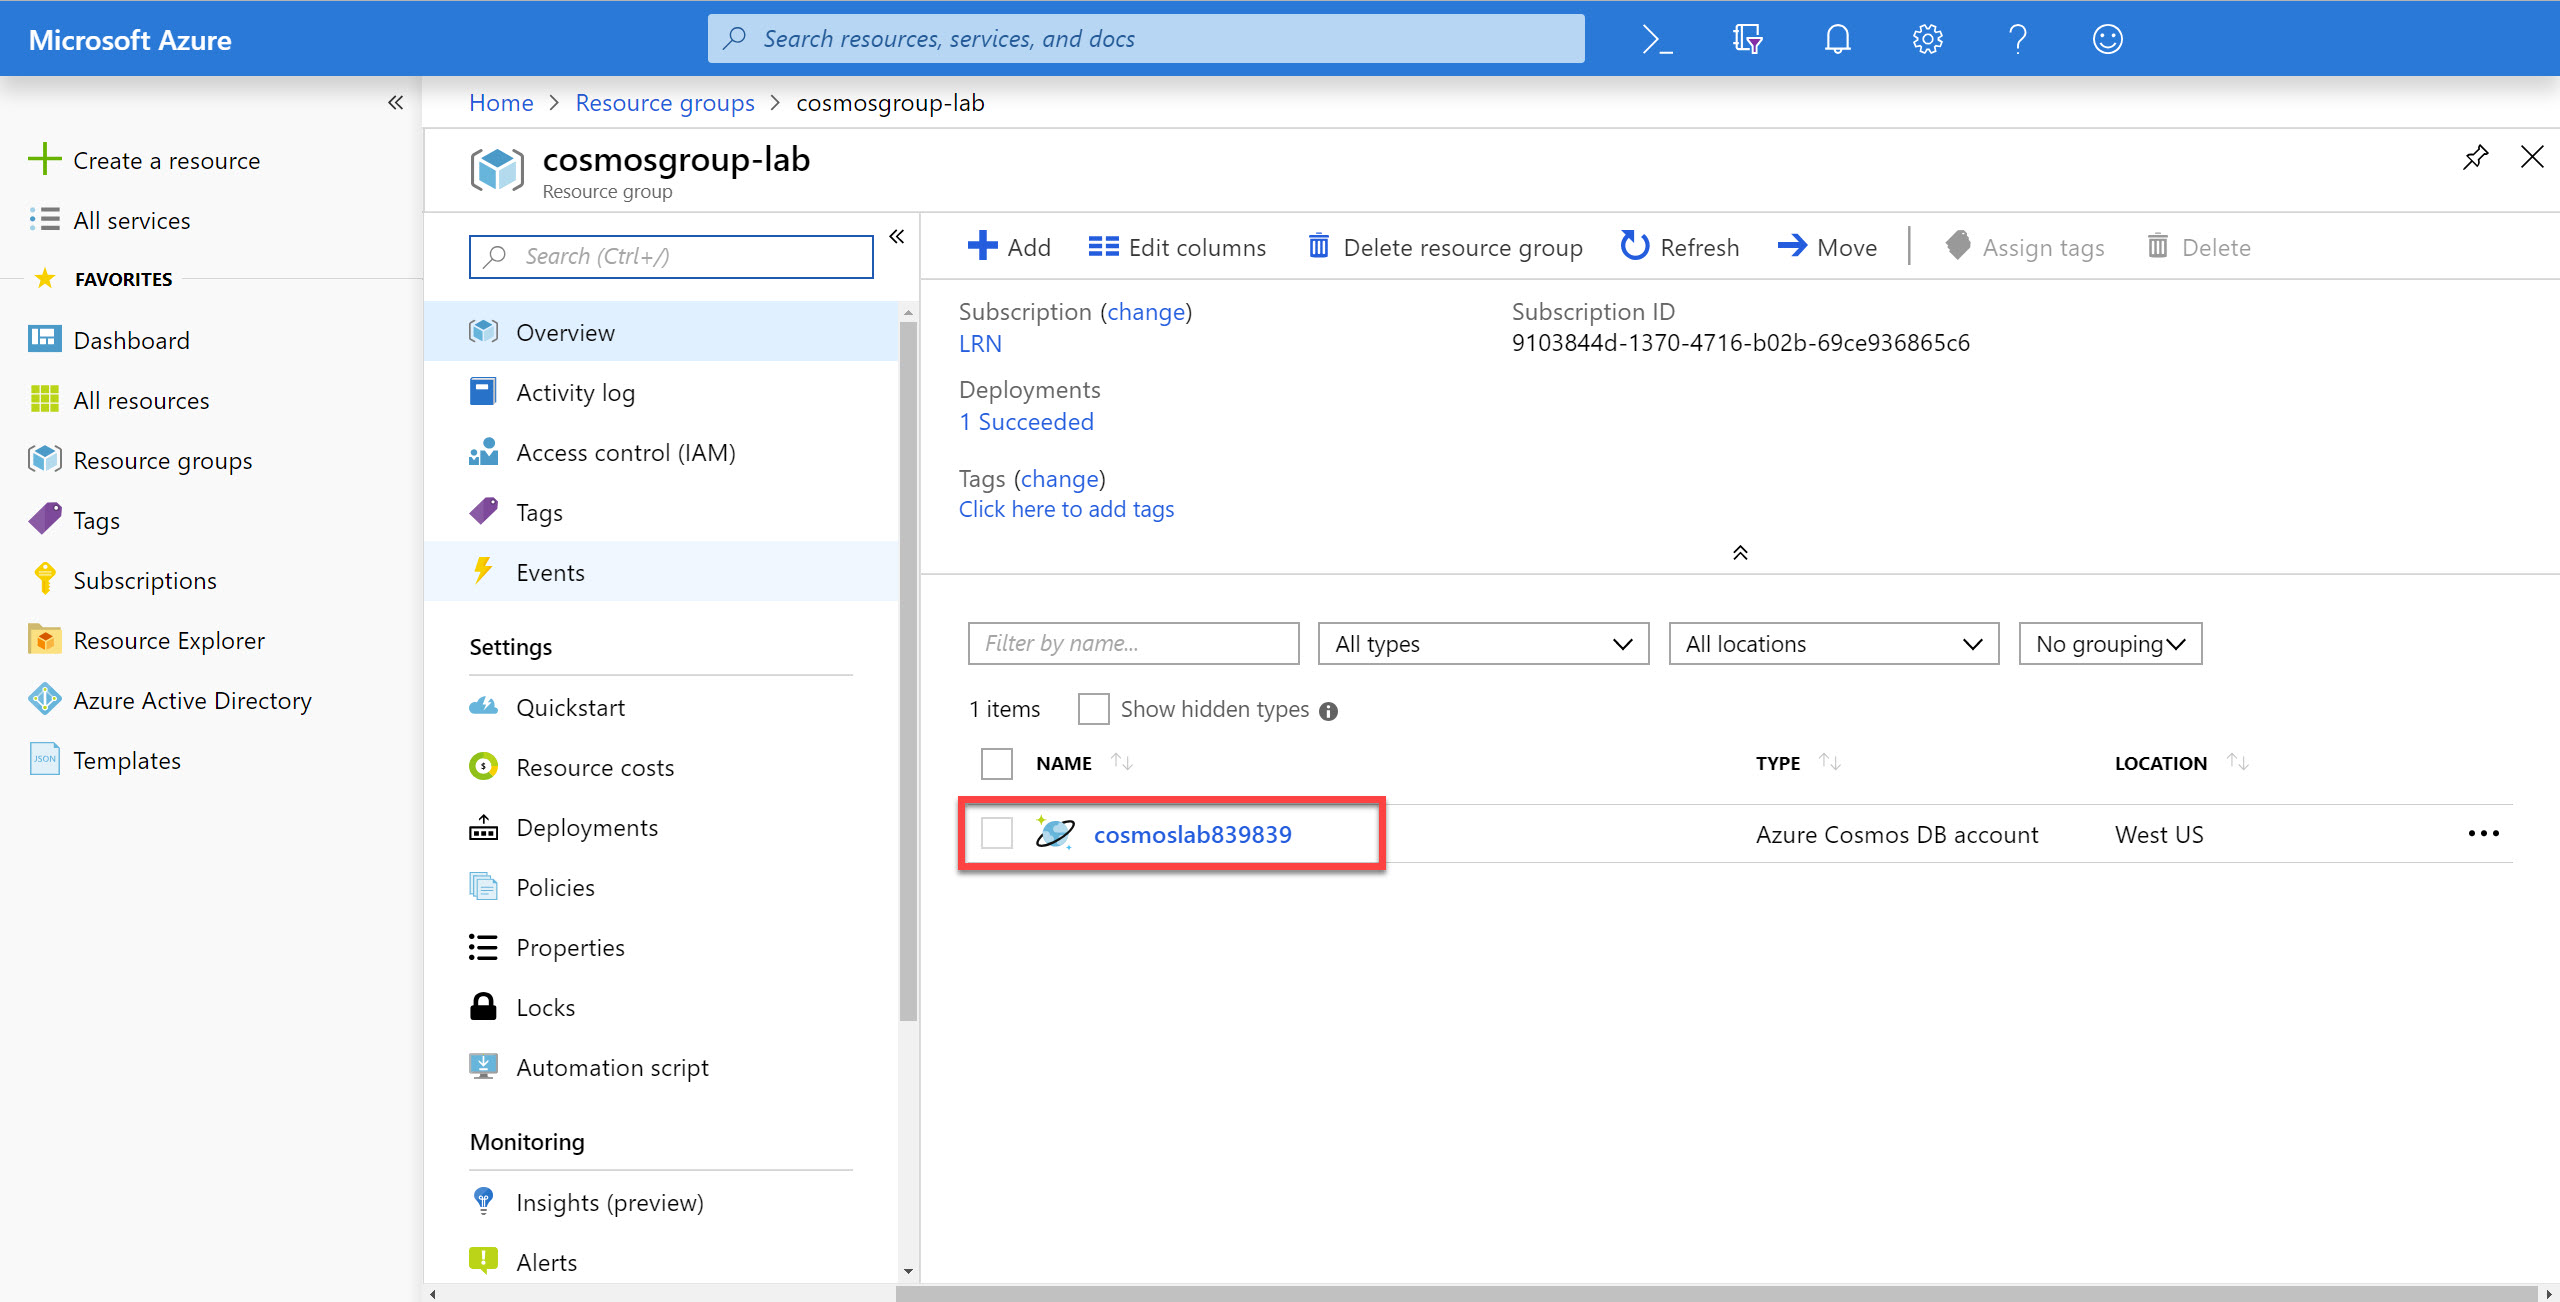
In the cosmosgroup-lab blade, select the Azure Cosmos DB account you recently created.
-
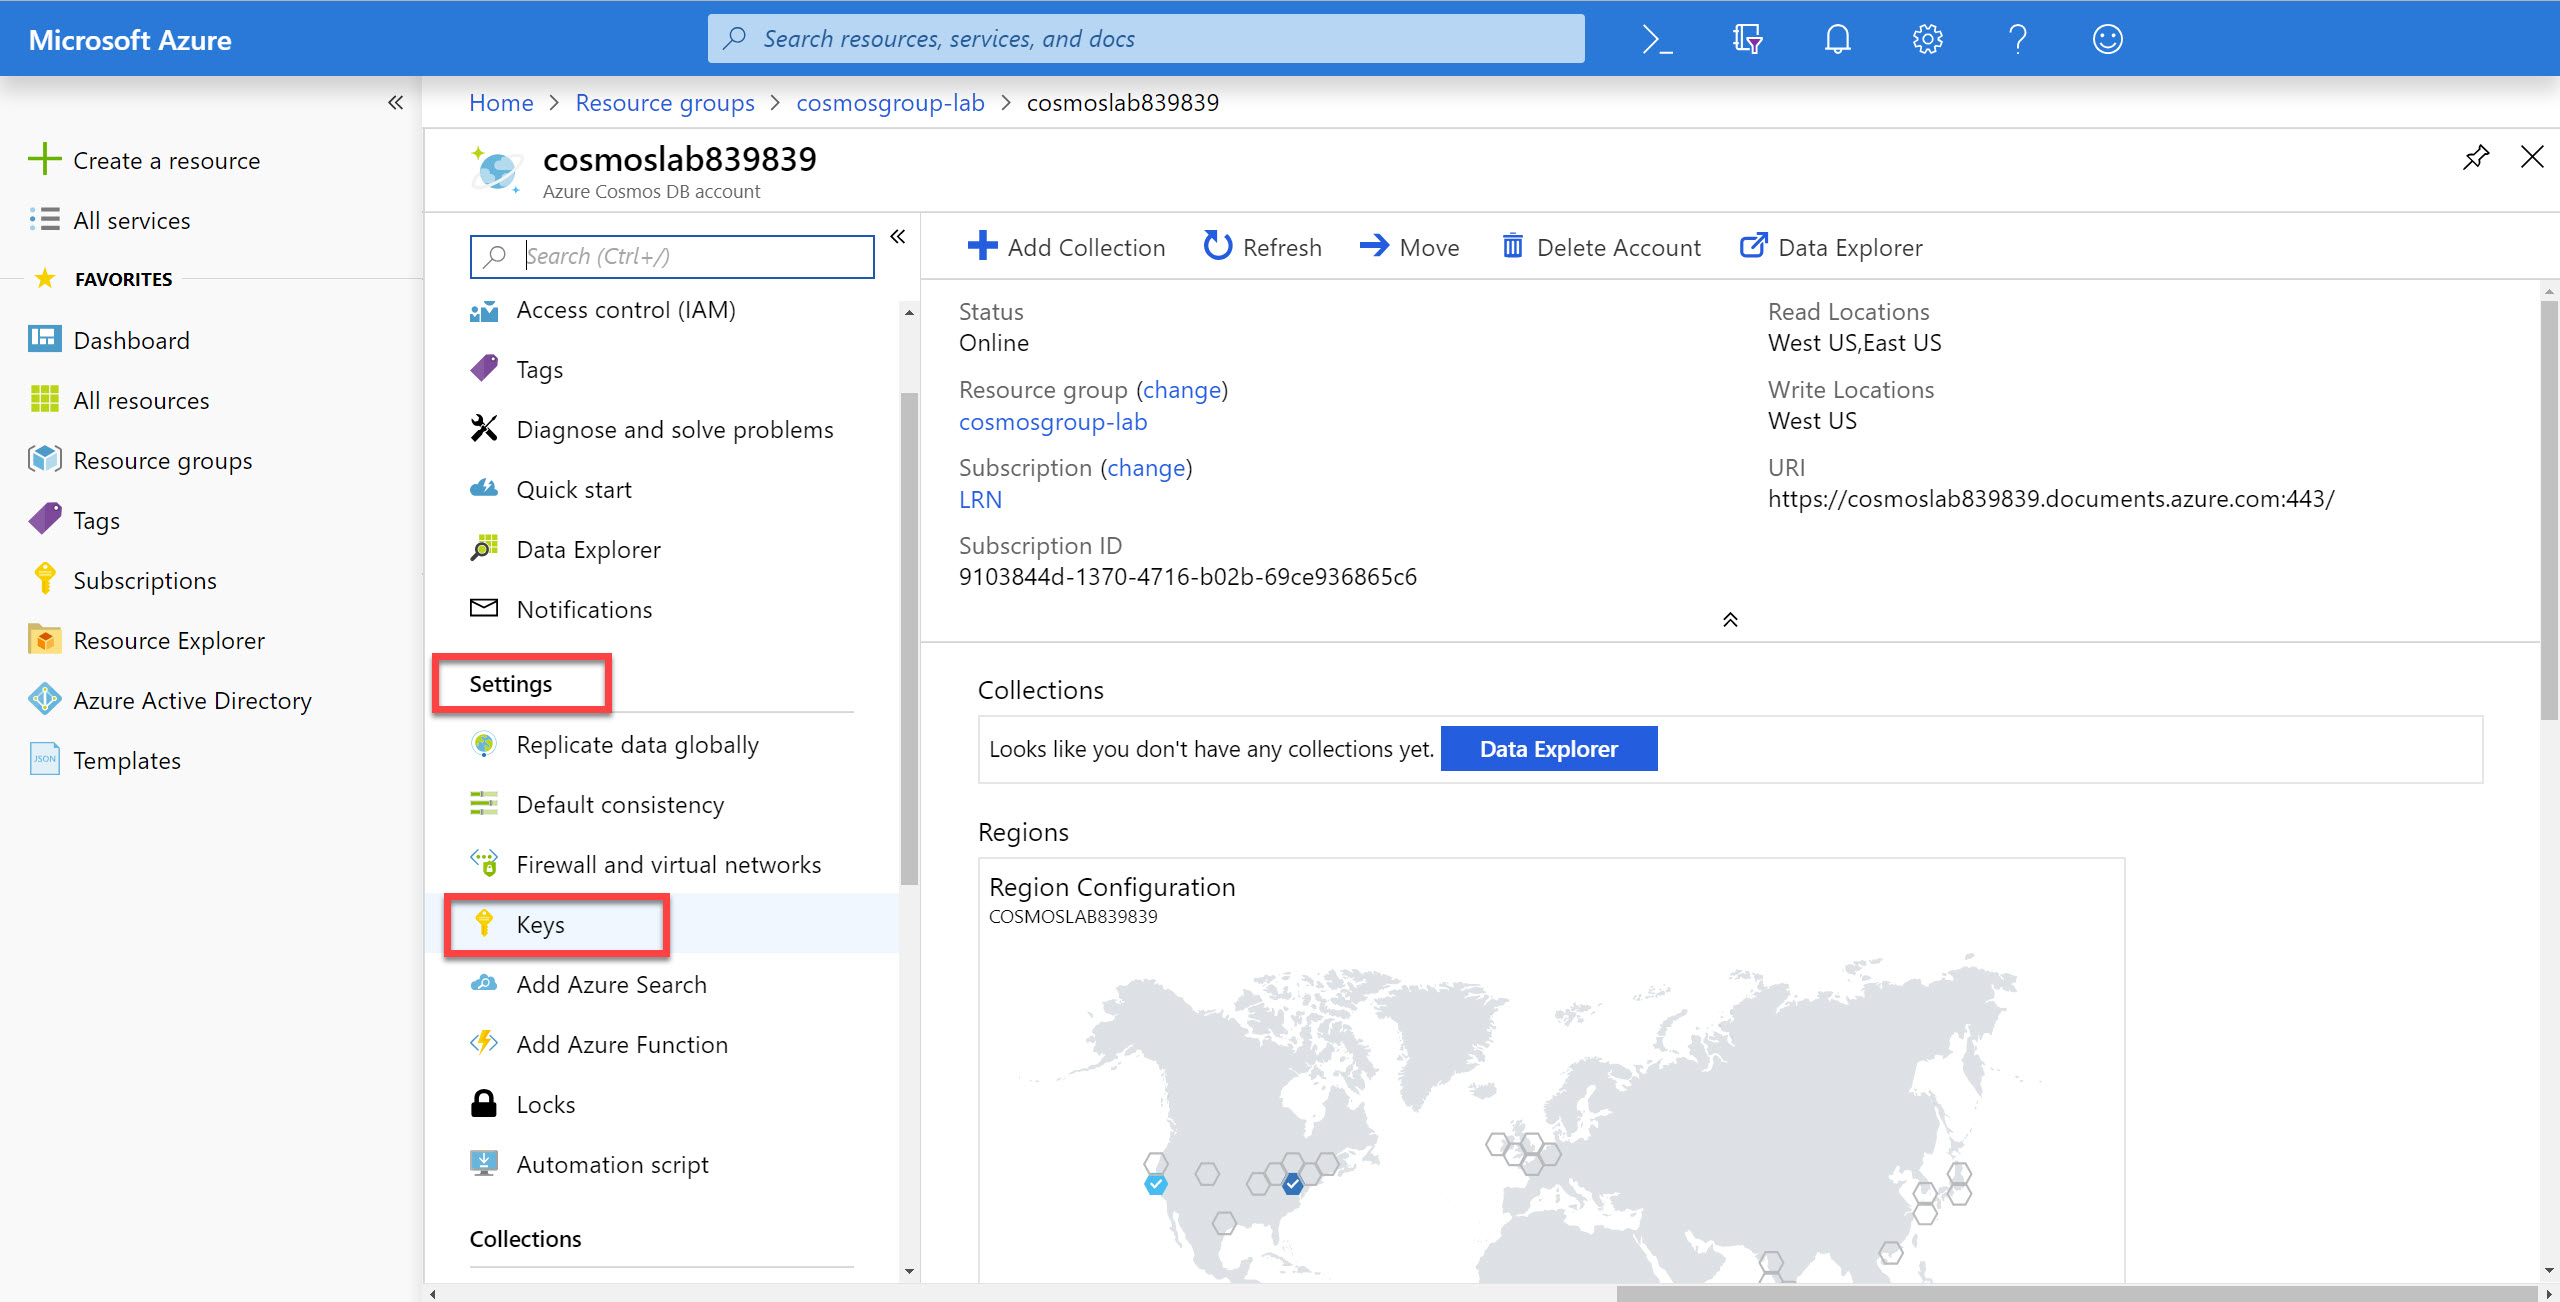
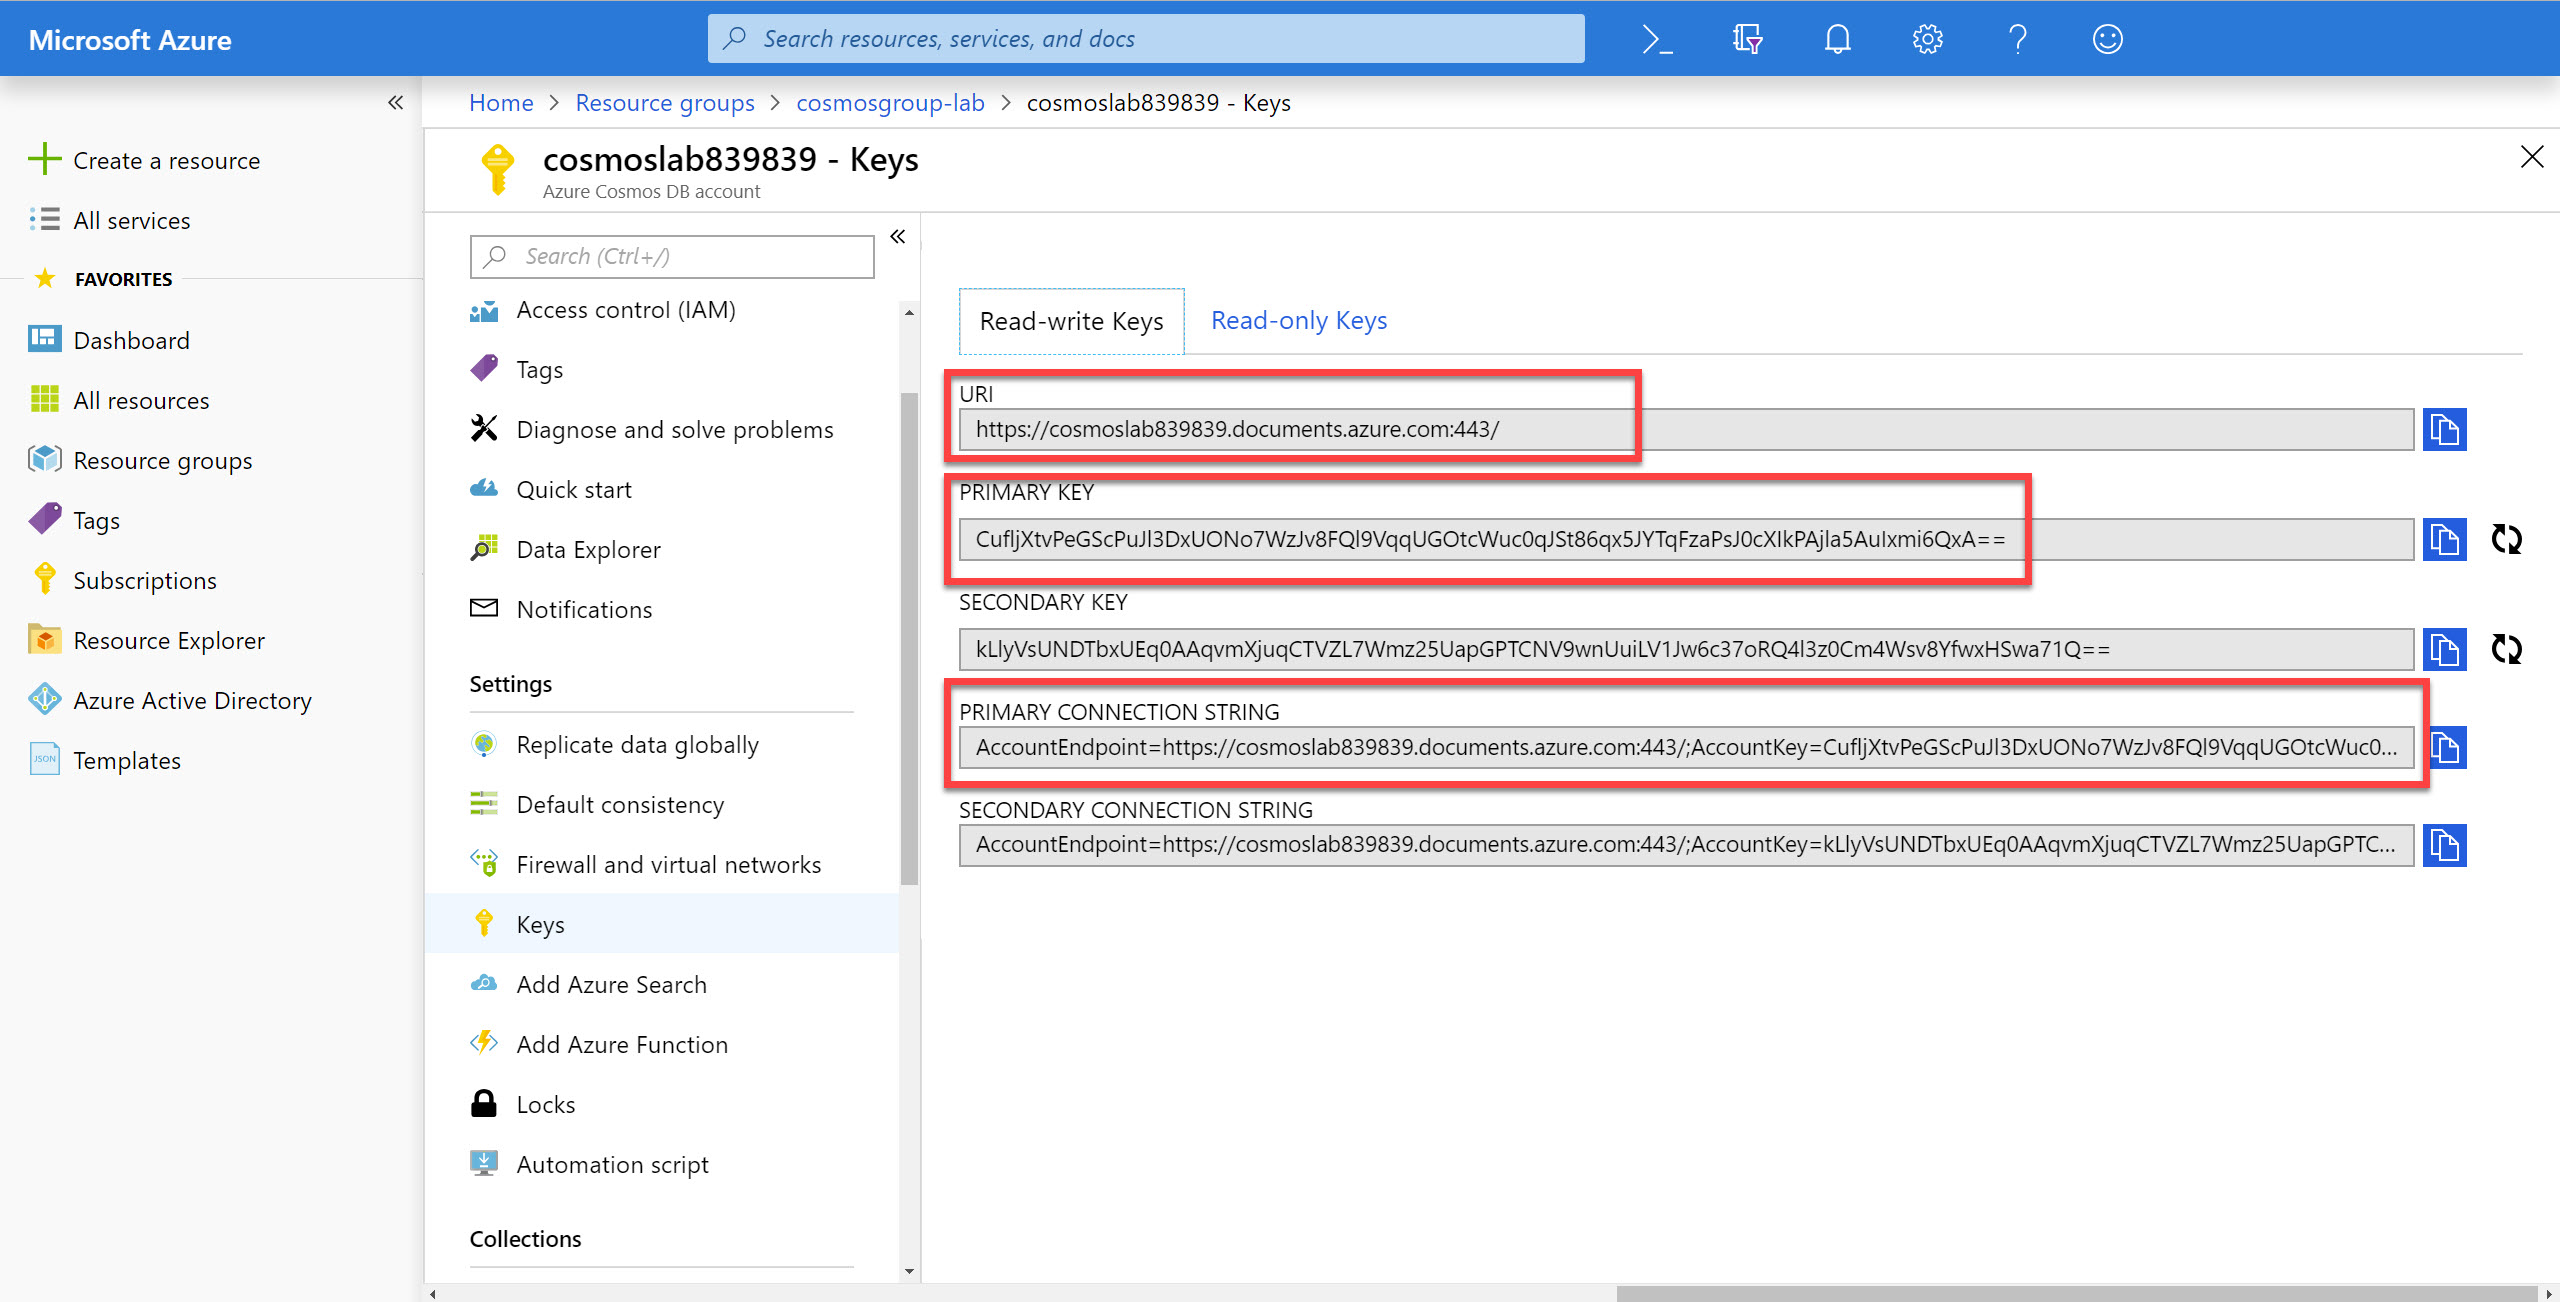
In the Azure Cosmos DB blade, locate the Settings section and click the Keys link.
-
In the Keys pane, record the values in the CONNECTION STRING, URI and PRIMARY KEY fields. You will use these values later in this lab.
Create Containers using the Java SDK
You will start by using the Java SDK to create both fixed-size and unlimited containers to use in the lab. This lab is based on VS Code, but you may feel free to use the Java IDE of your choice. If using VS Code, ensure you install the Java Extension Pack from here. You should also install Apache Maven (see here for maven downloads and instructions), and per the instructions, ensure that Maven is included in the PATH variable, within system variables.
Create a Java Project
-
On your local machine, create a new folder that will be used to contain the content of your Java project.
-
In the new folder, right-click the folder and select the Open with Code menu option.
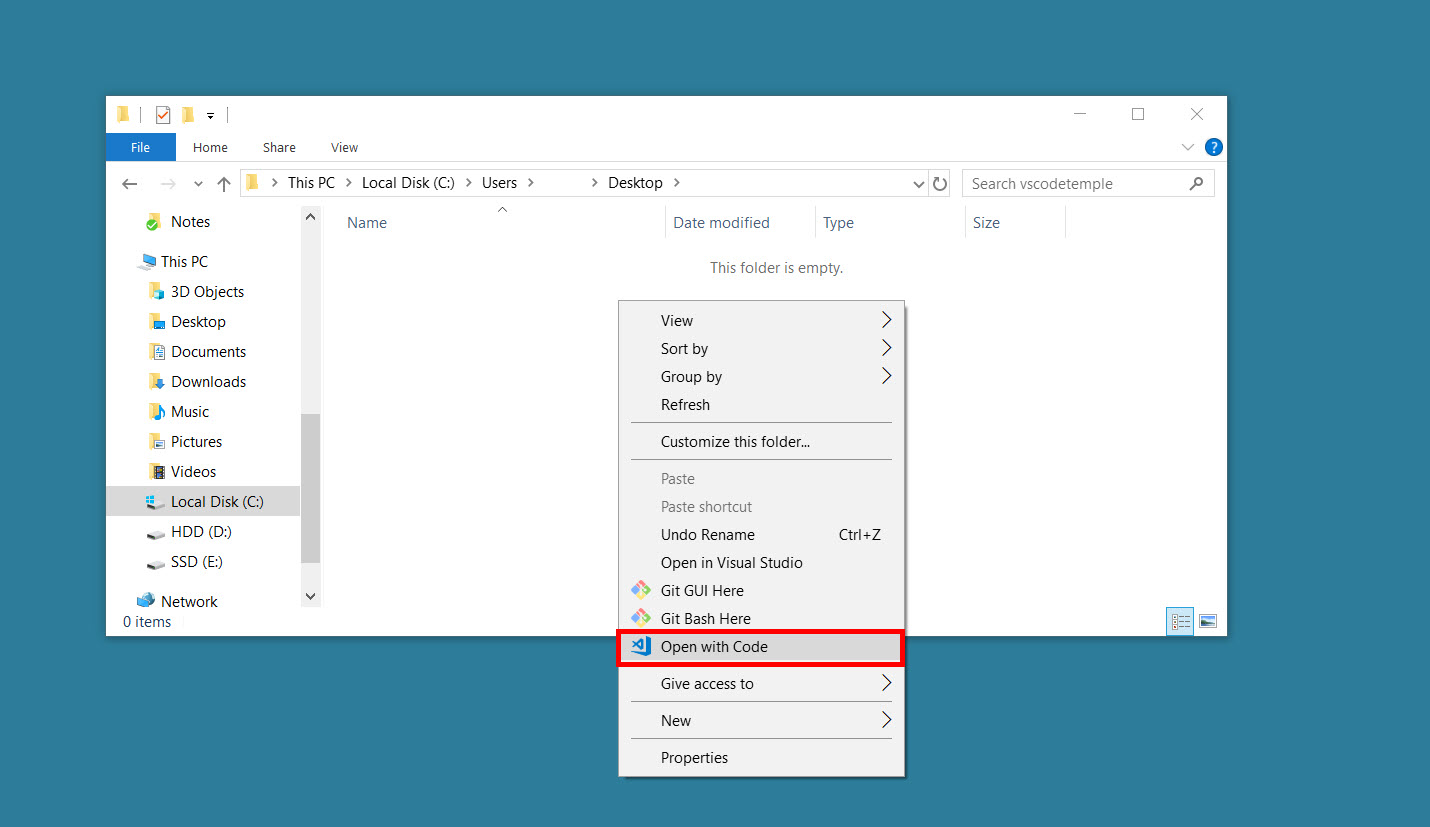
Alternatively, you can run a command prompt in your current directory and execute the
code .command. -
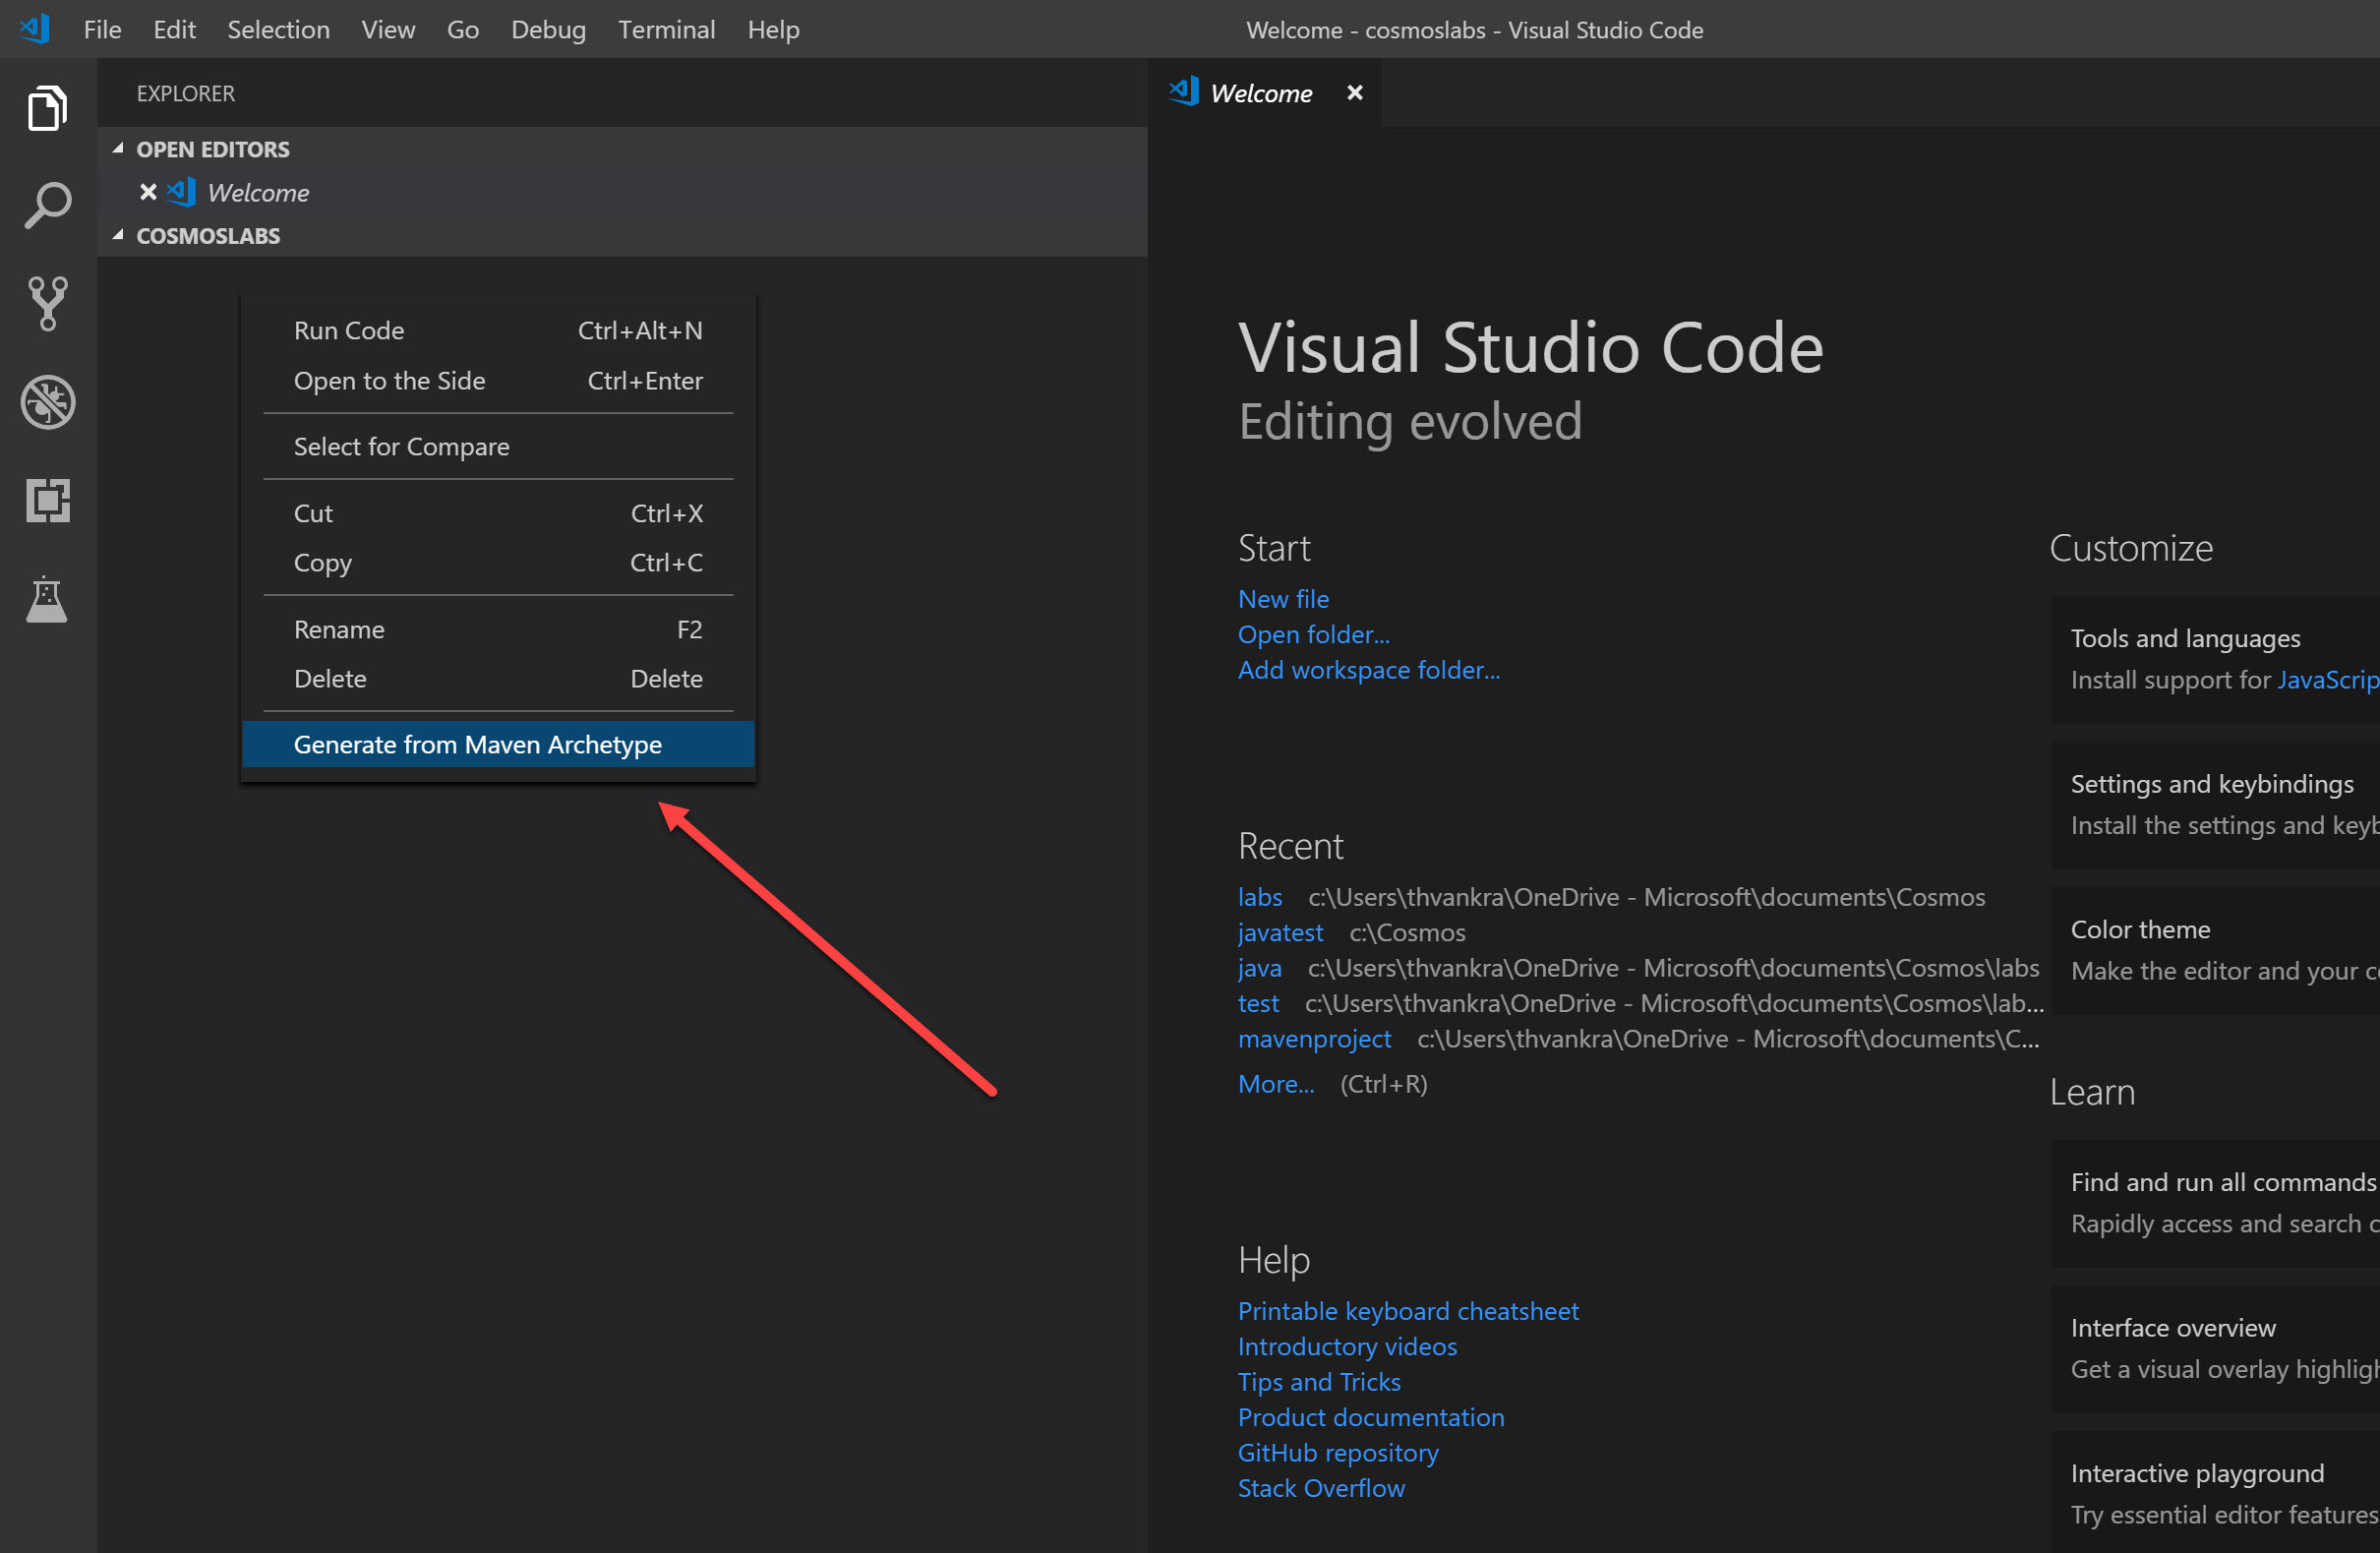
In the Visual Studio Code window that appears, right-click the Explorer under the folder you created, and select “Generate from Maven Archetype”:
-
From the options that appear, select “maven-archetype-quickstart”, and then select the directory you created for the project when prompted. Maven will then prompt you to provide values for group id, artifact id, version, package. Fill these in when prompted and then confirm:

-
Once confirmed, Maven will create the project, and provide a sample App.java. For any Java class created in the project, VS Code’s Java Extension will provide “run” and “debug” links directly in the code. Clicking “run” will compile and run your Java code:
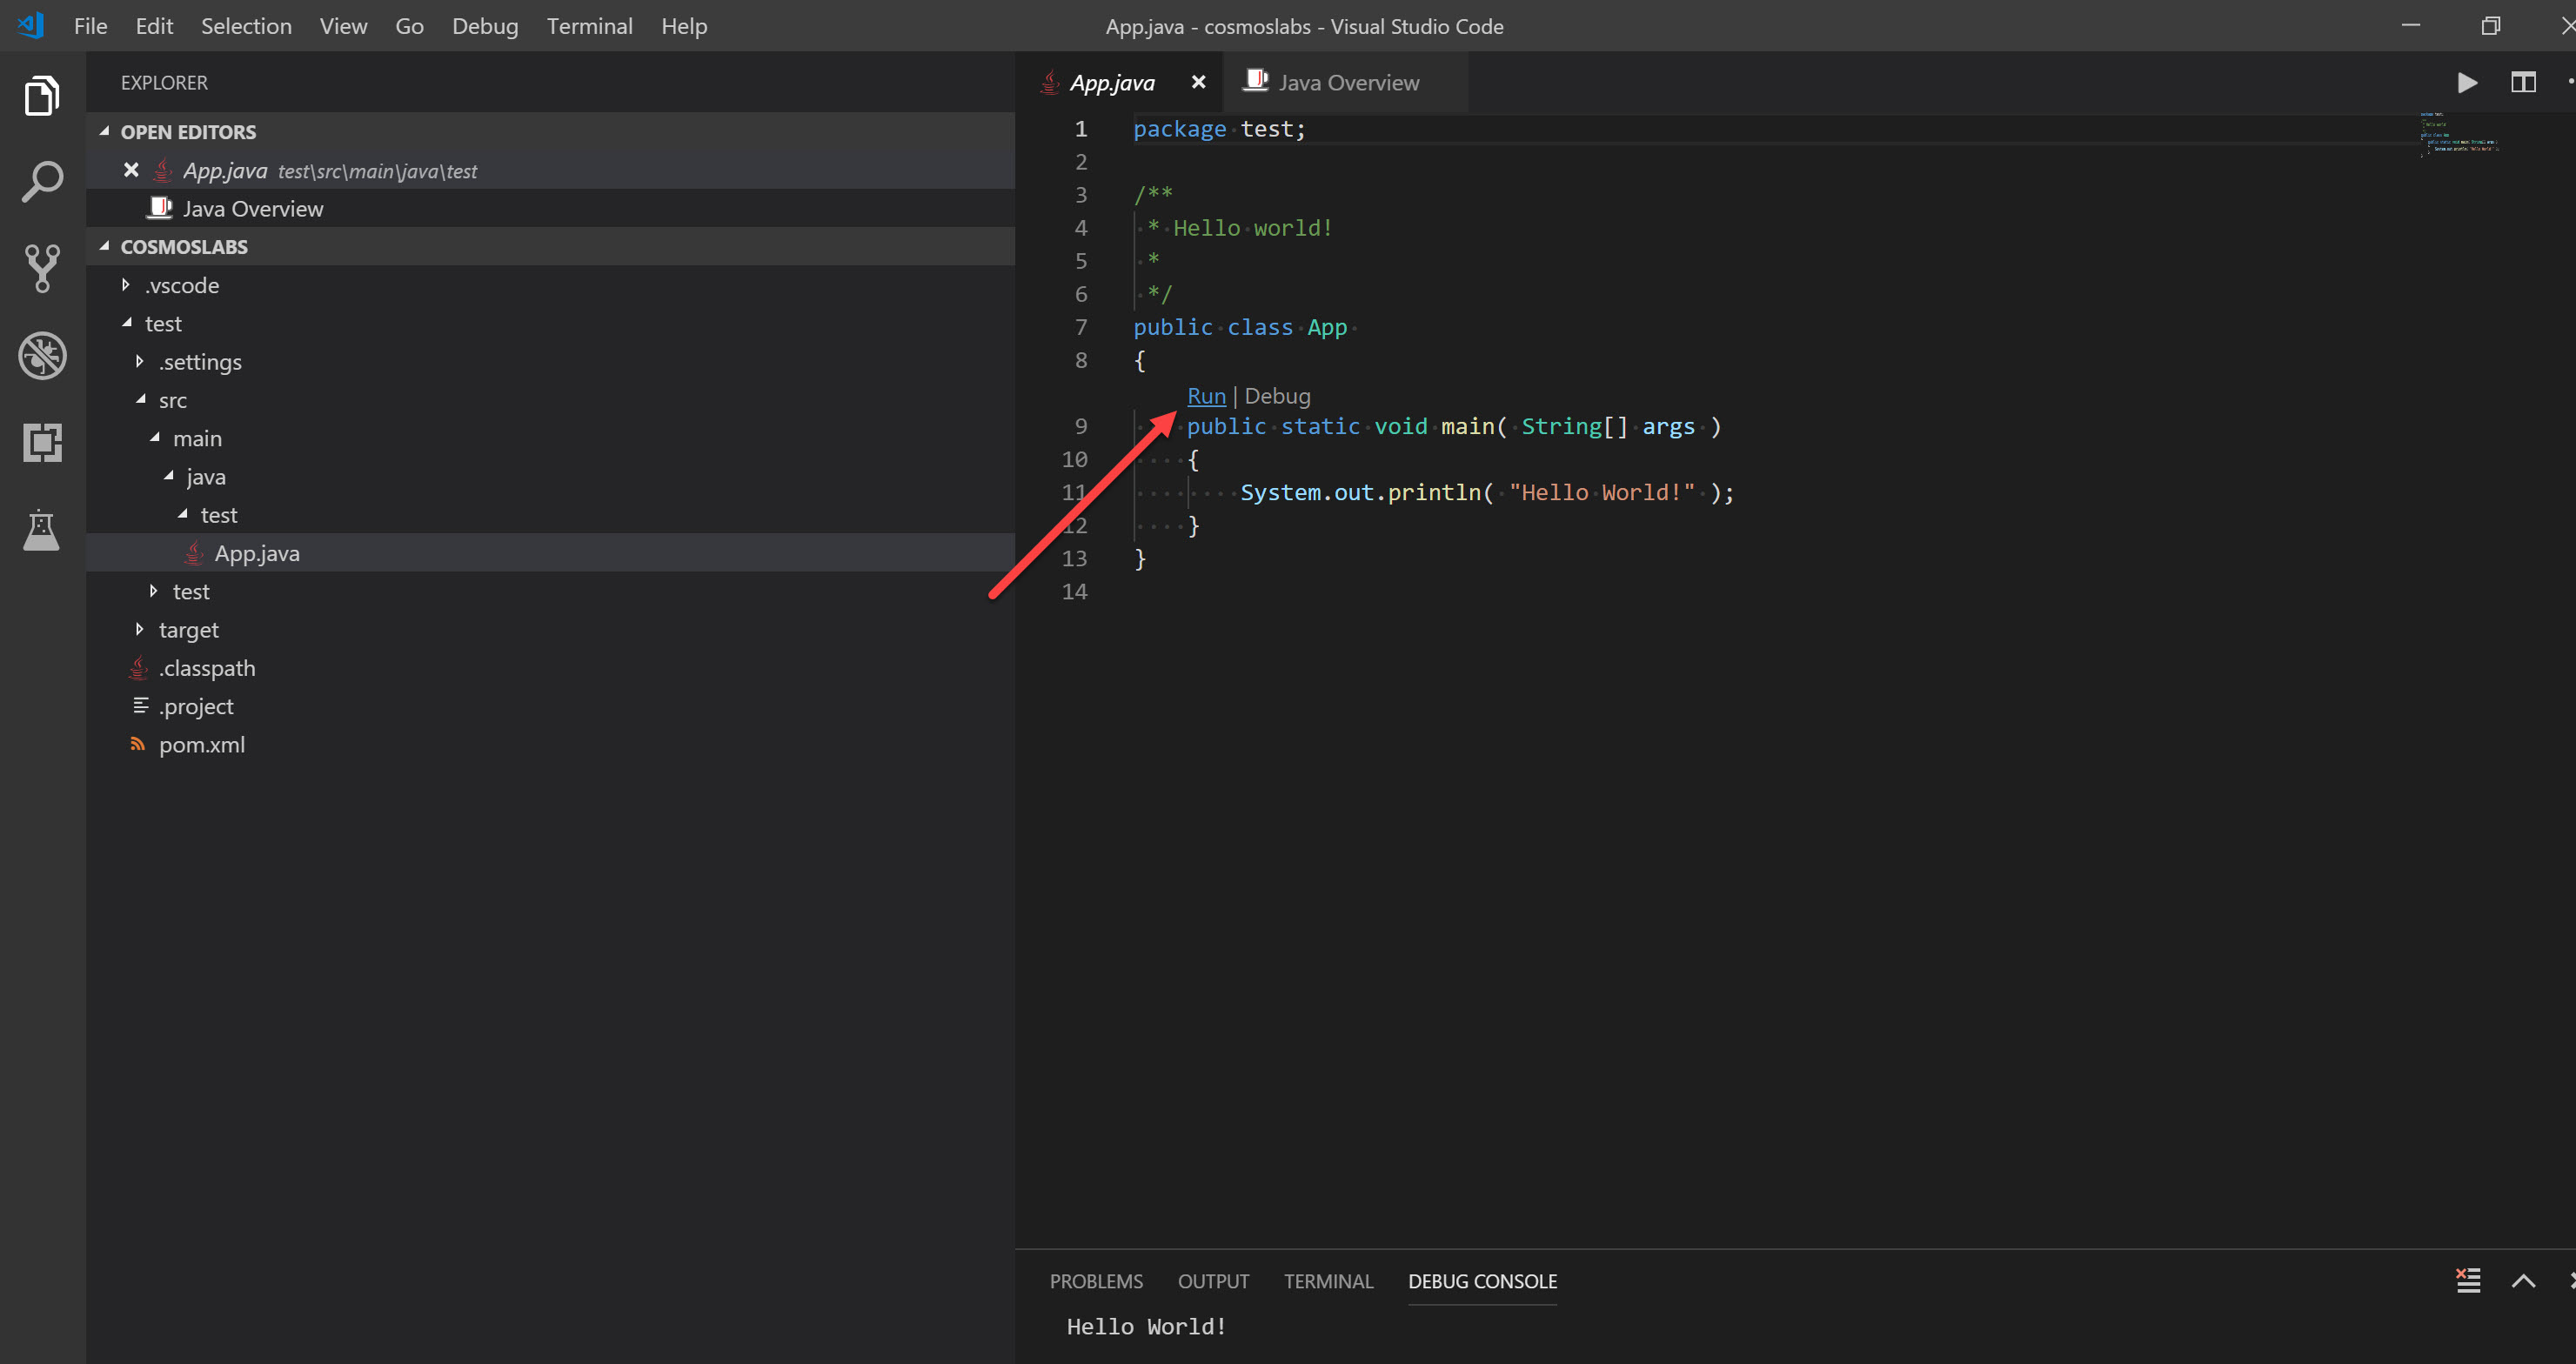
-
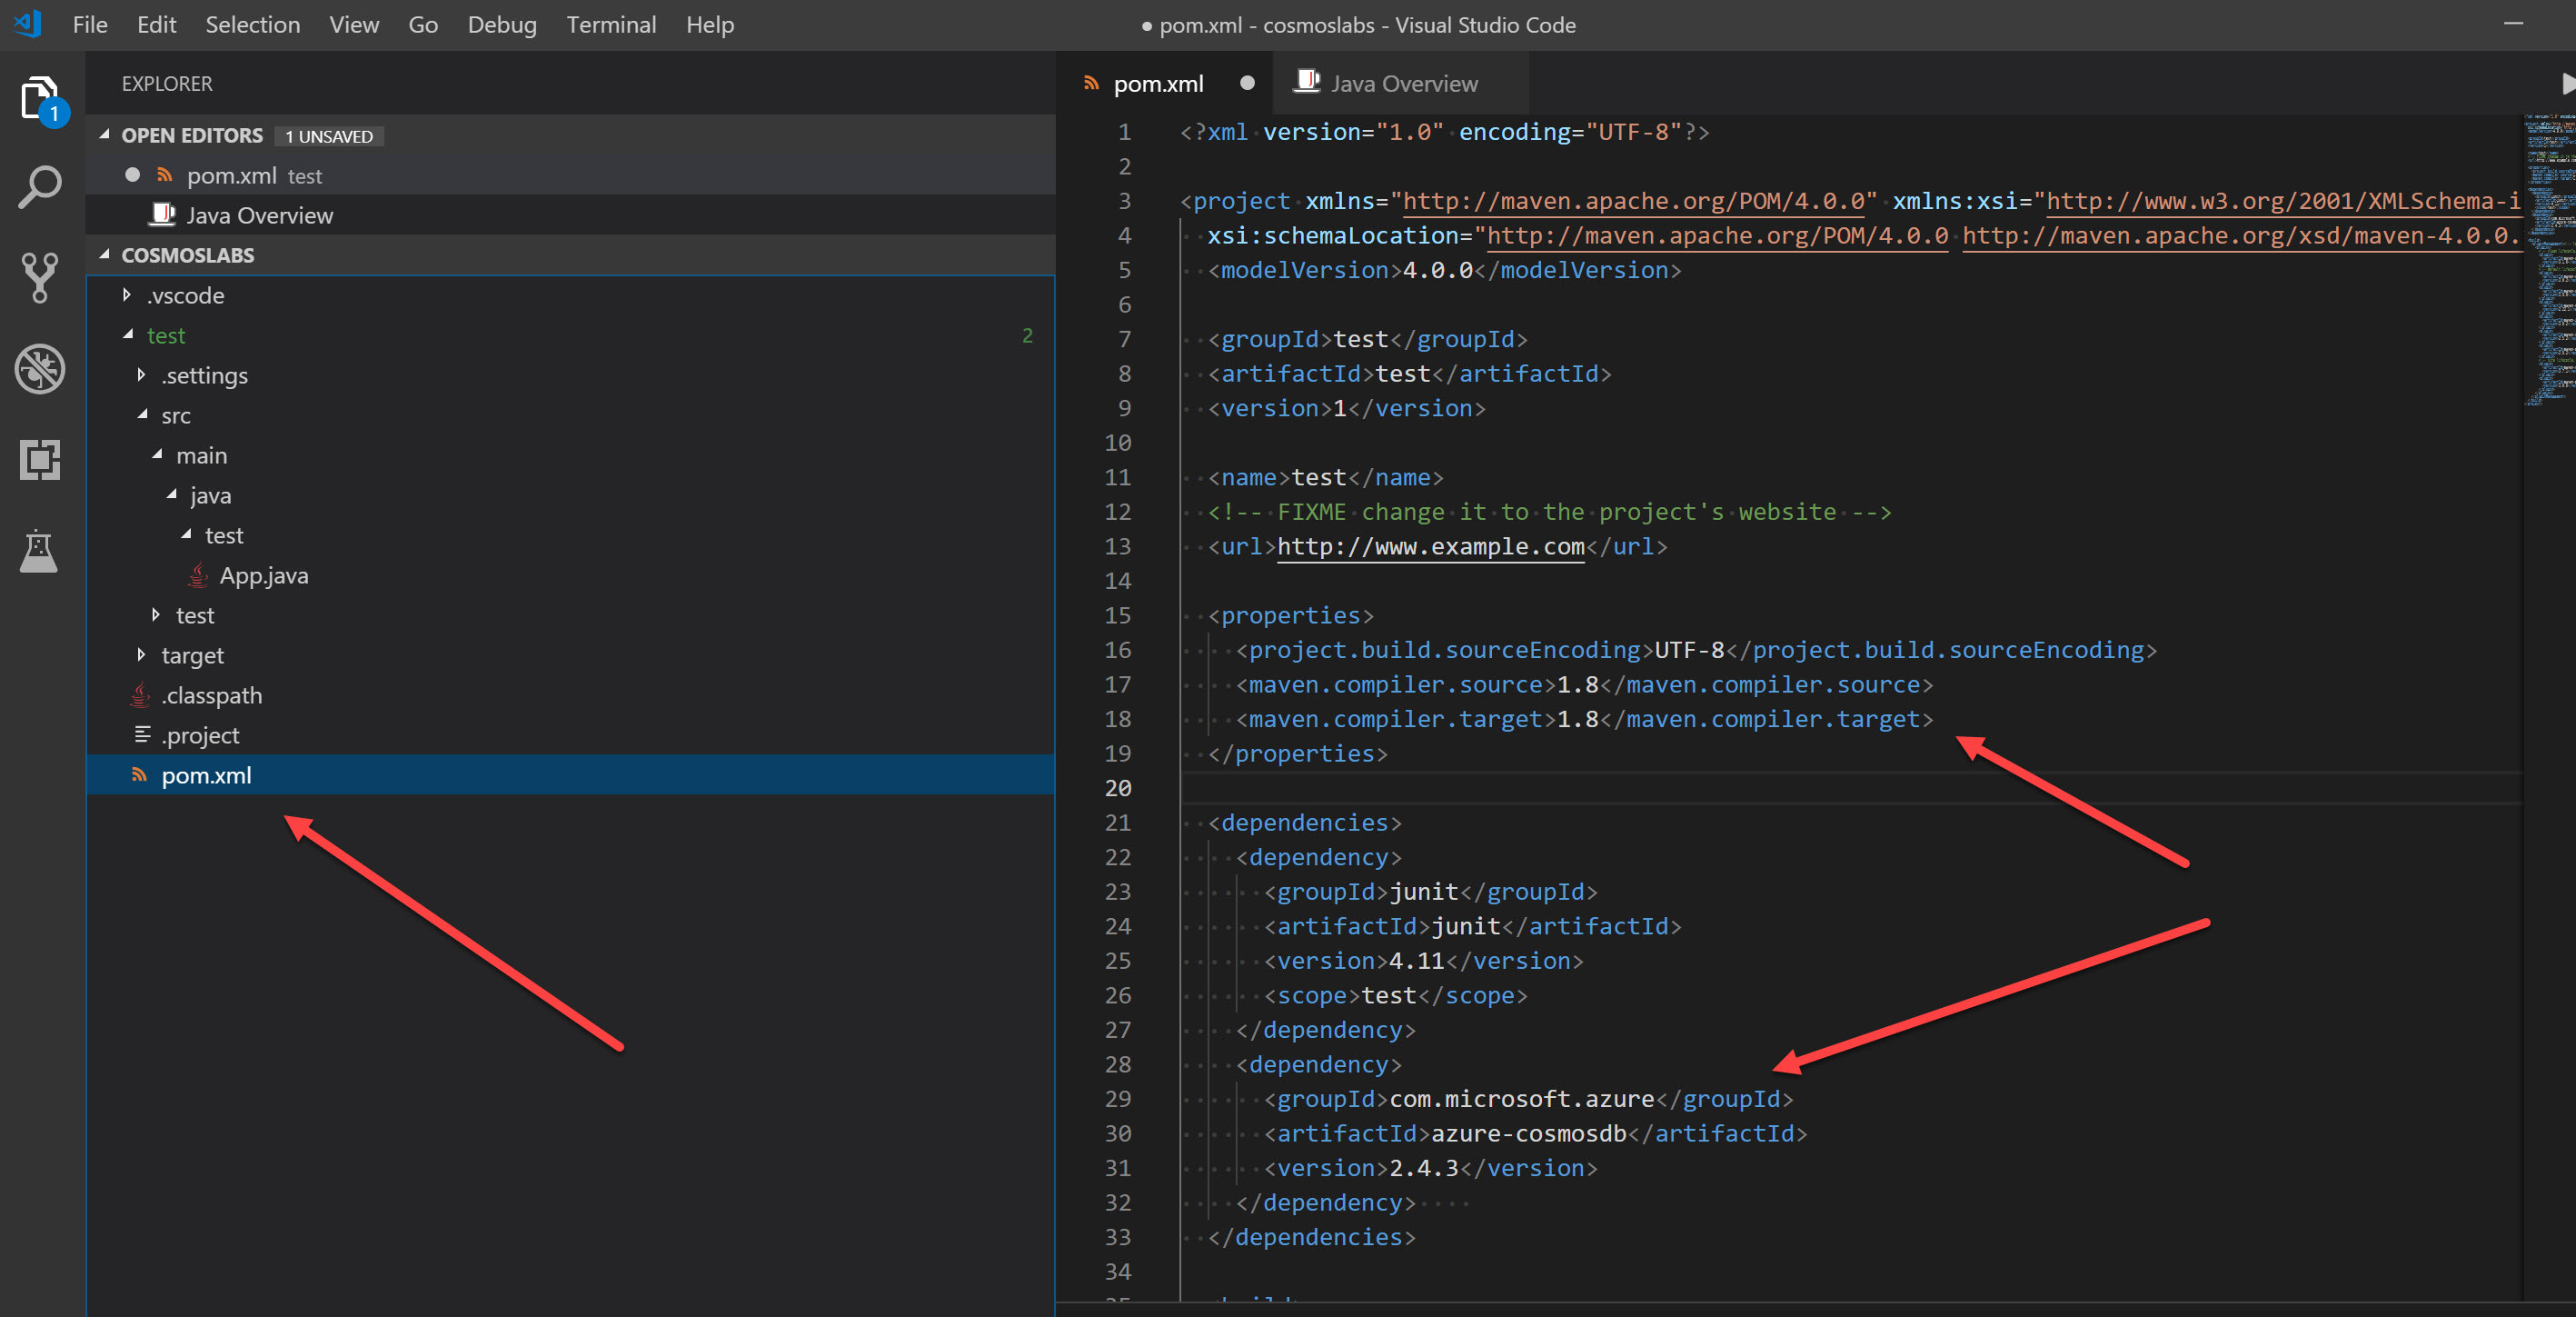
To add the Maven project dependancies required to work with Cosmos DB, you should add the following into the pom.xml file located at the bottom of your project, within the dependancies section:
<dependency> <groupId>com.microsoft.azure</groupId> <artifactId>azure-cosmosdb</artifactId> <version>2.4.3</version> </dependency> -
For this tutorial, you will also need to change the source and target compiler versions to Java 1.8, as we will use some lambda syntax which is only supported from Java 8 onwards. When finished, your pom.xml should look like the below:
-
Once the changes are applied, ensure you click file -> save all. At this point, VS Code will recognise that you modified the pom.xml build file. Ensure that you accept the prompt to sync the dependancies:

Once the dependencies are pulled down, you will be ready to start writing Java code for Cosmos DB.
Create AsyncDocumentClient Instance and Database
The AsyncDocumentClient class is the main “entry point” to using the SQL API in Azure Cosmos DB. We are going to create an instance of the AsyncDocumentClient class by passing in connection metadata as parameters of the class’ constructor. We will then use this class instance throughout the lab.
-
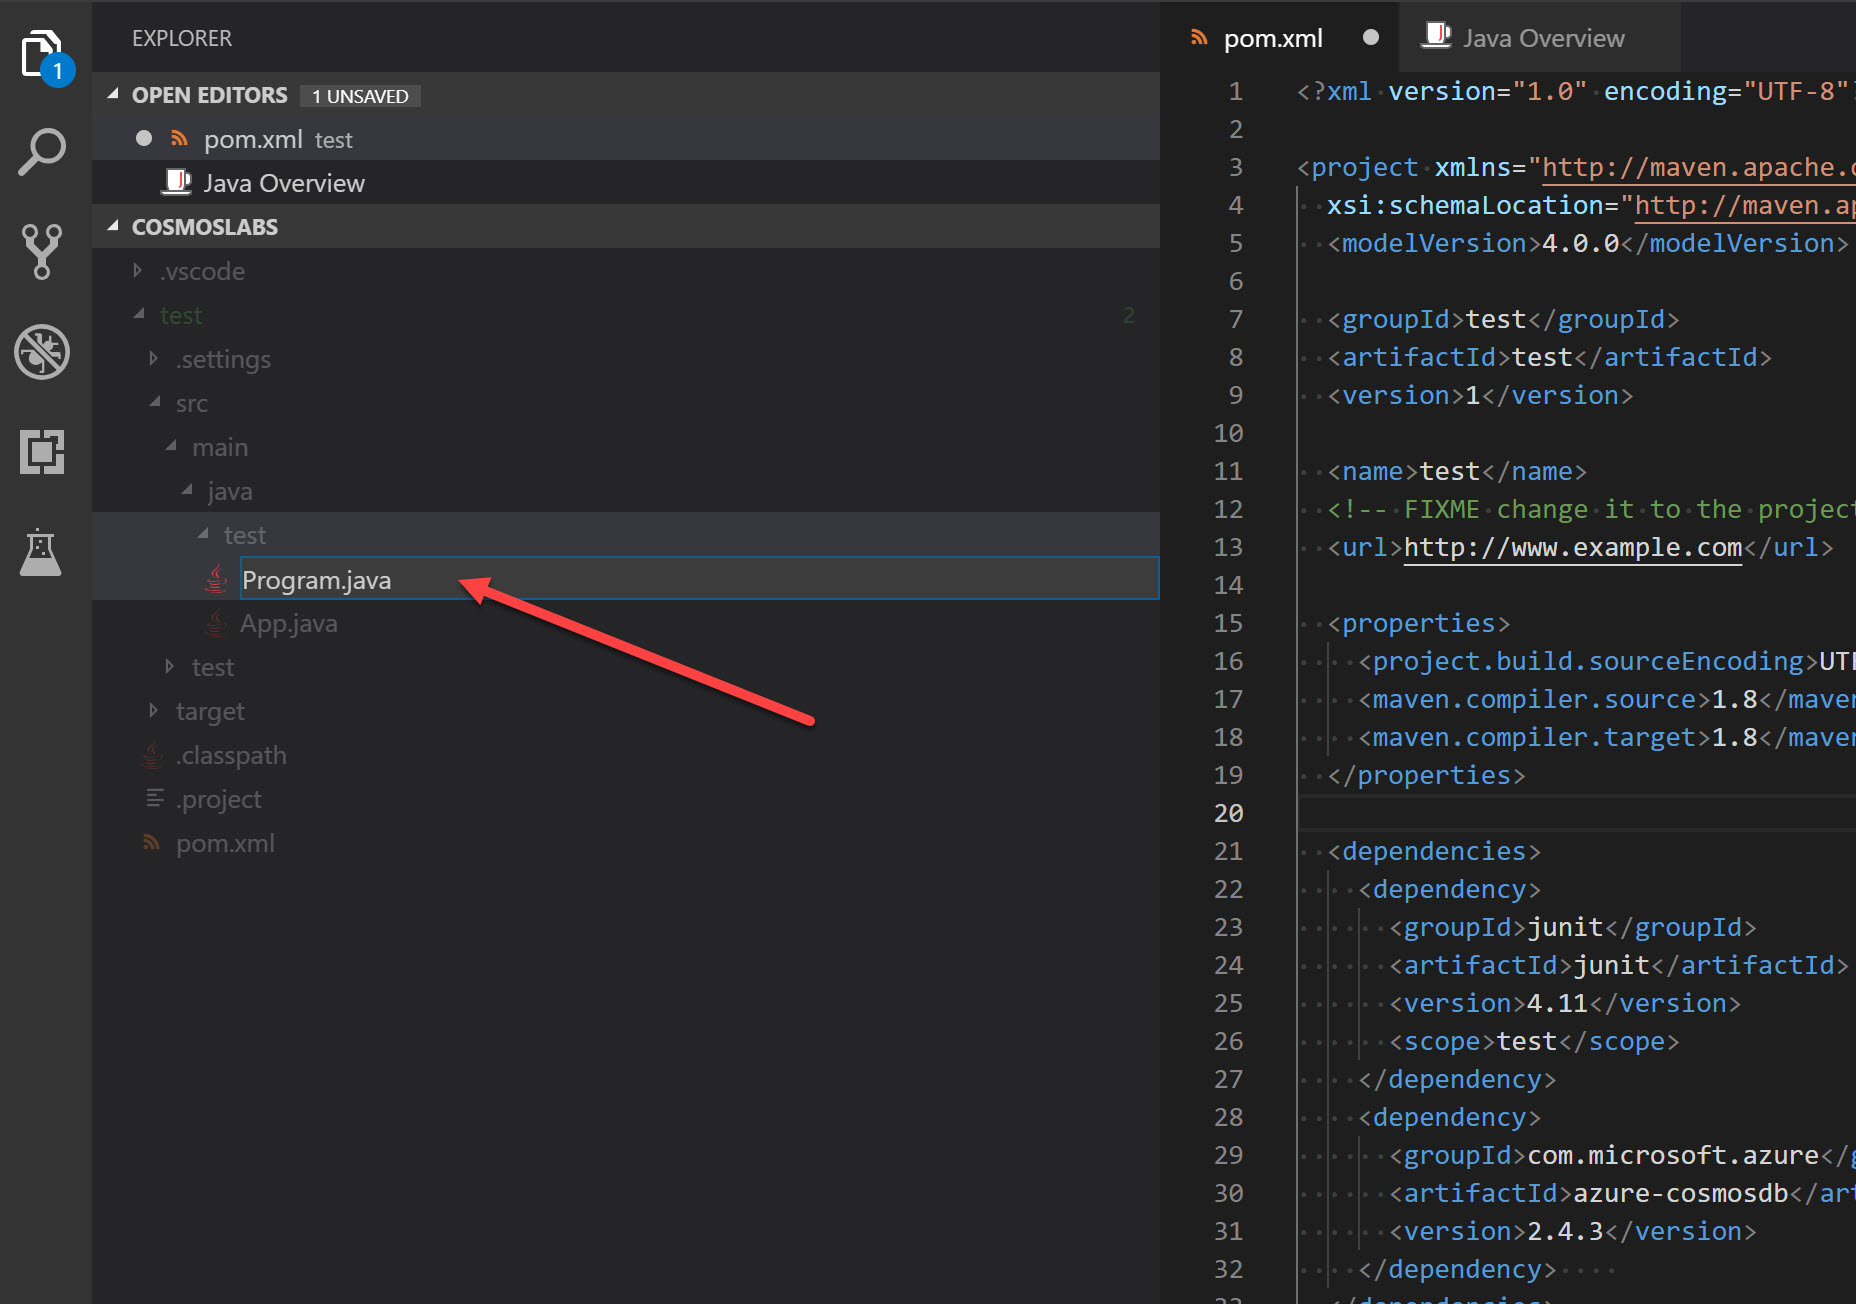
At the same level as the default “App.java” file that already exists, right click and create a new file called “Program.java”:
-
Within the Program.java editor tab, Add the package declaration (which will need to match the path you created for your maven project, if not “test” as in the sample shown here) and the following imports to the top of the editor:
package test; import java.util.ArrayList; import java.util.Collection; import java.util.List; import java.util.concurrent.CountDownLatch; import java.util.concurrent.ExecutorService; import java.util.concurrent.Executors; import com.microsoft.azure.cosmosdb.ConnectionPolicy; import com.microsoft.azure.cosmosdb.ConsistencyLevel; import com.microsoft.azure.cosmosdb.DataType; import com.microsoft.azure.cosmosdb.Database; import com.microsoft.azure.cosmosdb.DocumentClientException; import com.microsoft.azure.cosmosdb.DocumentCollection; import com.microsoft.azure.cosmosdb.IncludedPath; import com.microsoft.azure.cosmosdb.Index; import com.microsoft.azure.cosmosdb.IndexingPolicy; import com.microsoft.azure.cosmosdb.PartitionKeyDefinition; import com.microsoft.azure.cosmosdb.RequestOptions; import com.microsoft.azure.cosmosdb.ResourceResponse; import com.microsoft.azure.cosmosdb.rx.AsyncDocumentClient; import rx.Observable; import rx.Scheduler; import rx.schedulers.Schedulers; -
Create a Program class in the Program.java file as below, with the following class variables, a public constructor and main method:
public class Program { private final ExecutorService executorService; private final Scheduler scheduler; private AsyncDocumentClient client; private final String databaseName = "EntertainmentDatabase"; public Program() { //public constructor } public static void main( String[] args ) { } } -
Locate the Program class’s constructor:
public Program() { //public constructor } -
Within the constructor, add the following lines of code to create a scheduler (this is used for switching from a netty thread to a user app thread, which is required for async IO operations) and also the AsyncDocumentClient (replace “uri” and “key” with the values you recorded earlier in the lab) that we will use throughout this lab:
executorService = Executors.newFixedThreadPool(100); scheduler = Schedulers.from(executorService); client = new AsyncDocumentClient.Builder().withServiceEndpoint("uri") .withMasterKeyOrResourceToken("key") .withConnectionPolicy(ConnectionPolicy.GetDefault()).withConsistencyLevel(ConsistencyLevel.Eventual) .build(); -
For the
urivalue, replace this with the URI value from your Azure Cosmos DB account that you recorded earlier in this lab:For example, if your uri is
https://cosmosacct.documents.azure.com:443/, the input parameter for withServiceEndpoint input will look like this:withServiceEndpoint("https://cosmosacct.documents.azure.com:443/"). -
For the
keyvariable, replace the placeholder value with the PRIMARY KEY value from your Azure Cosmos DB account that you recorded earlier in this lab:For example, if your primary key is
NAye14XRGsHFbhpOVUWB7CMG2MOTAigdei5eNjxHNHup7oaBbXyVYSLW2lkPGeKRlZrCkgMdFpCEnOjlHpz94g==, the input parameter for withMasterKeyOrResourceToken will look like this:withMasterKeyOrResourceToken("NAye14XRGsHFbhpOVUWB7CMG2MOTAigdei5eNjxHNHup7oaBbXyVYSLW2lkPGeKRlZrCkgMdFpCEnOjlHpz94g=="). -
Below the main method in the Program class, add the following methods for creating a database, and closing down the AsyncDocumentClient:
private void createDatabase() throws Exception { String databaseLink = String.format("/dbs/%s", databaseName); Observable<ResourceResponse<Database>> databaseReadObs = client.readDatabase(databaseLink, null); Observable<ResourceResponse<Database>> databaseExistenceObs = databaseReadObs.doOnNext(x -> { System.out.println("database " + databaseName + " already exists."); }).onErrorResumeNext(e -> { if (e instanceof DocumentClientException) { DocumentClientException de = (DocumentClientException) e; if (de.getStatusCode() == 404) { System.out.println("database " + databaseName + " doesn't exist," + " creating it..."); Database dbDefinition = new Database(); dbDefinition.setId(databaseName); return client.createDatabase(dbDefinition, null); } } System.err.println("Reading database " + databaseName + " failed."); return Observable.error(e); }); databaseExistenceObs.toCompletable().await(); System.out.println("Checking database " + databaseName + " completed!\n"); } public void close() { executorService.shutdown(); client.close(); } -
Locate the Main method:
public static void main( String[] args ) { } -
Within the Main method, add the following lines of code to create and dispose of the AsyncDocumentClient instance:
Program p = new Program(); try { p.createDatabase(); System.out.println(String.format("Database created, please hold while resources are released")); } catch (Exception e) { System.err.println(String.format("DocumentDB GetStarted failed with %s", e)); } finally { System.out.println("close the client"); p.close(); } System.exit(0); -
Your
Programclass definition should now look like this:public class Program { private final ExecutorService executorService; private final Scheduler scheduler; private AsyncDocumentClient client; private final String databaseName = "EntertainmentDatabase"; public Program() { executorService = Executors.newFixedThreadPool(100); scheduler = Schedulers.from(executorService); client = new AsyncDocumentClient.Builder().withServiceEndpoint("uri") .withMasterKeyOrResourceToken("key") .withConnectionPolicy(ConnectionPolicy.GetDefault()).withConsistencyLevel(ConsistencyLevel.Eventual) .build(); } public static void main( String[] args ) { Program p = new Program(); try { p.createDatabase(); System.out.println(String.format("Database created, please hold while resources are released")); } catch (Exception e) { System.err.println(String.format("DocumentDB GetStarted failed with %s", e)); } finally { System.out.println("close the client"); p.close(); } System.exit(0); } private void createDatabase() throws Exception { String databaseLink = String.format("/dbs/%s", databaseName); Observable<ResourceResponse<Database>> databaseReadObs = client.readDatabase(databaseLink, null); Observable<ResourceResponse<Database>> databaseExistenceObs = databaseReadObs.doOnNext(x -> { System.out.println("database " + databaseName + " already exists."); }).onErrorResumeNext(e -> { if (e instanceof DocumentClientException) { DocumentClientException de = (DocumentClientException) e; if (de.getStatusCode() == 404) { System.out.println("database " + databaseName + " doesn't exist," + " creating it..."); Database dbDefinition = new Database(); dbDefinition.setId(databaseName); return client.createDatabase(dbDefinition, null); } } System.err.println("Reading database " + databaseName + " failed."); return Observable.error(e); }); databaseExistenceObs.toCompletable().await(); System.out.println("Checking database " + databaseName + " completed!\n"); } public void close() { executorService.shutdown(); client.close(); } } -
Save all of your open editor tabs.
-
In the Visual Studio Code window, select the “run” option (from “run” and “debug”) that should appear within your class file (or compile and run the code in your java IDE of choice). After the code has compiled and run, you should be able to view the database in Data Explorer from the Azure portal.
Create an Unlimited Collection using the SDK
Unlimited containers have higher storage and throughput limits. To create a container as unlimited, you must specify a partition key and a minimum throughput of 400 RU/s. You will specify those values when creating a container in this task. A partition key is a logical hint for distributing data onto a scaled out underlying set of physical partitions and for efficiently routing queries to the appropriate underlying partition. To learn more, refer to /docs.microsoft.com/azure/cosmos-db/partition-data.
-
Go back to your Program class and add three new instance variables:
private final String collectionId = "CustomCollection"; private final String partitionKeyPath = "/type"; private final int throughPut = 400; -
Now create another method within the class, below the createDatabase() method, to define the multi-partition parameters. This will set indexing policy for your collection, and include the partition key (defined as “/type” in your instance variable) and collection id (the name of the collection defined in your instance variable):
 private DocumentCollection getMultiPartitionCollectionDefinition() {
     DocumentCollection collectionDefinition = new DocumentCollection();
     collectionDefinition.setId(collectionId);

     PartitionKeyDefinition partitionKeyDefinition = new PartitionKeyDefinition();
     List<String> paths = new ArrayList<>();
     paths.add(partitionKeyPath);
     partitionKeyDefinition.setPaths(paths);
     collectionDefinition.setPartitionKey(partitionKeyDefinition);

     // Set indexing policy to be range for string and number
     IndexingPolicy indexingPolicy = new IndexingPolicy();
     Collection<IncludedPath> includedPaths = new ArrayList<>();
     IncludedPath includedPath = new IncludedPath();
     includedPath.setPath("/*");
     Collection<Index> indexes = new ArrayList<>();
     Index stringIndex = Index.Range(DataType.String);
     stringIndex.set("precision", -1);
     indexes.add(stringIndex);

     Index numberIndex = Index.Range(DataType.Number);
     numberIndex.set("precision", -1);
     indexes.add(numberIndex);
     includedPath.setIndexes(indexes);
     includedPaths.add(includedPath);
     indexingPolicy.setIncludedPaths(includedPaths);
     collectionDefinition.setIndexingPolicy(indexingPolicy);

     return collectionDefinition;
 }
By default, all Azure Cosmos DB data is indexed. Although many customers are happy to let Azure Cosmos DB automatically handle all aspects of indexing, you can specify a custom indexing policy for collections. This indexing policy we created is very similar to the default indexing policy created by the SDK but it implements a Range index on string types instead of a Hash index.
-
Now, below this method, add another method that will create the multi partition collection. This will also set the throughput value:
public void createMultiPartitionCollection() throws Exception { RequestOptions multiPartitionRequestOptions = new RequestOptions(); multiPartitionRequestOptions.setOfferThroughput(throughPut); String databaseLink = String.format("/dbs/%s", databaseName); Observable<ResourceResponse<DocumentCollection>> createCollectionObservable = client.createCollection( databaseLink, getMultiPartitionCollectionDefinition(), multiPartitionRequestOptions); final CountDownLatch countDownLatch = new CountDownLatch(1); createCollectionObservable.single() // We know there is only single result .subscribe(collectionResourceResponse -> { System.out.println(collectionResourceResponse.getActivityId()); countDownLatch.countDown(); }, error -> { System.err.println( "an error occurred while creating the collection: actual cause: " + error.getMessage()); countDownLatch.countDown(); }); System.out.println("creating collection..."); countDownLatch.await(); } -
Finally, add a call to the new createMultiPartitionCollection() nethod in the main method of your Program class:
public static void main(String[] args) { Program p = new Program(); try { p.createDatabase(); System.out.println(String.format("Database created, please hold while resources are released")); //create collection... p.createMultiPartitionCollection(); } catch (Exception e) { System.err.println(String.format("DocumentDB GetStarted failed with %s", e)); } finally { System.out.println("close the client"); p.close(); } System.exit(0); } } -
Your Program class should now look like this:
public class Program { private final ExecutorService executorService; private final Scheduler scheduler; private AsyncDocumentClient client; private final String databaseName = "EntertainmentDatabase"; private final String collectionId = "CustomCollection"; private final String partitionKeyPath = "/type"; private final int throughPut = 400; public Program() { executorService = Executors.newFixedThreadPool(100); scheduler = Schedulers.from(executorService); client = new AsyncDocumentClient.Builder().withServiceEndpoint("uri") .withMasterKeyOrResourceToken("key") .withConnectionPolicy(ConnectionPolicy.GetDefault()).withConsistencyLevel(ConsistencyLevel.Eventual) .build(); } public static void main(String[] args) { Program p = new Program(); try { p.createDatabase(); System.out.println(String.format("Database created, please hold while resources are released")); //create collection... p.createMultiPartitionCollection(); } catch (Exception e) { System.err.println(String.format("DocumentDB GetStarted failed with %s", e)); } finally { System.out.println("close the client"); p.close(); } System.exit(0); } private void createDatabase() throws Exception { String databaseLink = String.format("/dbs/%s", databaseName); Observable<ResourceResponse<Database>> databaseReadObs = client.readDatabase(databaseLink, null); Observable<ResourceResponse<Database>> databaseExistenceObs = databaseReadObs.doOnNext(x -> { System.out.println("database " + databaseName + " already exists."); }).onErrorResumeNext(e -> { if (e instanceof DocumentClientException) { DocumentClientException de = (DocumentClientException) e; if (de.getStatusCode() == 404) { System.out.println("database " + databaseName + " doesn't exist," + " creating it..."); Database dbDefinition = new Database(); dbDefinition.setId(databaseName); return client.createDatabase(dbDefinition, null); } } System.err.println("Reading database " + databaseName + " failed."); return Observable.error(e); }); databaseExistenceObs.toCompletable().await(); System.out.println("Checking database " + databaseName + " completed!\n"); } private DocumentCollection getMultiPartitionCollectionDefinition() { DocumentCollection collectionDefinition = new DocumentCollection(); collectionDefinition.setId(collectionId); PartitionKeyDefinition partitionKeyDefinition = new PartitionKeyDefinition(); List<String> paths = new ArrayList<>(); paths.add(partitionKeyPath); partitionKeyDefinition.setPaths(paths); collectionDefinition.setPartitionKey(partitionKeyDefinition); // Set indexing policy to be range range for string and number IndexingPolicy indexingPolicy = new IndexingPolicy(); Collection<IncludedPath> includedPaths = new ArrayList<>(); IncludedPath includedPath = new IncludedPath(); includedPath.setPath("/*"); Collection<Index> indexes = new ArrayList<>(); Index stringIndex = Index.Range(DataType.String); stringIndex.set("precision", -1); indexes.add(stringIndex); Index numberIndex = Index.Range(DataType.Number); numberIndex.set("precision", -1); indexes.add(numberIndex); includedPath.setIndexes(indexes); includedPaths.add(includedPath); indexingPolicy.setIncludedPaths(includedPaths); collectionDefinition.setIndexingPolicy(indexingPolicy); return collectionDefinition; } public void createMultiPartitionCollection() throws Exception { RequestOptions multiPartitionRequestOptions = new RequestOptions(); multiPartitionRequestOptions.setOfferThroughput(throughPut); String databaseLink = String.format("/dbs/%s", databaseName); Observable<ResourceResponse<DocumentCollection>> createCollectionObservable = client.createCollection( databaseLink, getMultiPartitionCollectionDefinition(), multiPartitionRequestOptions); final CountDownLatch countDownLatch = new CountDownLatch(1); createCollectionObservable.single() // We know there is only single result .subscribe(collectionResourceResponse -> { System.out.println(collectionResourceResponse.getActivityId()); countDownLatch.countDown(); }, error -> { System.err.println( "an error occurred while creating the collection: actual cause: " + error.getMessage()); countDownLatch.countDown(); }); System.out.println("creating collection..."); countDownLatch.await(); } public void close() { executorService.shutdown(); client.close(); } } -
Save all of your open editor tabs, and click run.
Observe Newly Created Database and Collections in the Portal
-
In a new window, sign in to the Azure Portal (http://portal.azure.com).
-
On the left side of the portal, click the Resource groups link.
-
In the Resource groups blade, locate and select the cosmosgroup-lab Resource Group.
-
In the cosmosgroup-lab blade, select the Azure Cosmos DB account you recently created.
-
In the Azure Cosmos DB blade, observe the new collections and database displayed in the middle of the blade.
-
Locate and click the Data Explorer link on the left side of the blade.
-
In the Data Explorer section, expand the EntertainmentDatabase database node and then observe the collection node.
-
In the Data Explorer section, expand the CustomCollection node. Within the node, click the Scale & Settings link.
-
Observe the following properties of the collection and compare them to the last collection:
-
Storage Capacity
-
Assigned Throughput
-
Partition Key
-
Indexing Policy
You configured all of these values when you created this collection using the SDK. You should take time to look at the custom indexing policy you created using the SDK.
{ "indexingMode": "consistent", "automatic": true, "includedPaths": [ { "path": "/*", "indexes": [] } ], "excludedPaths": [ { "path": "/\"_etag\"/?" } ] } -
-
Close your browser window displaying the Azure Portal.
Populate a Collection with Documents using the SDK
You will now use the Async Java SDK to populate your collection with various documents of varying schemas. These documents will be serialized instances of multiple Java classes that you will create in your project. To help generate random data in the documents, we are going to use a java library called “javafaker”, so you will need to add the following to your pom.xml file, located at the bottom of your project, within the dependancies section (ensure you accept the “synchronize the Java classpath/configuration” warning if you have not accepted this permanently):
     <dependency>
         <groupId>com.github.javafaker</groupId>
         <artifactId>javafaker</artifactId>
         <version>0.17.2</version>
     </dependency>
Create Classes
-
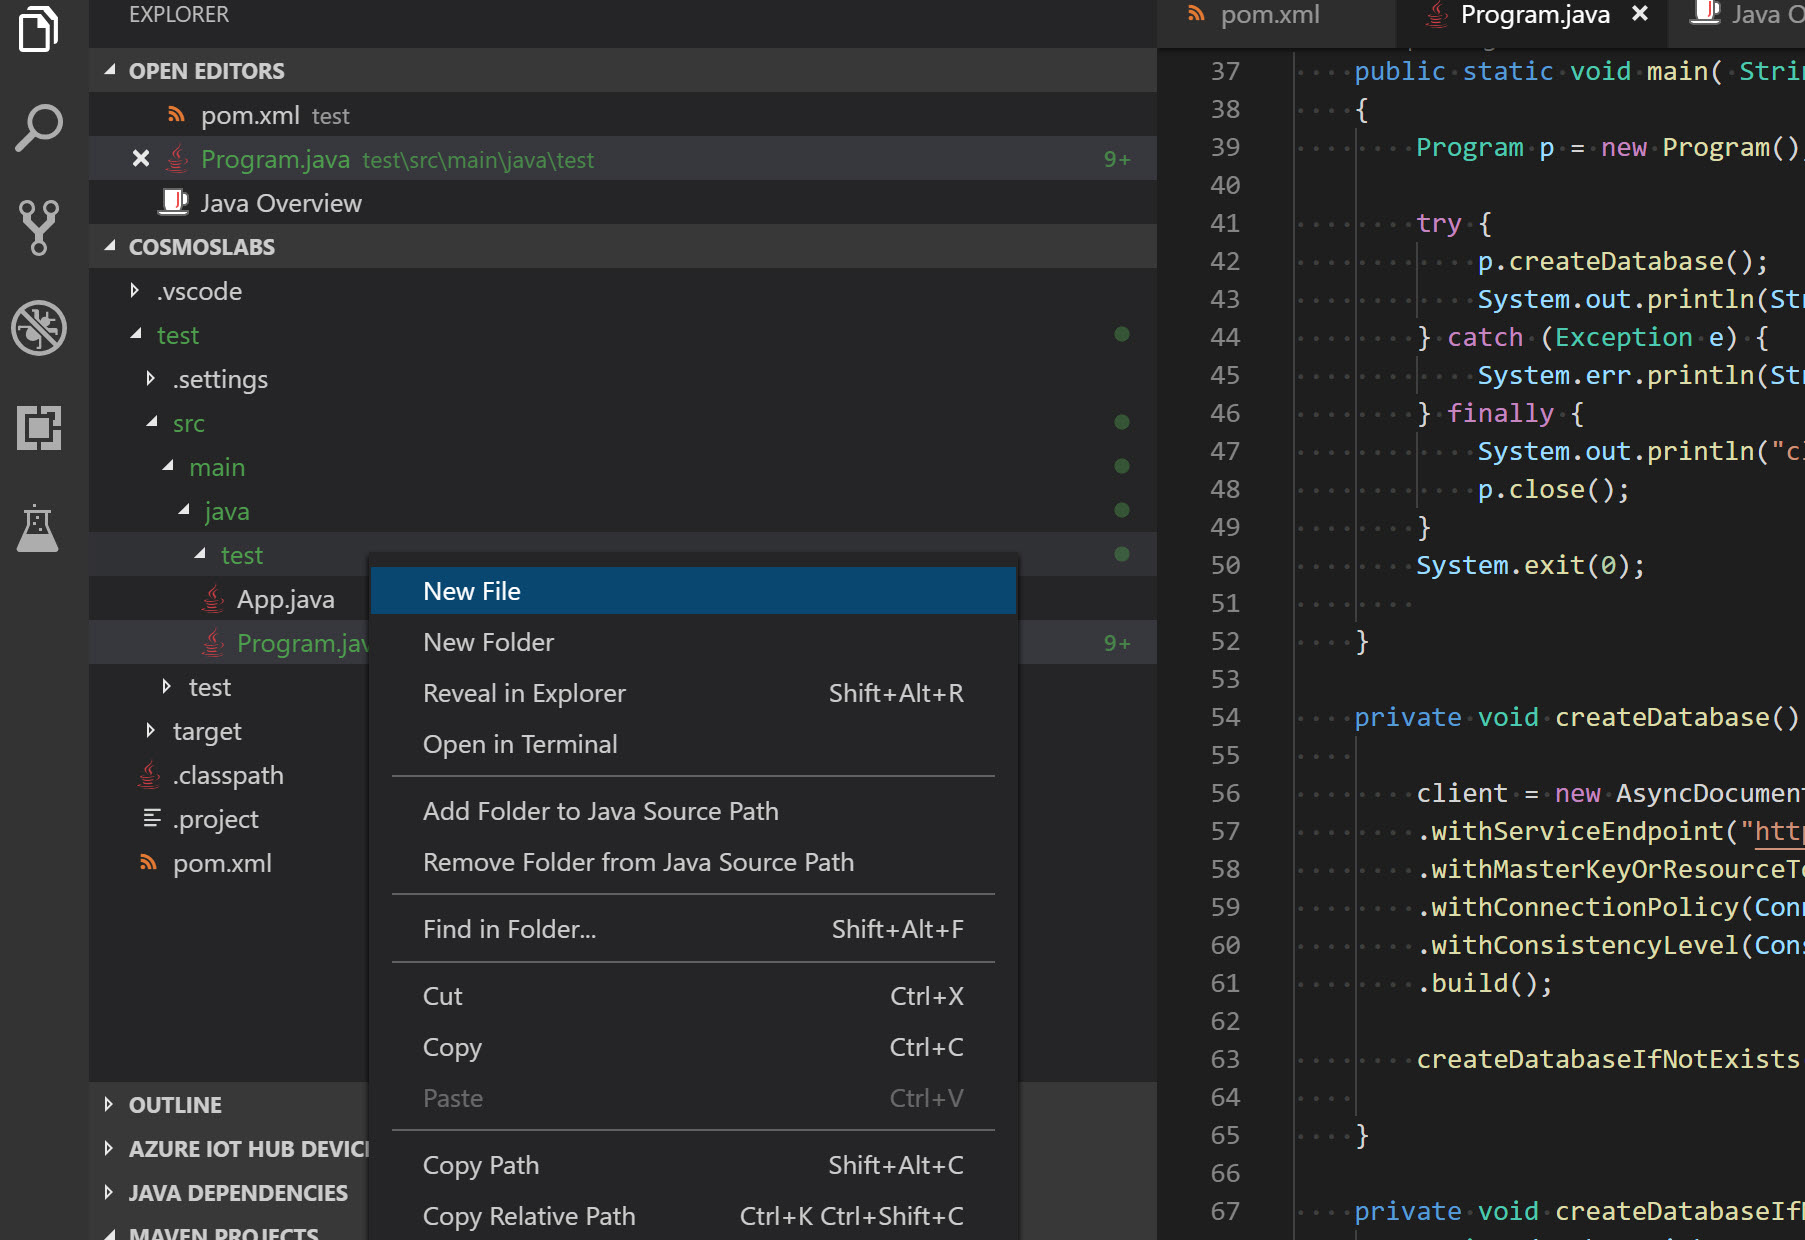
In the Visual Studio Code window, at the “test” directory (or whatever you named the classpath when creating your maven project) right-click the Explorer pane and select the New File menu option.
-
Name the new file PurchaseFoodOrBeverage.java . The editor tab will automatically open for the new file. Paste in the following code for the
PurchaseFoodOrBeverageclass (ensure the package declaration matches the classpath for your project):package test; import java.text.DecimalFormat; import java.util.ArrayList; import com.github.javafaker.Faker; import com.microsoft.azure.cosmosdb.Document; public class PurchaseFoodOrBeverage { Faker faker = new Faker(); ArrayList<Document> documentDefinitions = new ArrayList<>(); public PurchaseFoodOrBeverage(int number) throws NumberFormatException { for (int i= 0; i < number;i++){ Document documentDefinition = new Document(); DecimalFormat df = new DecimalFormat("###.###"); documentDefinition.set("type", "PurchaseFoodOrBeverage"); documentDefinition.set("quantity", faker.random().nextInt(1, 5)); String unitPrice = df.format(Double.valueOf((Double)faker.random().nextDouble())); documentDefinition.set("unitPrice", Double.valueOf(unitPrice)); int quantity = Integer.valueOf((Integer)documentDefinition.get("quantity")); String totalPrice = df.format(Double.valueOf(unitPrice) * quantity); documentDefinition.set("totalPrice", Double.valueOf(totalPrice)); documentDefinitions.add(documentDefinition); } } } -
In the Visual Studio Code window, right-click the Explorer pane and select the New File menu option.
-
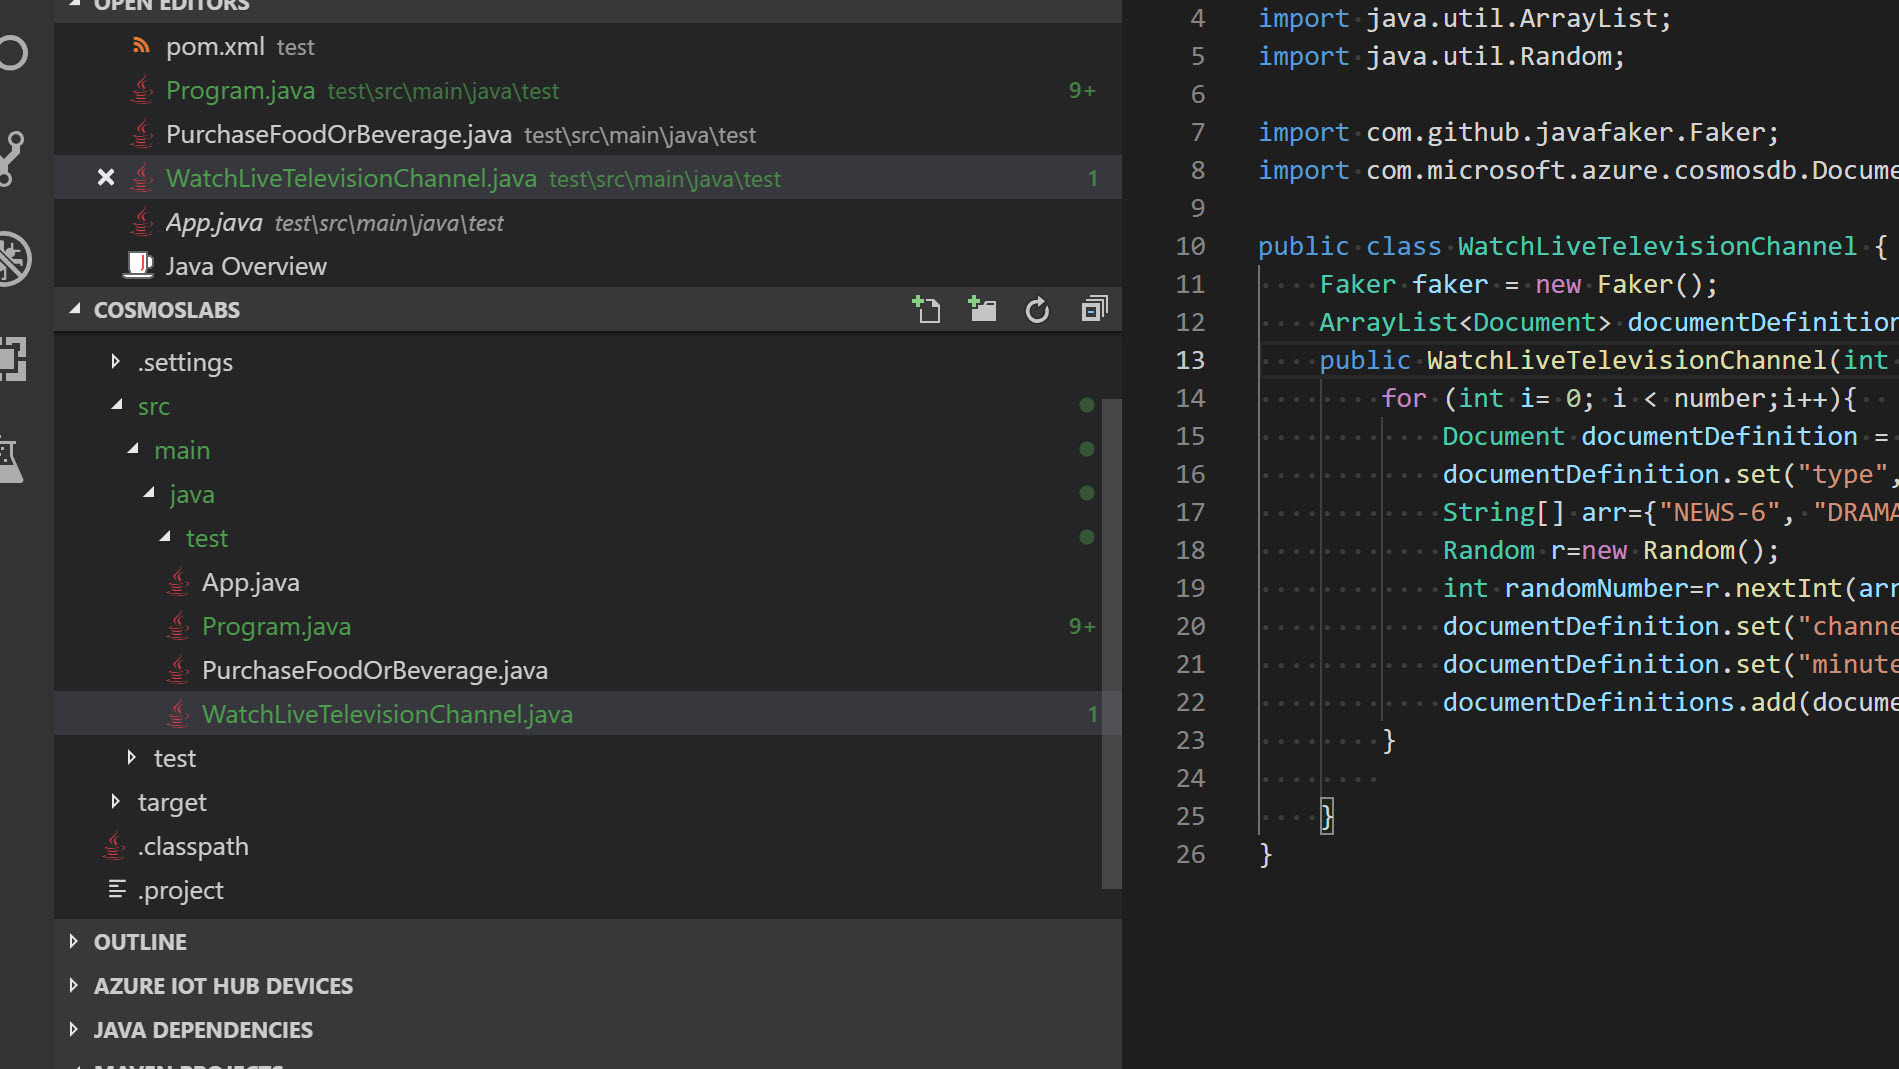
Name the new file WatchLiveTelevisionChannel.java . The editor tab will automatically open for the new file.
-
Paste in the following code for the
WatchLiveTelevisionChannelclass (ensure the package declaration matches the classpath for your project):package test; import java.text.DecimalFormat; import java.util.ArrayList; import java.util.Random; import com.github.javafaker.Faker; import com.microsoft.azure.cosmosdb.Document; public class WatchLiveTelevisionChannel { Faker faker = new Faker(); ArrayList<Document> documentDefinitions = new ArrayList<>(); public WatchLiveTelevisionChannel(int number) throws NumberFormatException { for (int i= 0; i < number;i++){ Document documentDefinition = new Document(); DecimalFormat df = new DecimalFormat("###.###"); documentDefinition.set("type", "WatchLiveTelevisionChannel"); String[] arr={"NEWS-6", "DRAMA-15", "ACTION-12", "DOCUMENTARY-4", "SPORTS-8"}; Random r=new Random(); int randomNumber=r.nextInt(arr.length); documentDefinition.set("channelName", arr[randomNumber]); documentDefinition.set("minutesViewed", faker.random().nextInt(1, 45)); documentDefinitions.add(documentDefinition); } } } -
Observe your newly created files in the Explorer pane.
-
Save all of your open editor tabs.
-
Close all open editor tabs.
Populate Unlimited Collection with Data
-
Open Program.java in the Explorer pane to open the file in the editor. Remove all methods except the main() method, and remove the contents of the main method. When done your program class should look as below (with your uri and key):
public class Program { private final ExecutorService executorService; private final Scheduler scheduler; private AsyncDocumentClient client; private final String databaseName = "EntertainmentDatabase"; private final String collectionId = "CustomCollection"; private AsyncDocumentClient asyncClient; private final String partitionKeyPath = "/type"; private final int throughPut = 400; public Program() { executorService = Executors.newFixedThreadPool(100); scheduler = Schedulers.from(executorService); ConnectionPolicy connectionPolicy = new ConnectionPolicy(); connectionPolicy.setConnectionMode(ConnectionMode.Direct); asyncClient = new AsyncDocumentClient.Builder() .withServiceEndpoint("uri") .withMasterKeyOrResourceToken("key") .withConnectionPolicy(connectionPolicy) .withConsistencyLevel(ConsistencyLevel.Session) .build(); DocumentCollection collectionDefinition = new DocumentCollection(); collectionDefinition.setId(UUID.randomUUID().toString()); } public static void main(String[] args) { } } -
Below the main() method, add the following method to create 500 documents using the PurchaseFoodOrBeverage class:
 public void createDocument() throws Exception {
     ArrayList<Document> documents = new PurchaseFoodOrBeverage(500).documentDefinitions;
     for (Document document: documents){
         // Create a document
         asyncClient.createDocument("dbs/" + databaseName + "/colls/" + collectionId, document, null, false)
         .toBlocking().single().getResource();
         System.out.println("inserting: "+document);
     }
 }
Note: generally blocking is not recommended but since this is a lab, we need to wait until the call completes and hence the block.
-
Locate the Main method:
public static void main( String[] args ) { } -
Add the following code within the main method:
Program p = new Program(); try { p.createDocument(); } catch (Exception e) { System.err.println(String.format("failed with %s", e)); } System.exit(0); -
You Program class should now look like this:
public class Program { private final ExecutorService executorService; private final Scheduler scheduler; private AsyncDocumentClient client; private final String databaseName = "EntertainmentDatabase"; private final String collectionId = "CustomCollection"; private AsyncDocumentClient asyncClient; private final String partitionKeyPath = "/type"; private final int throughPut = 400; public Program() { executorService = Executors.newFixedThreadPool(100); scheduler = Schedulers.from(executorService); // Sets up the requirements for each test ConnectionPolicy connectionPolicy = new ConnectionPolicy(); connectionPolicy.setConnectionMode(ConnectionMode.Direct); asyncClient = new AsyncDocumentClient.Builder() .withServiceEndpoint("uri") .withMasterKeyOrResourceToken("key") .withConnectionPolicy(connectionPolicy) .withConsistencyLevel(ConsistencyLevel.Session) .build(); DocumentCollection collectionDefinition = new DocumentCollection(); collectionDefinition.setId(UUID.randomUUID().toString()); } public static void main(String[] args) { Program p = new Program(); try { p.createDocument(); } catch (Exception e) { System.err.println(String.format("failed with %s", e)); } System.exit(0); } public void createDocument() throws Exception { ArrayList<Document> documents = new PurchaseFoodOrBeverage(500).documentDefinitions; for (Document document: documents){ // Create a document asyncClient.createDocument("dbs/" + databaseName + "/colls/" + collectionId, document, null, false) .toBlocking().single().getResource(); System.out.println("inserting: "+document); } } } -
Save all of your open editor tabs.
-
Click “run” in your class file (or compile and run from chosen IDE).
-
Observe the output of the console application.
You should see a list of documents that are being created by this tool.
-
Click the 🗙 symbol to close the terminal pane.
Populate Unlimited Collection with Data of Different Types
-
Locate the createDocument method and change the documents array to use the WatchLiveTelevisionChannel class. It should now look like the below:
public void createDocument() throws Exception { ArrayList<Document> documents = new WatchLiveTelevisionChannel(500).documentDefinitions; for (Document document: documents){ // Create a document asyncClient.createDocument("dbs/" + databaseName + "/colls/" + collectionId, document, null, false) .toBlocking().single().getResource(); System.out.println("inserting: "+document); } } -
Save all of your open editor tabs.
-
Click “run” in your class file (or compile and run from chosen IDE).
-
Observe the output of the console application.
You should see a list of documents that are being created.
-
Click the 🗙 symbol to close the terminal pane.
Benchmark your Collection using a Java Application
In the next part of this lab, you will test a large dataset against your collection using a benchmarking tool available on GitHub.com.
Clone Existing Java Project
-
On your local machine, create a new folder that will be used to contain the content of your new Java project.
-
In the new folder, right-click the folder and select the Open with Code menu option.
Alternatively, you can run a command prompt in your current directory and execute the
code .command. -
In the Visual Studio Code window that appears, right-click the Explorer pane and select the Open in Terminal menu option.
-
In the open terminal pane, enter and execute the following command:
git clone https://github.com/Azure/azure-cosmosdb-java.gitThis command will create a copy of a Java project located on GitHub (https://github.com/Azure/azure-cosmosdb-java/tree/master/benchmark) in your local folder.
-
When this has run, in the terminal pane, navigate to azure-cosmos-db-java folder and run “mvn clean package -DskipTests”:
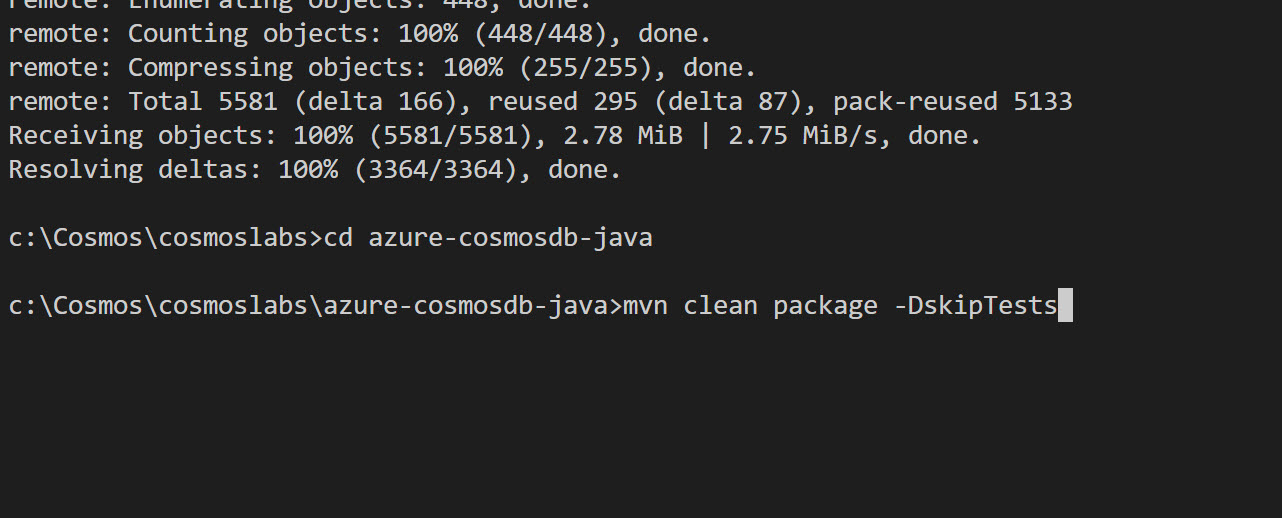
This command will build the project.
Run the Benchmark Application
-
Verify the project built with no errors (note: a JDK higher than version 8 may not compile). The navigate to the target folder by typing cd benchmark\target. You can then run the benchmark tool, replacing the text “uri” and “key” with the values from your account (ensure the jar file name is correct for the version of the jar present in the folder):
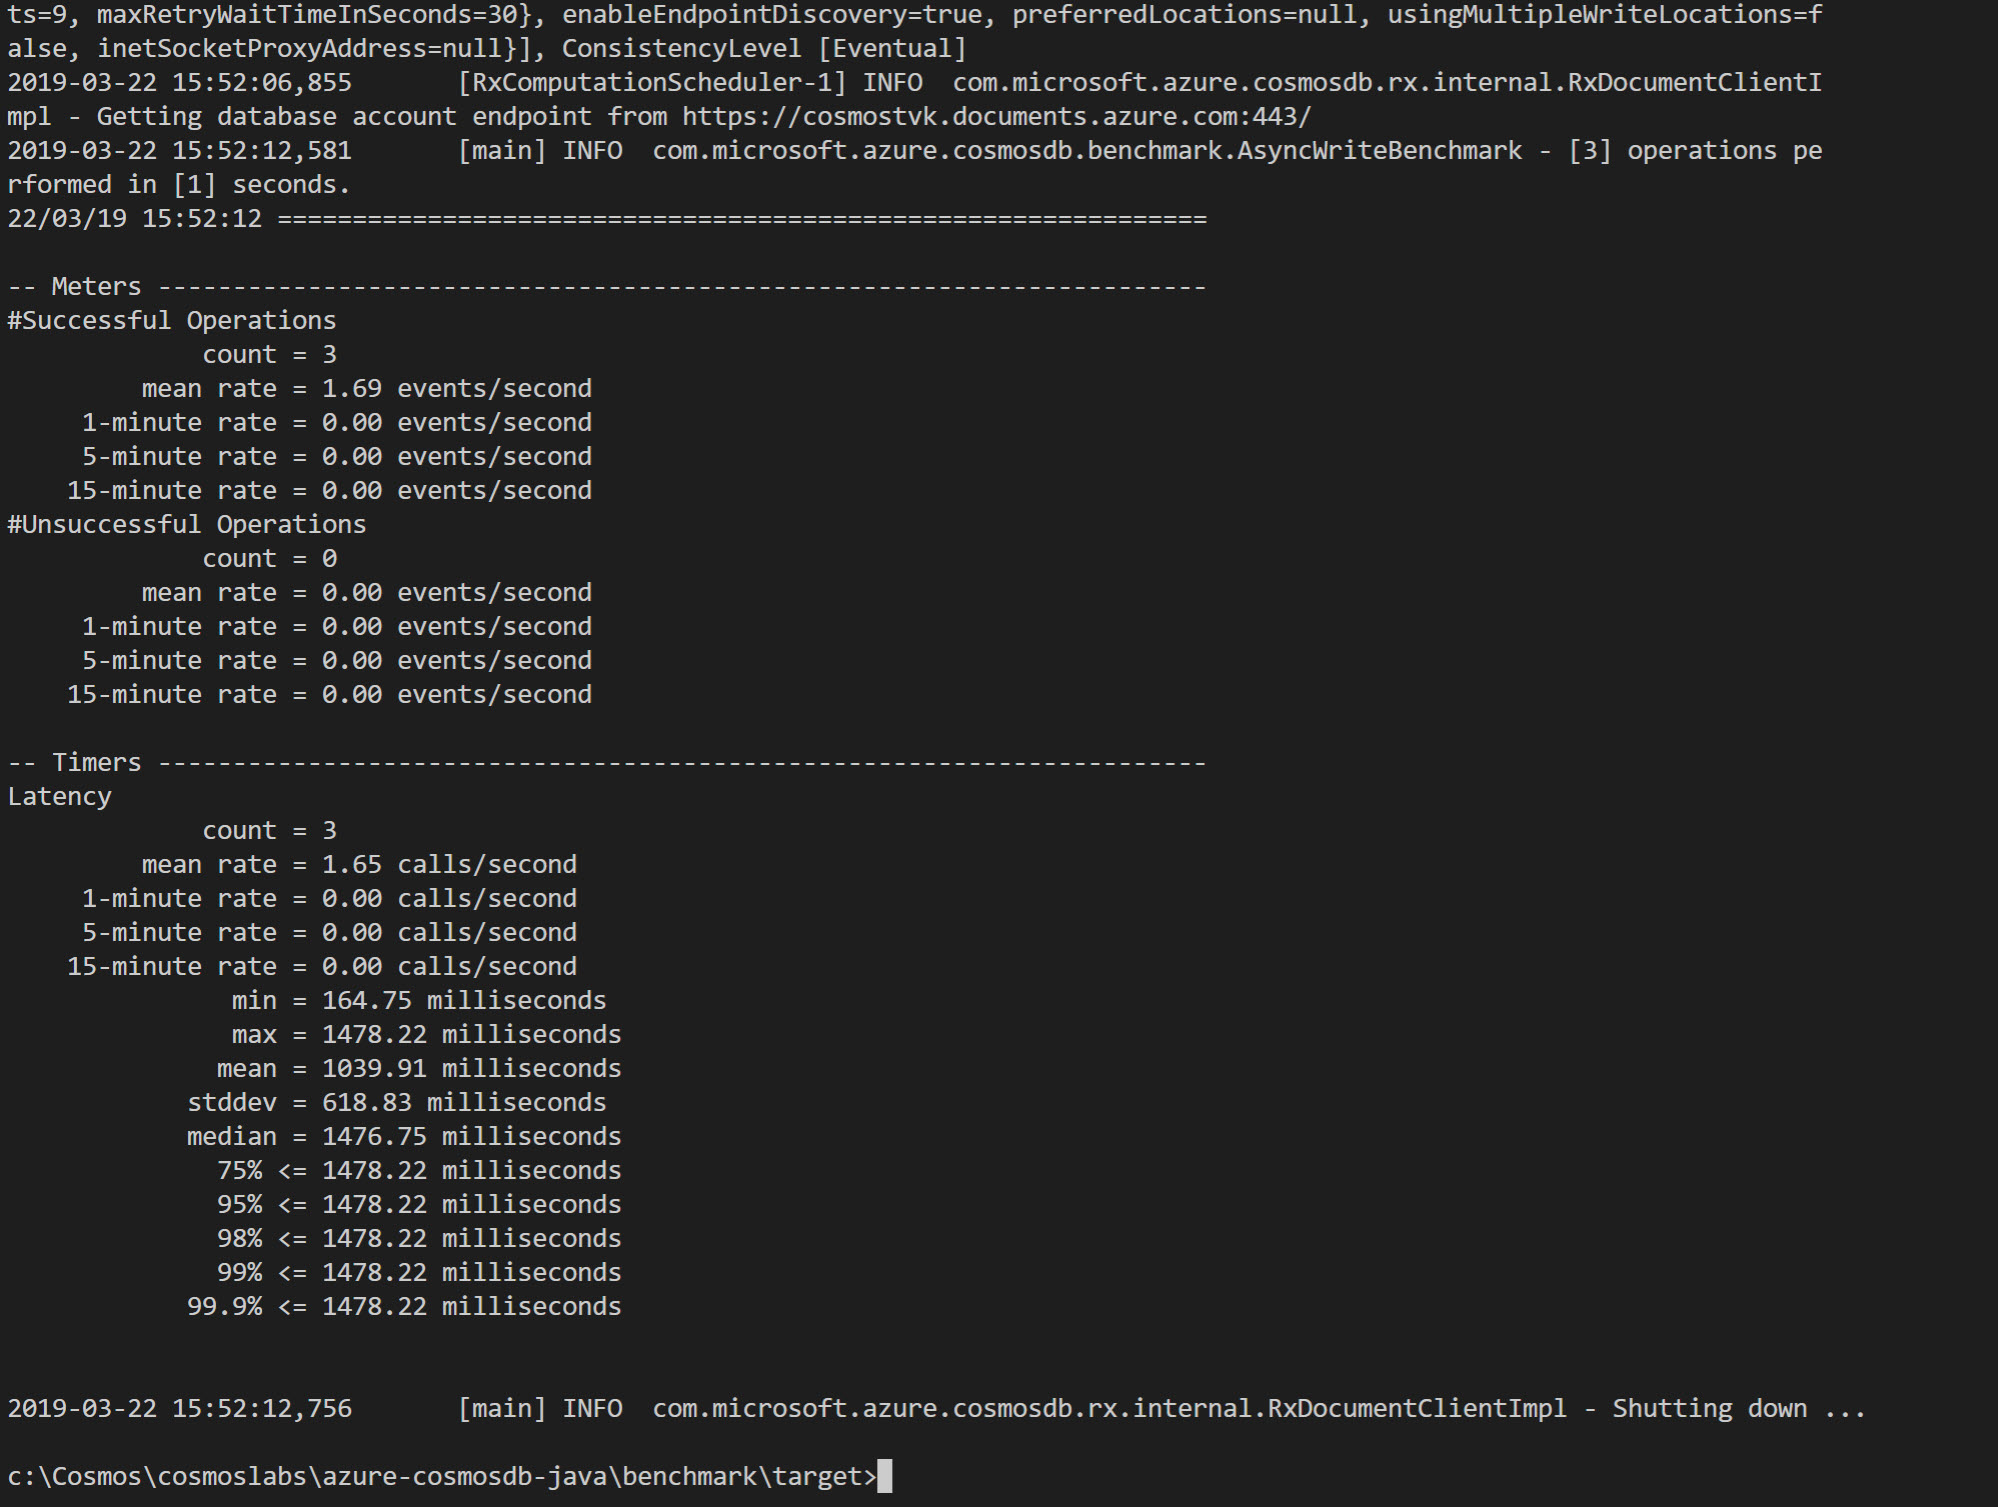
java -jar azure-cosmosdb-benchmark-2.4.3-jar-with-dependencies.jar -serviceEndpoint uri -masterKey key -databaseId EntertainmentDatabase -collectionId CustomCollection -consistencyLevel Eventual -concurrency 2 -numberOfOperations 10 -operation WriteLatency -connectionMode Direct -
You can experiment with the values “concurrency” (number of concurrent requests in the simulated app) and “numberOfOperations” (number of documents that will be inserted by the benchmark tool). By default, the tool will use the document id as the partition key, but you can experiment with this in the code, if you prefer.
-
The output of running the benchmark test should look as below:
Observe the data in the Azure Portal
-
Return to the Azure Portal (http://portal.azure.com).
-
On the left side of the portal, click the Resource groups link.
-
In the Resource groups blade, locate and select the cosmosgroup-lab Resource Group.
-
In the cosmosgroup-lab blade, select the Azure Cosmos DB account you recently created.
-
In the Azure Cosmos DB blade, locate and click the Data Explorer link on the left side of the blade.
-
In the Data Explorer section, expand the database node and then observe the collection node.
-
click the Scale & Settings link.
-
Observe the following properties of the collection:
-
Storage Capacity
-
Assigned Throughput
-
Indexing Policy
-
-
Click the New SQL Query button at the top of the Data Explorer section.
-
In the query tab, replace the contents of the query editor with the following SQL query:
SELECT VALUE COUNT(1) FROM c -
Click the Execute Query button in the query tab to run the query.
-
In the Results pane, observe the results of your query (this should return the number of records in the database).
-
Back in the Data Explorer section, right-click the database node and select the Delete Database option.
It makes sense to dispose of the database immediately to minimize your Azure subscription consumption.
-
In the Delete Database popup enter the name of the database in the field and then press the OK button.
-
Close your browser application.