Querying An Azure Cosmos DB Database using the SQL API
In this lab, you will query an Azure Cosmos DB database instance using the SQL language. You will use features common in SQL such as projection using SELECT statements and filtering using WHERE clauses. You will also get to use features unique to Azure Cosmos DB’s SQL API such as projection into JSON, intra-document JOIN and filtering to a range of partition keys.
Setup
Before you start this lab, you will need to create an Azure Cosmos DB database and collection that you will use throughout the lab. You will also use the Azure Data Factory (ADF) to import existing data into your collection.
Create Azure Cosmos DB Database and Collection
You will now create a database and collection within your Azure Cosmos DB account.
-
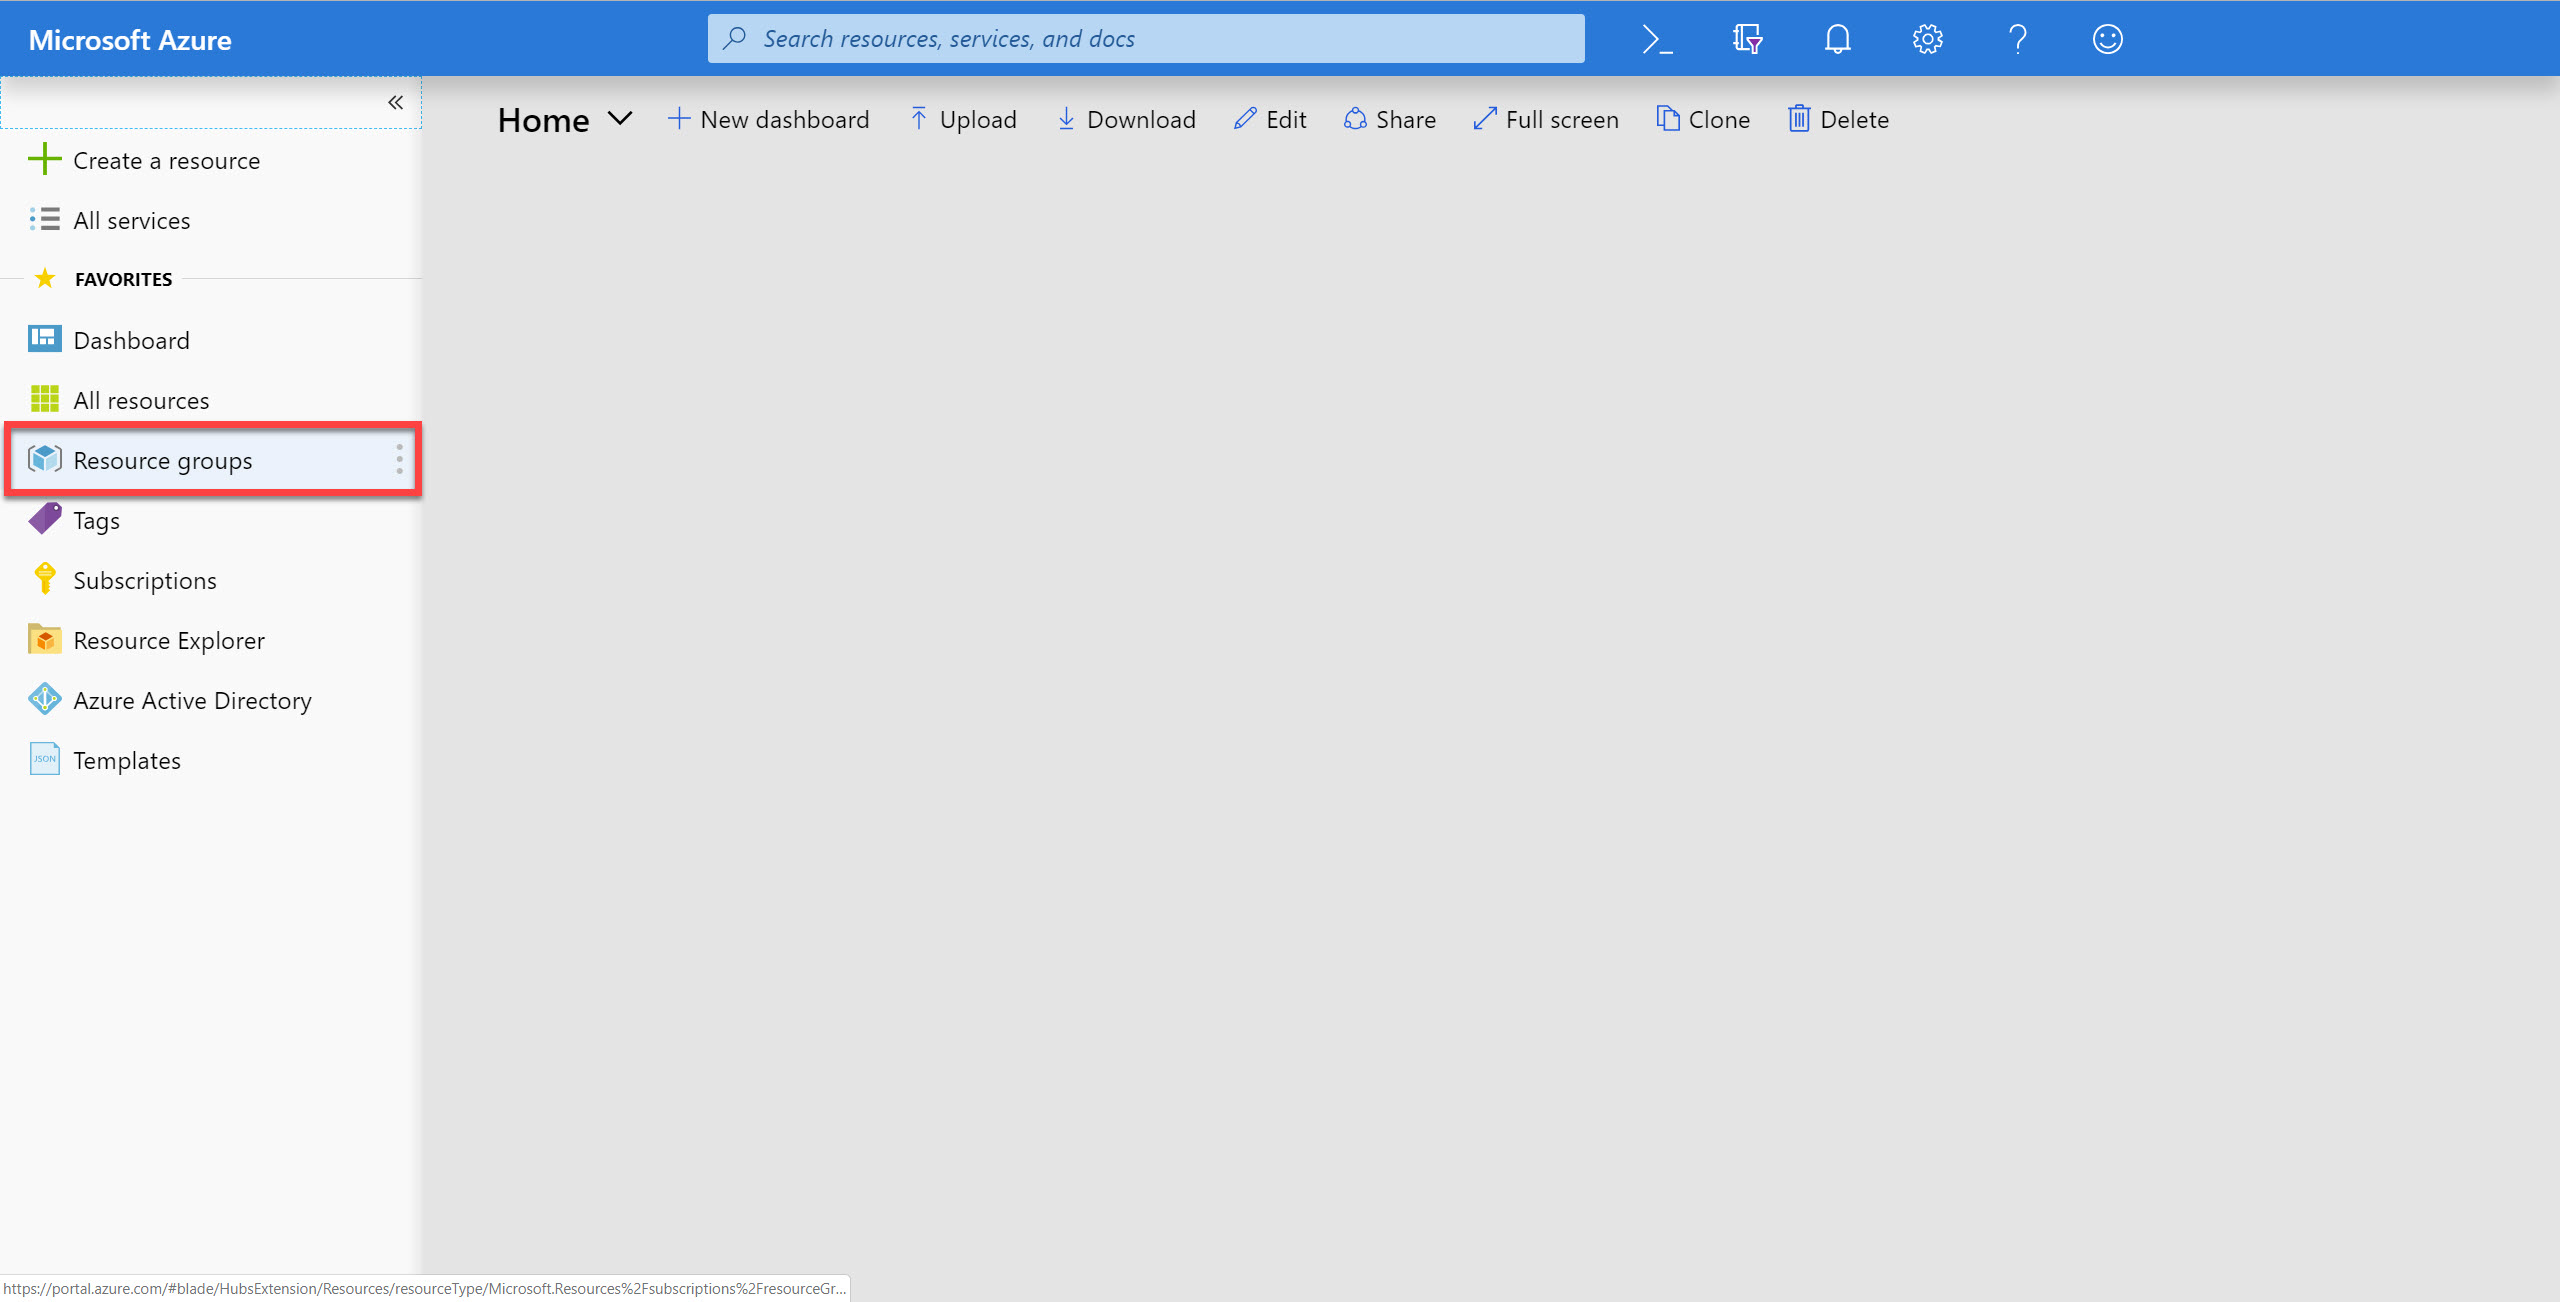
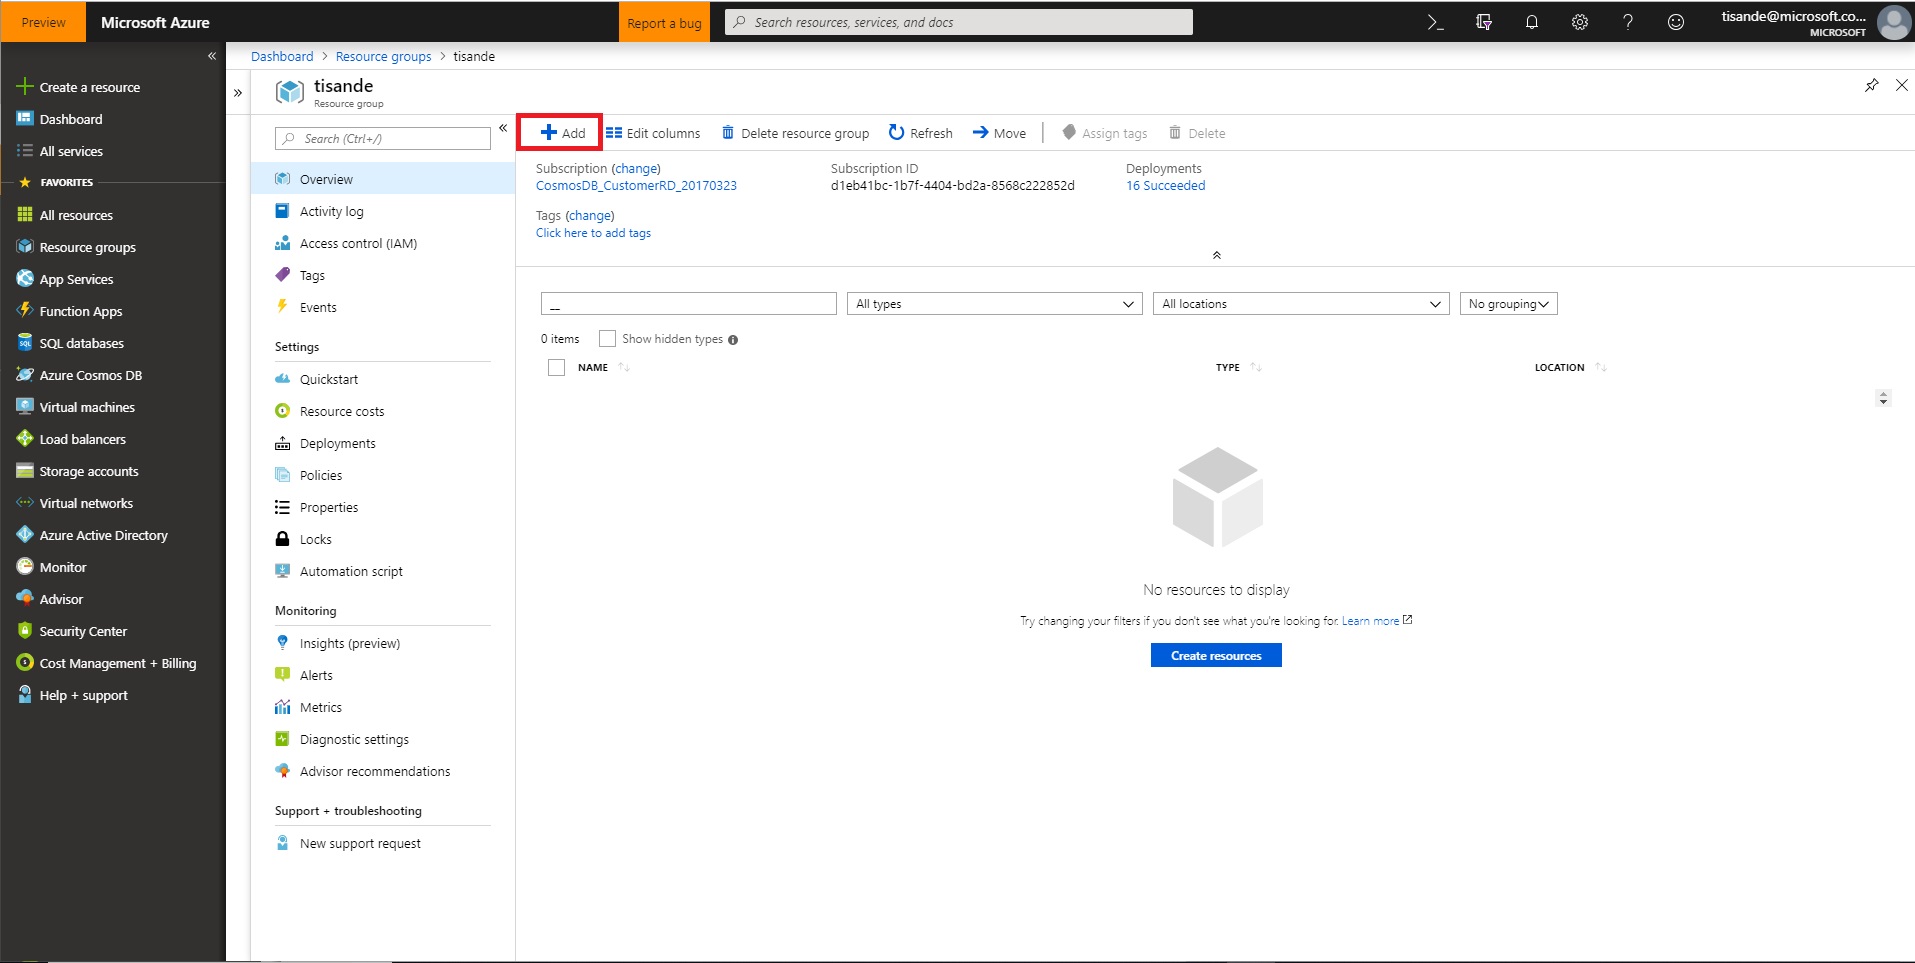
On the left side of the portal, click the Resource groups link.
-
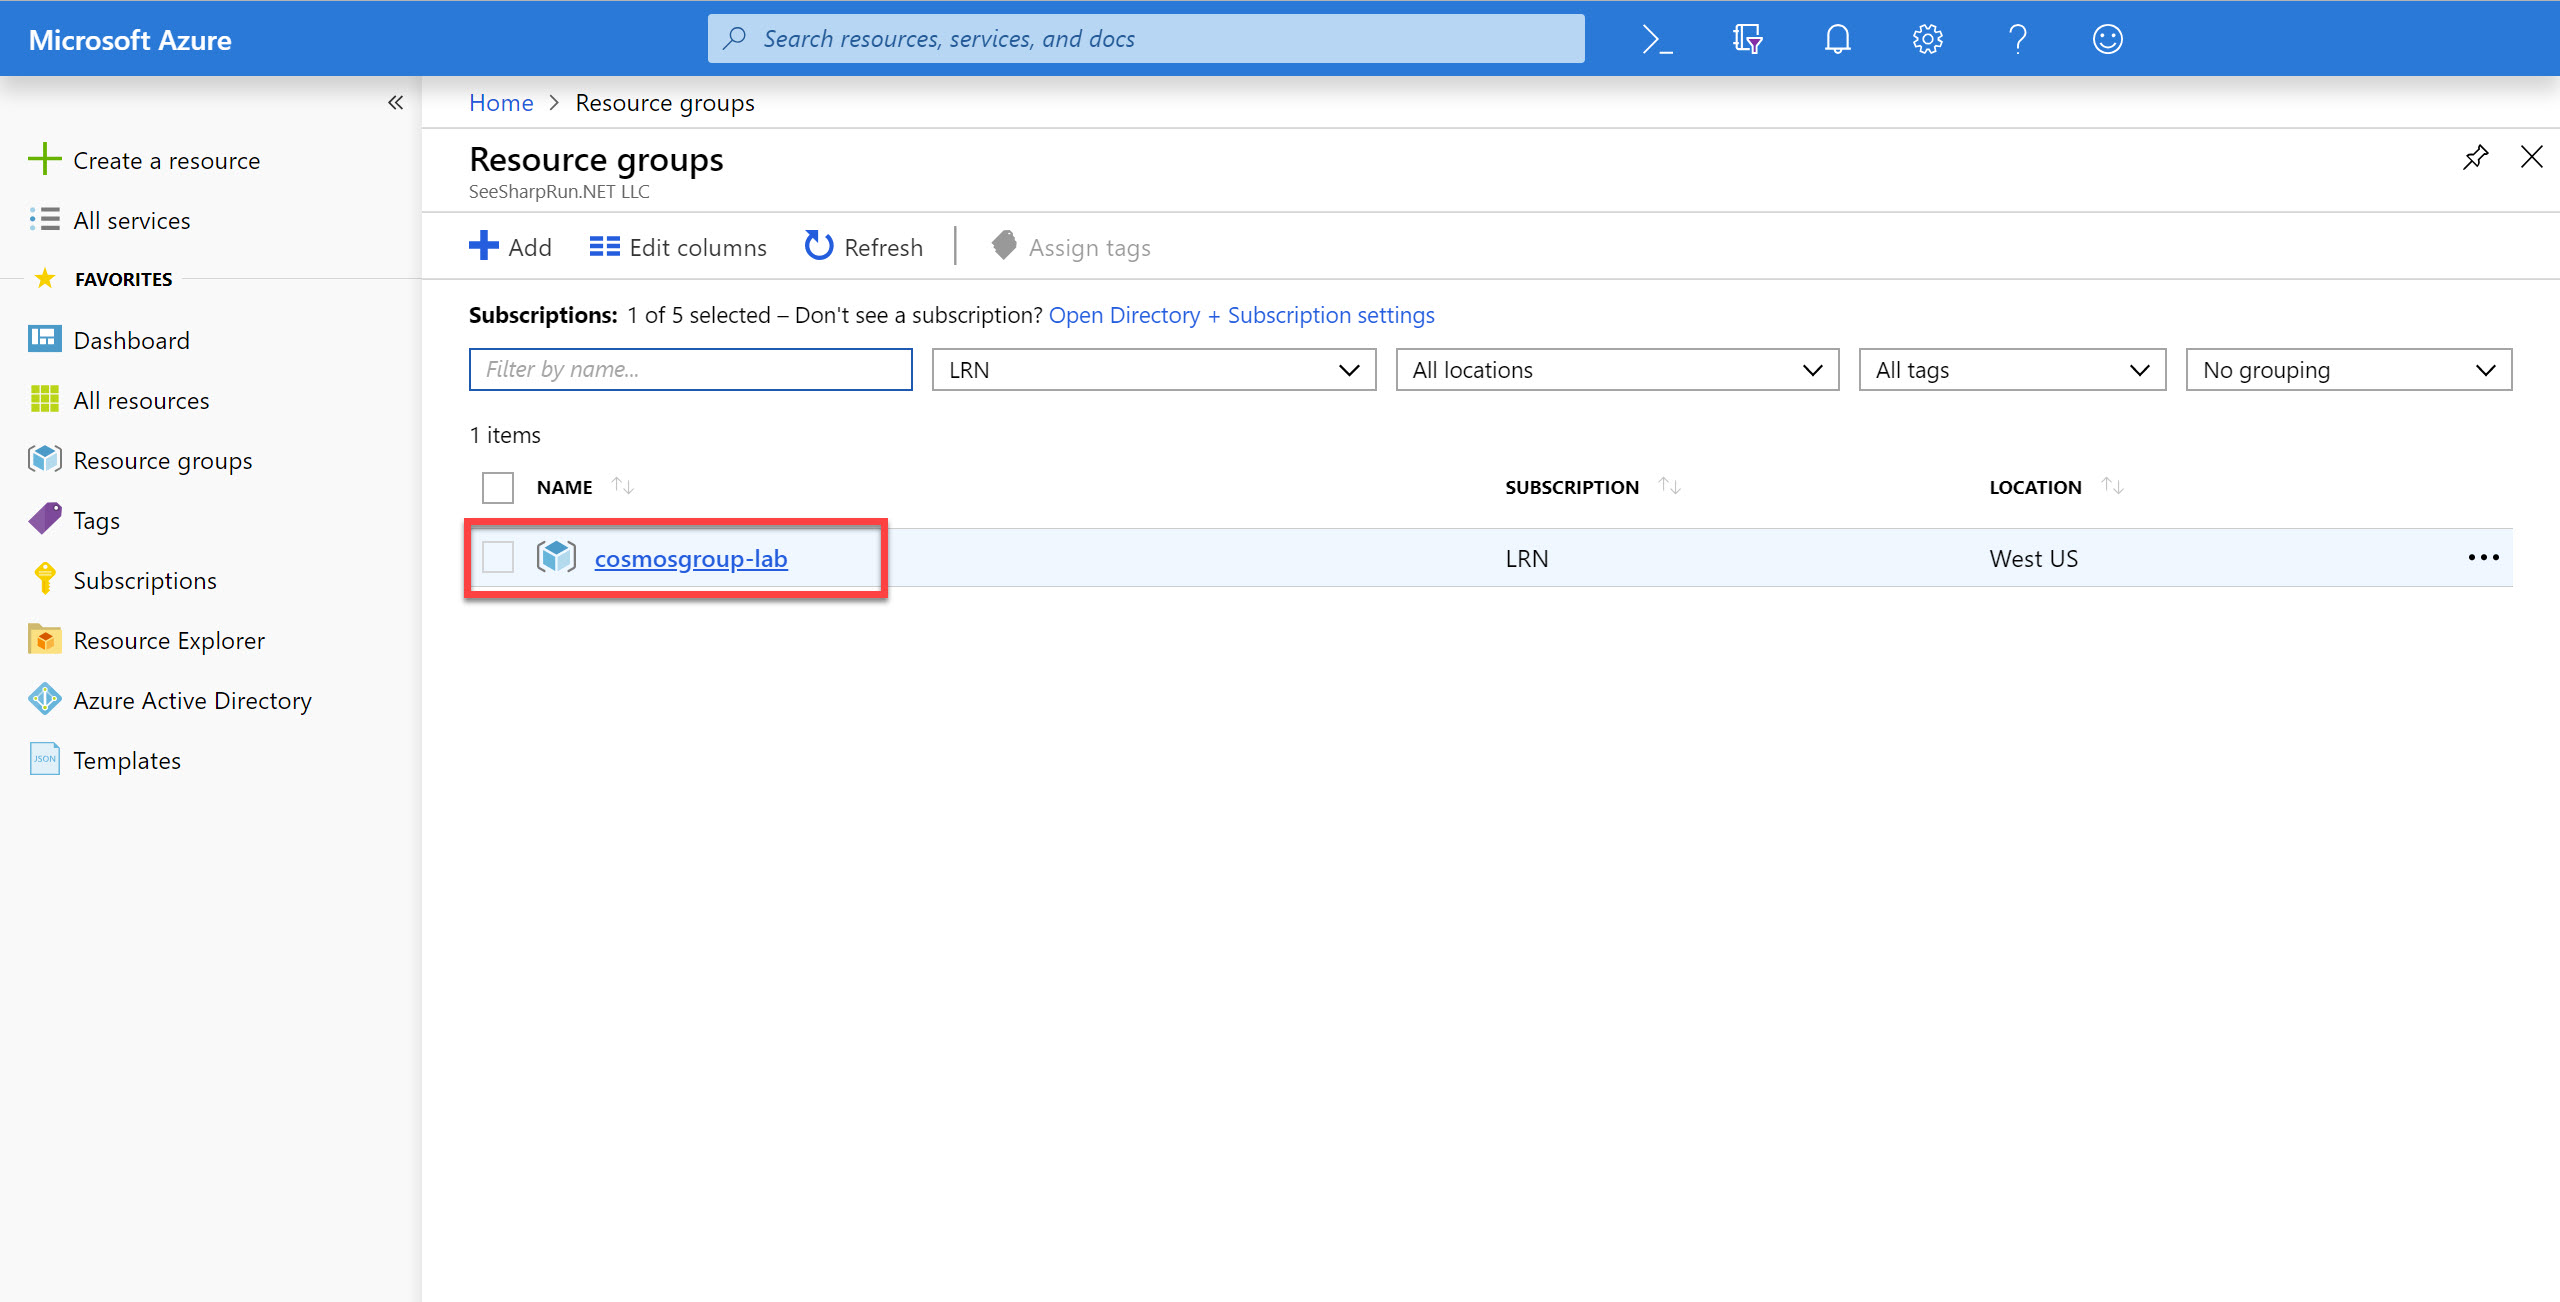
In the Resource groups blade, locate and select the cosmosgroup-lab Resource Group.
-
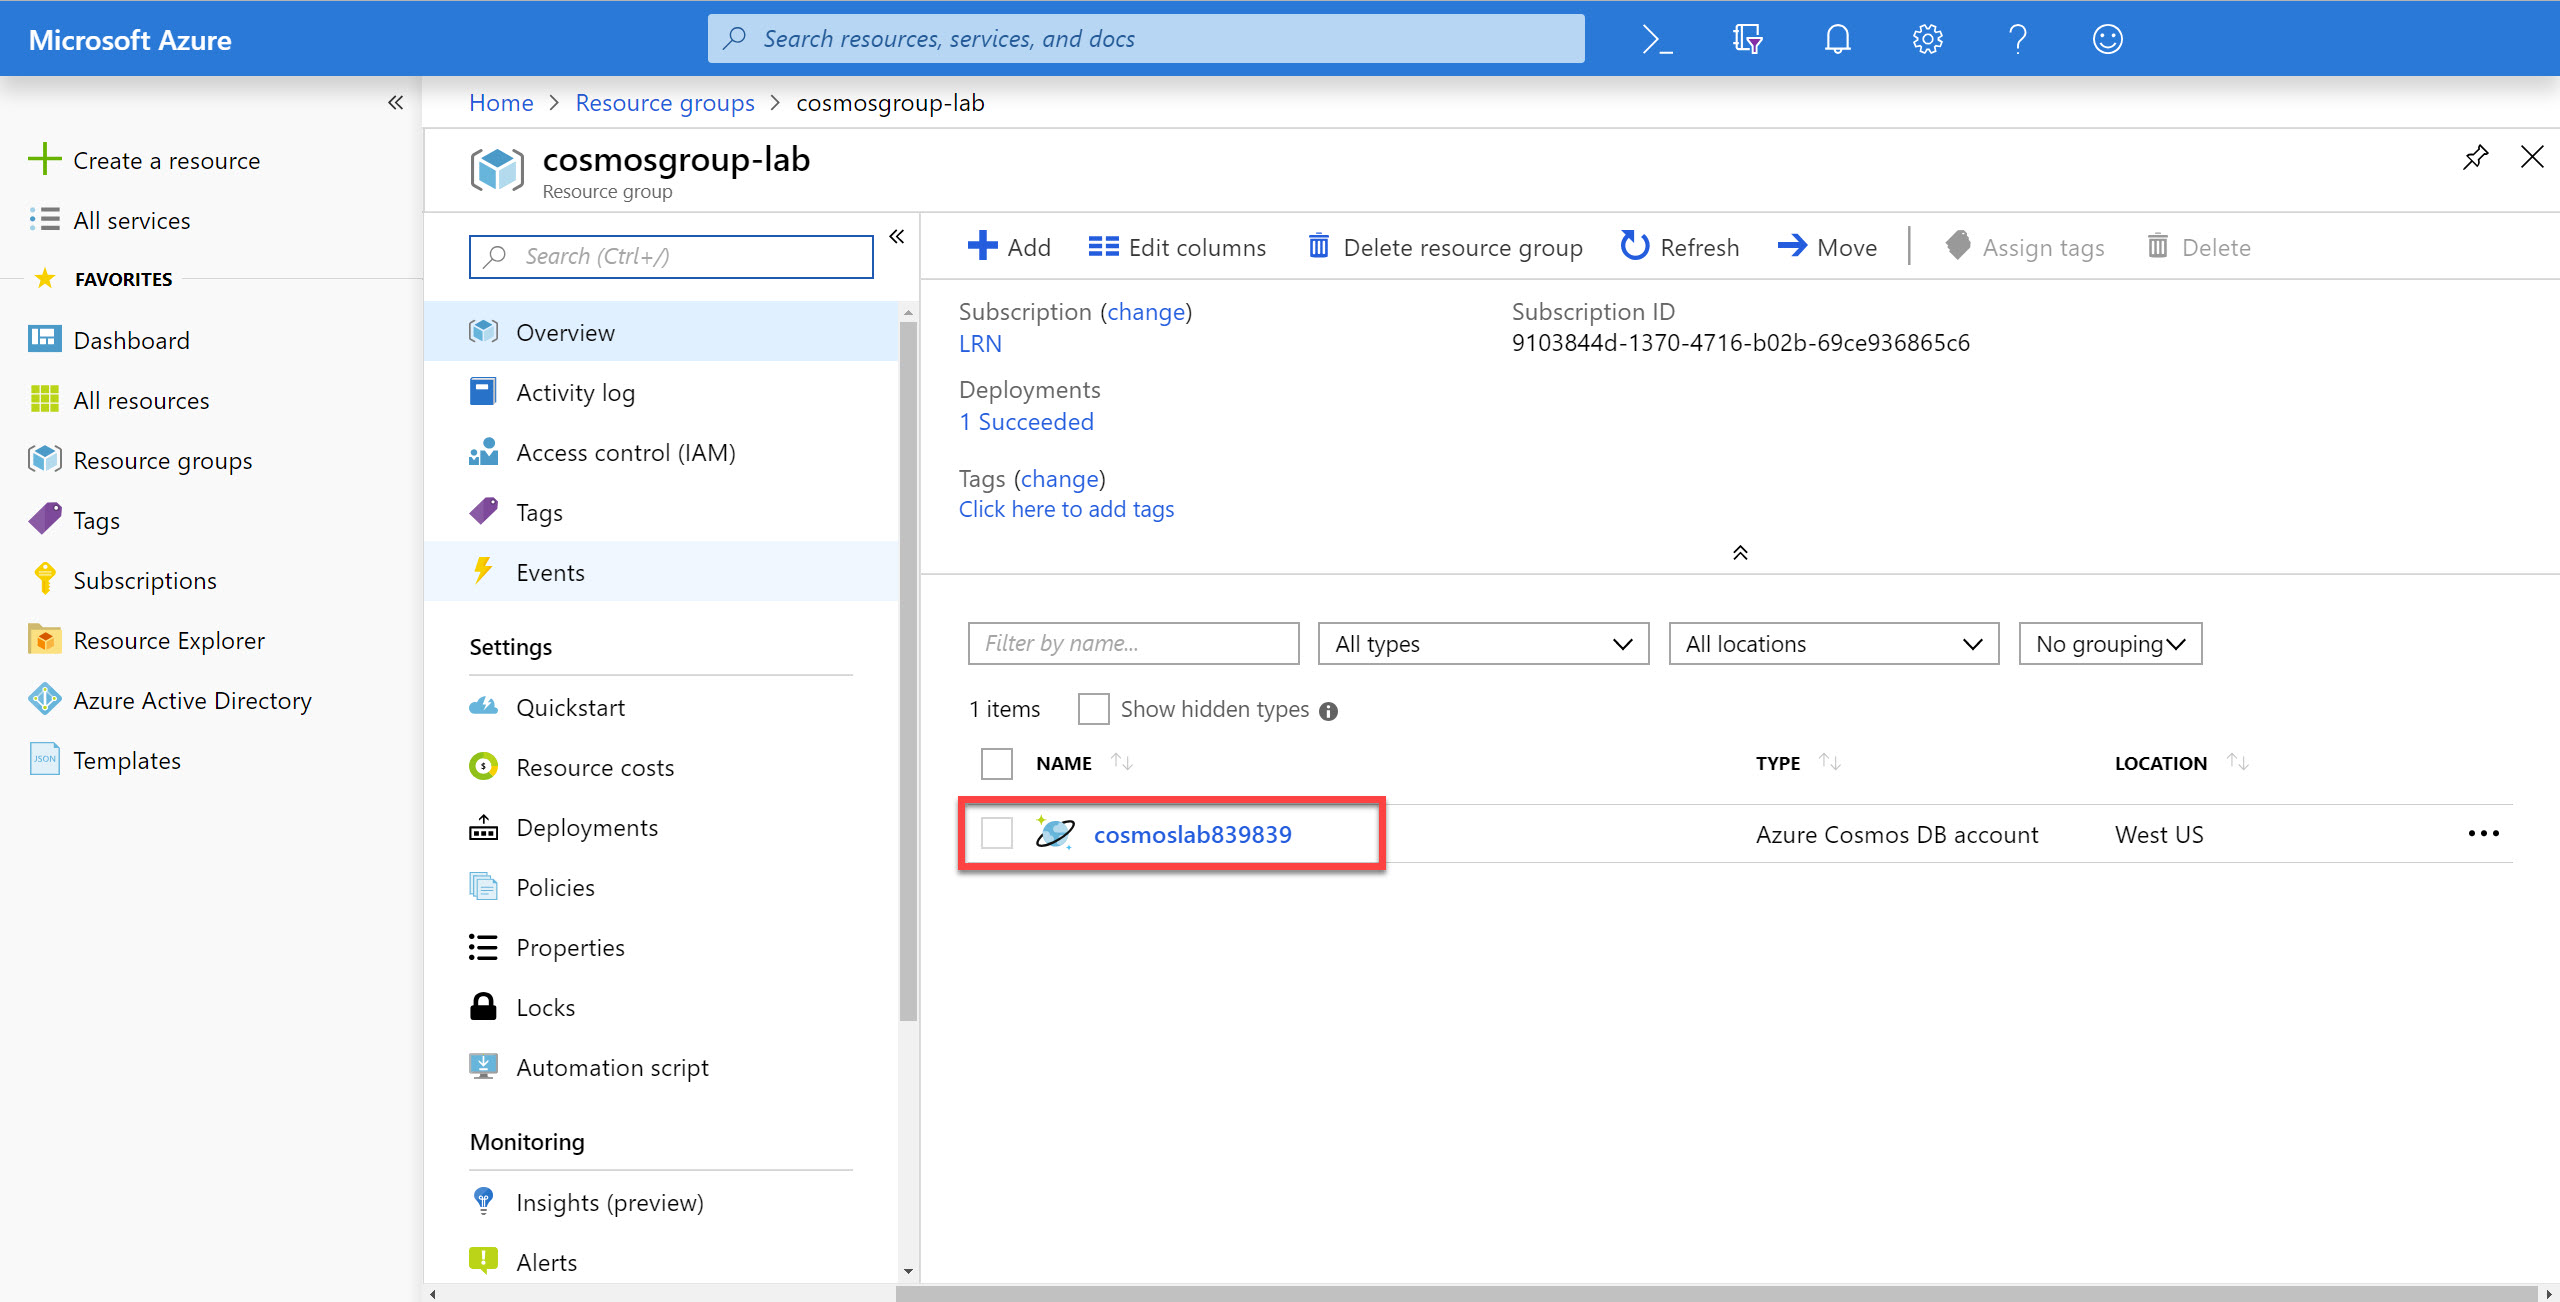
In the cosmosgroup-lab blade, select the Azure Cosmos DB account you recently created.
-
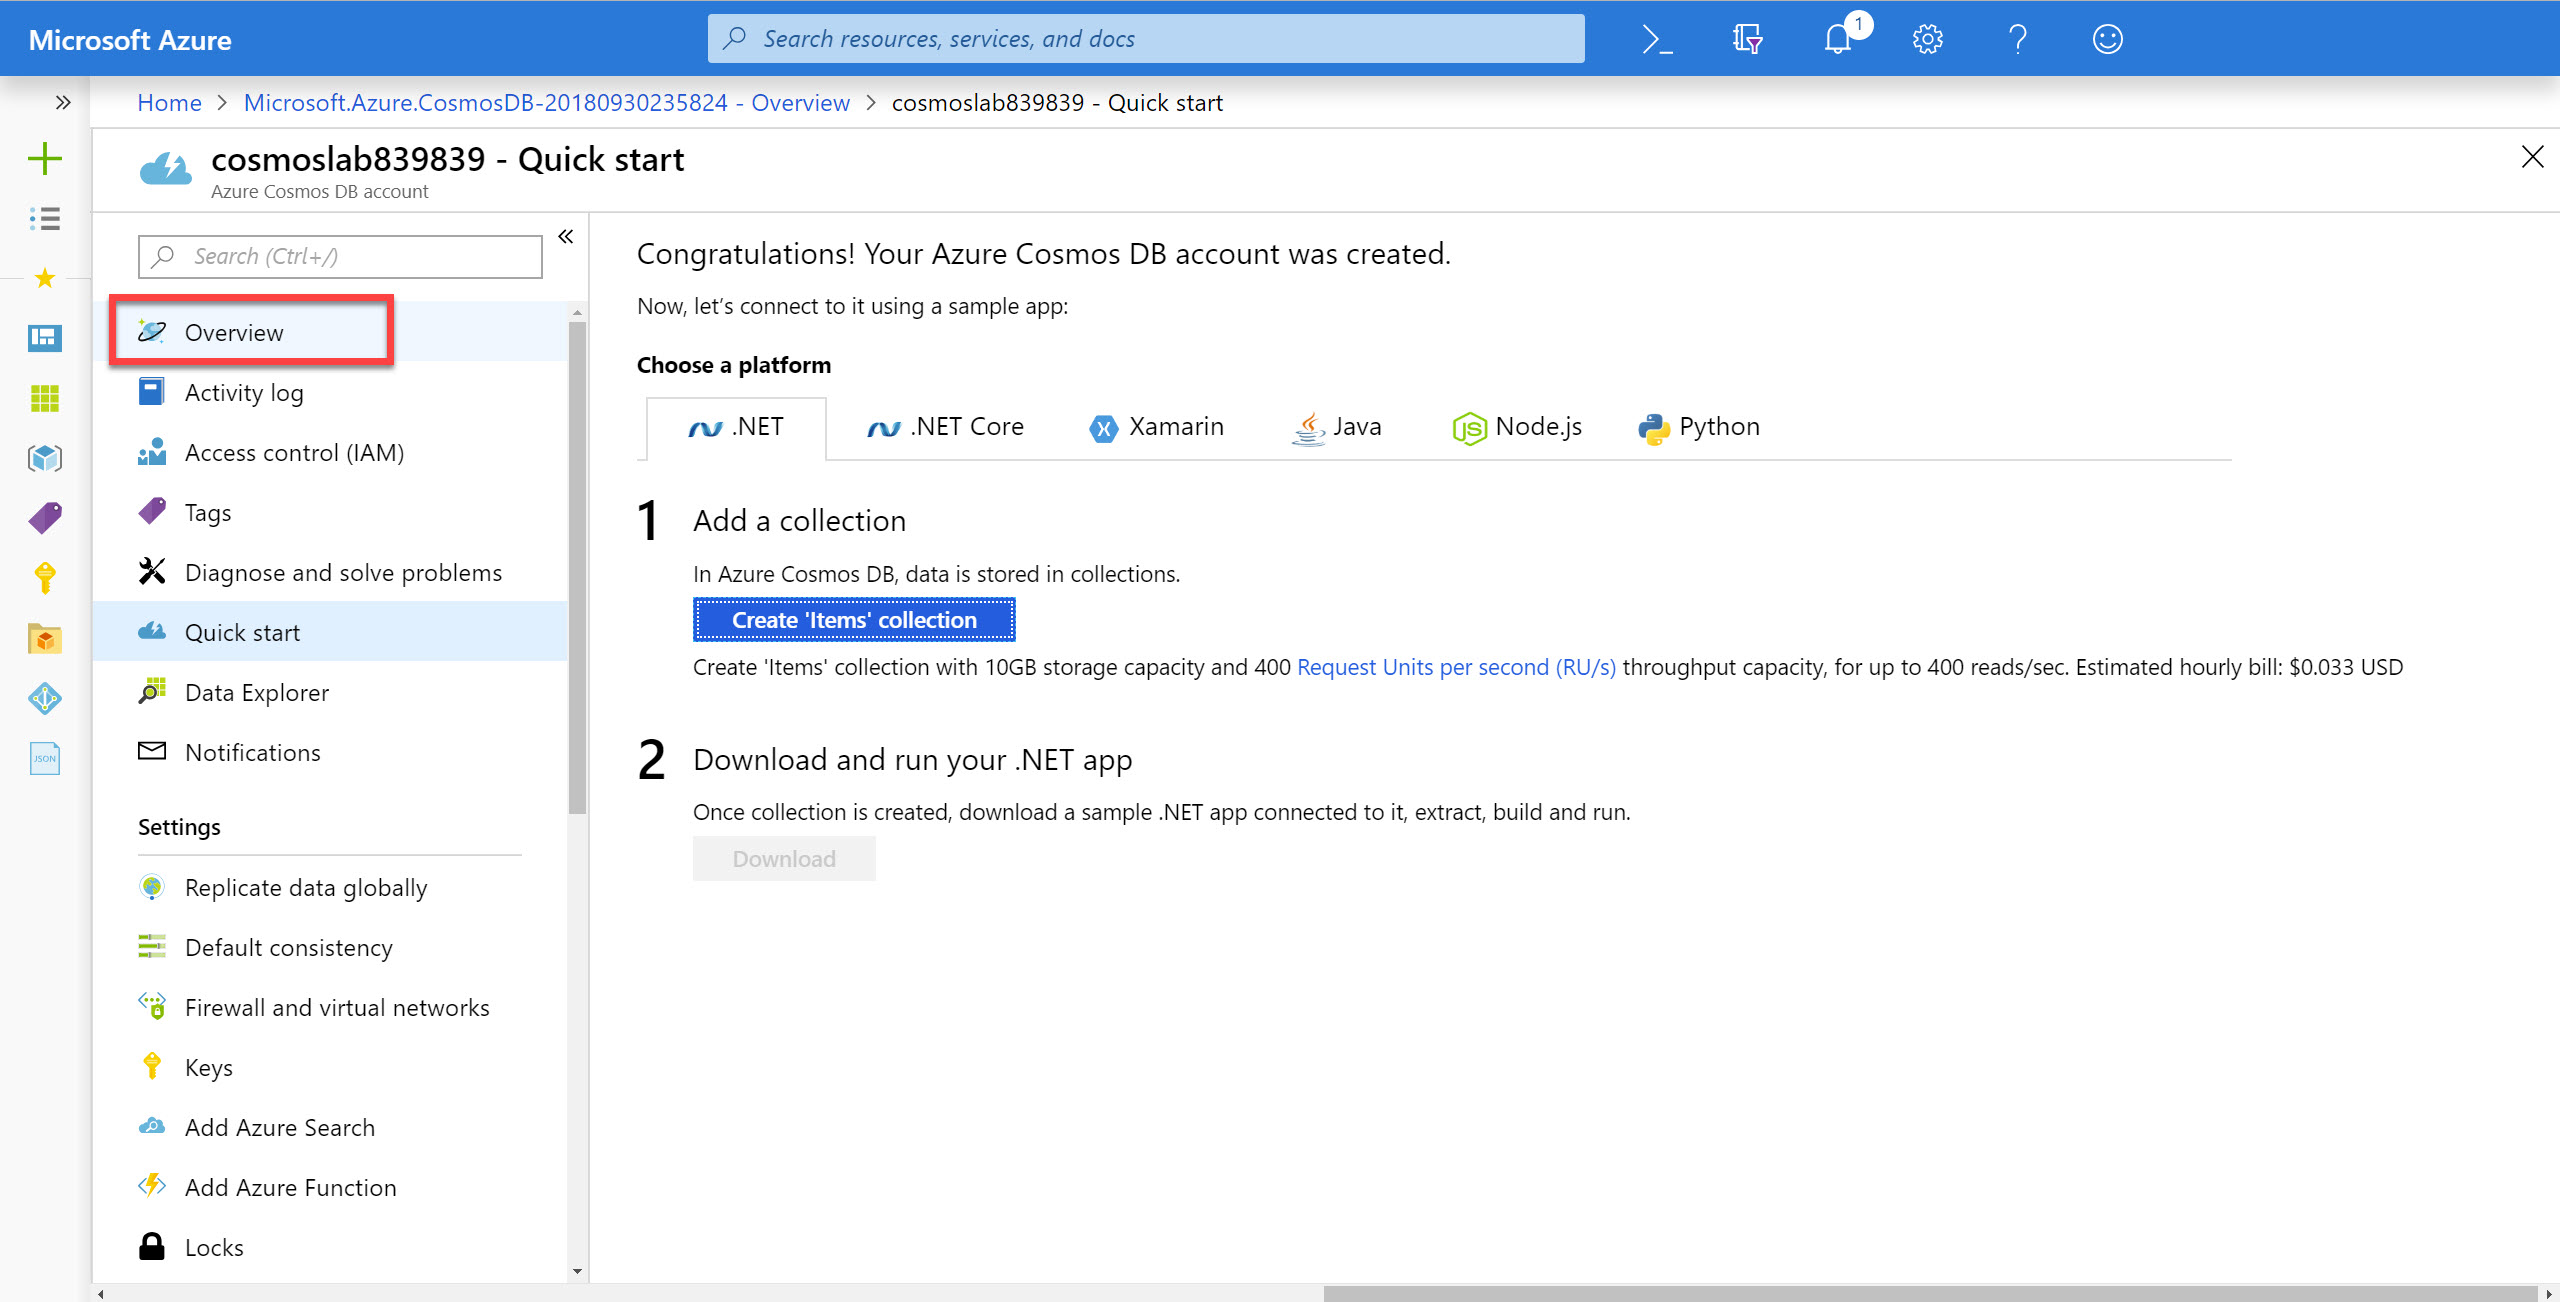
In the Azure Cosmos DB blade, locate and click the Overview link on the left side of the blade.
-
At the top of the Azure Cosmos DB blade, click the Add Collection button.
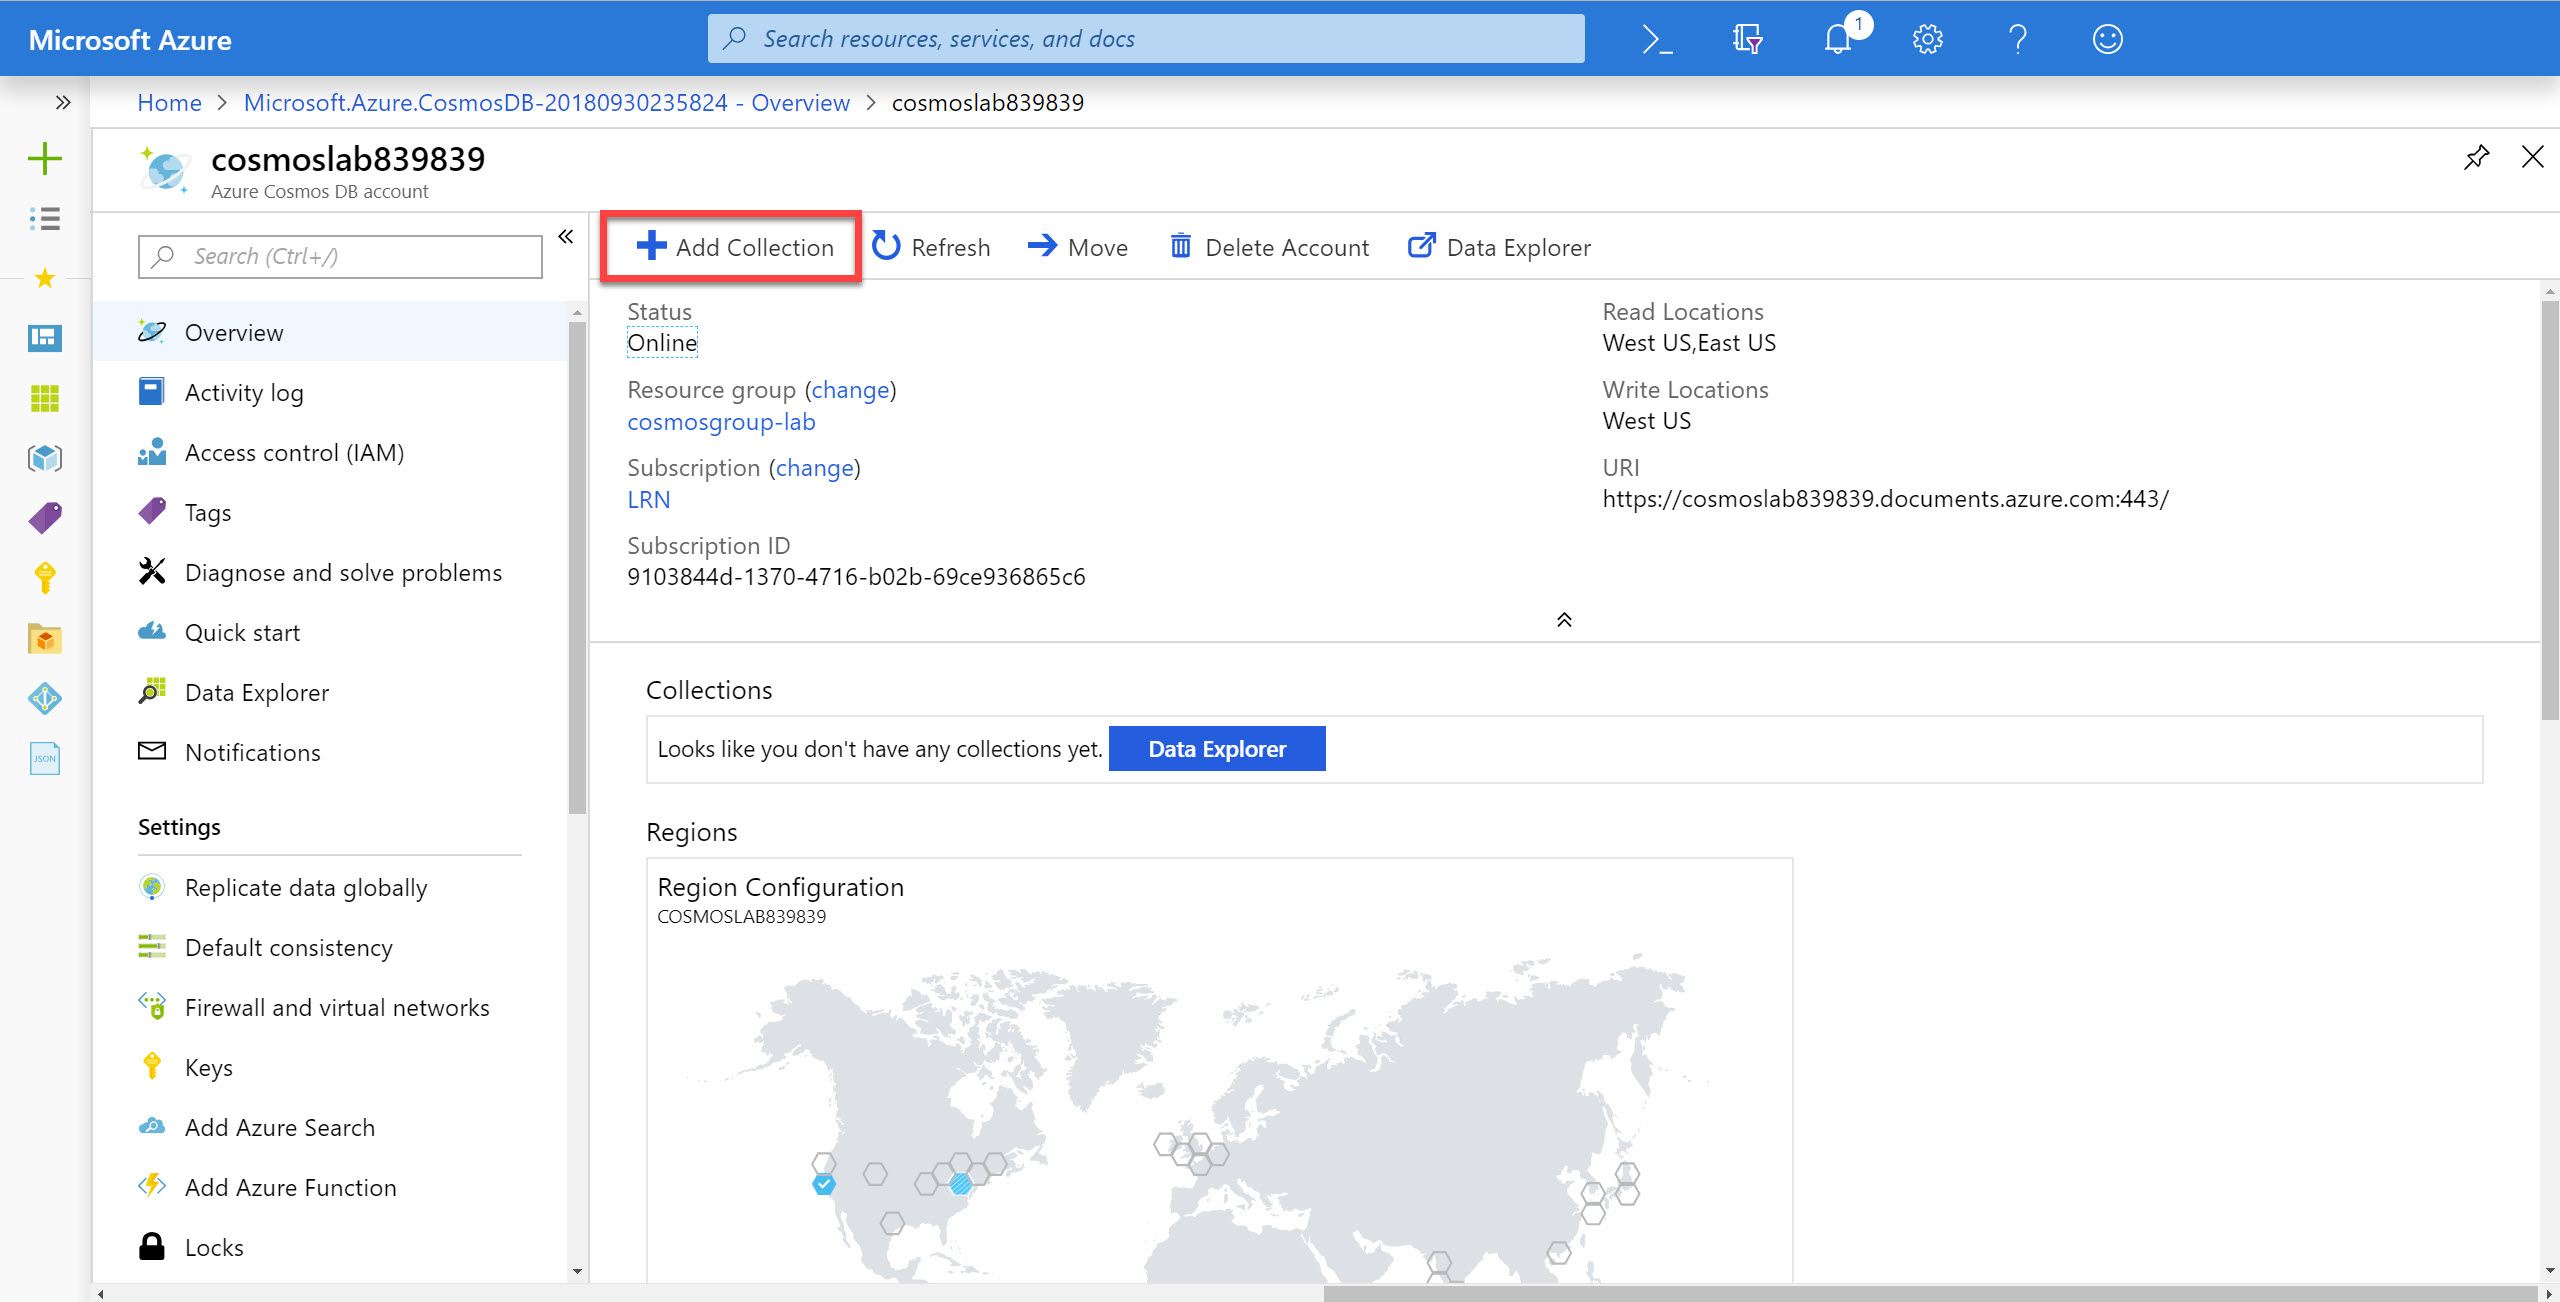
-
In the Add Collection popup, perform the following actions:
-
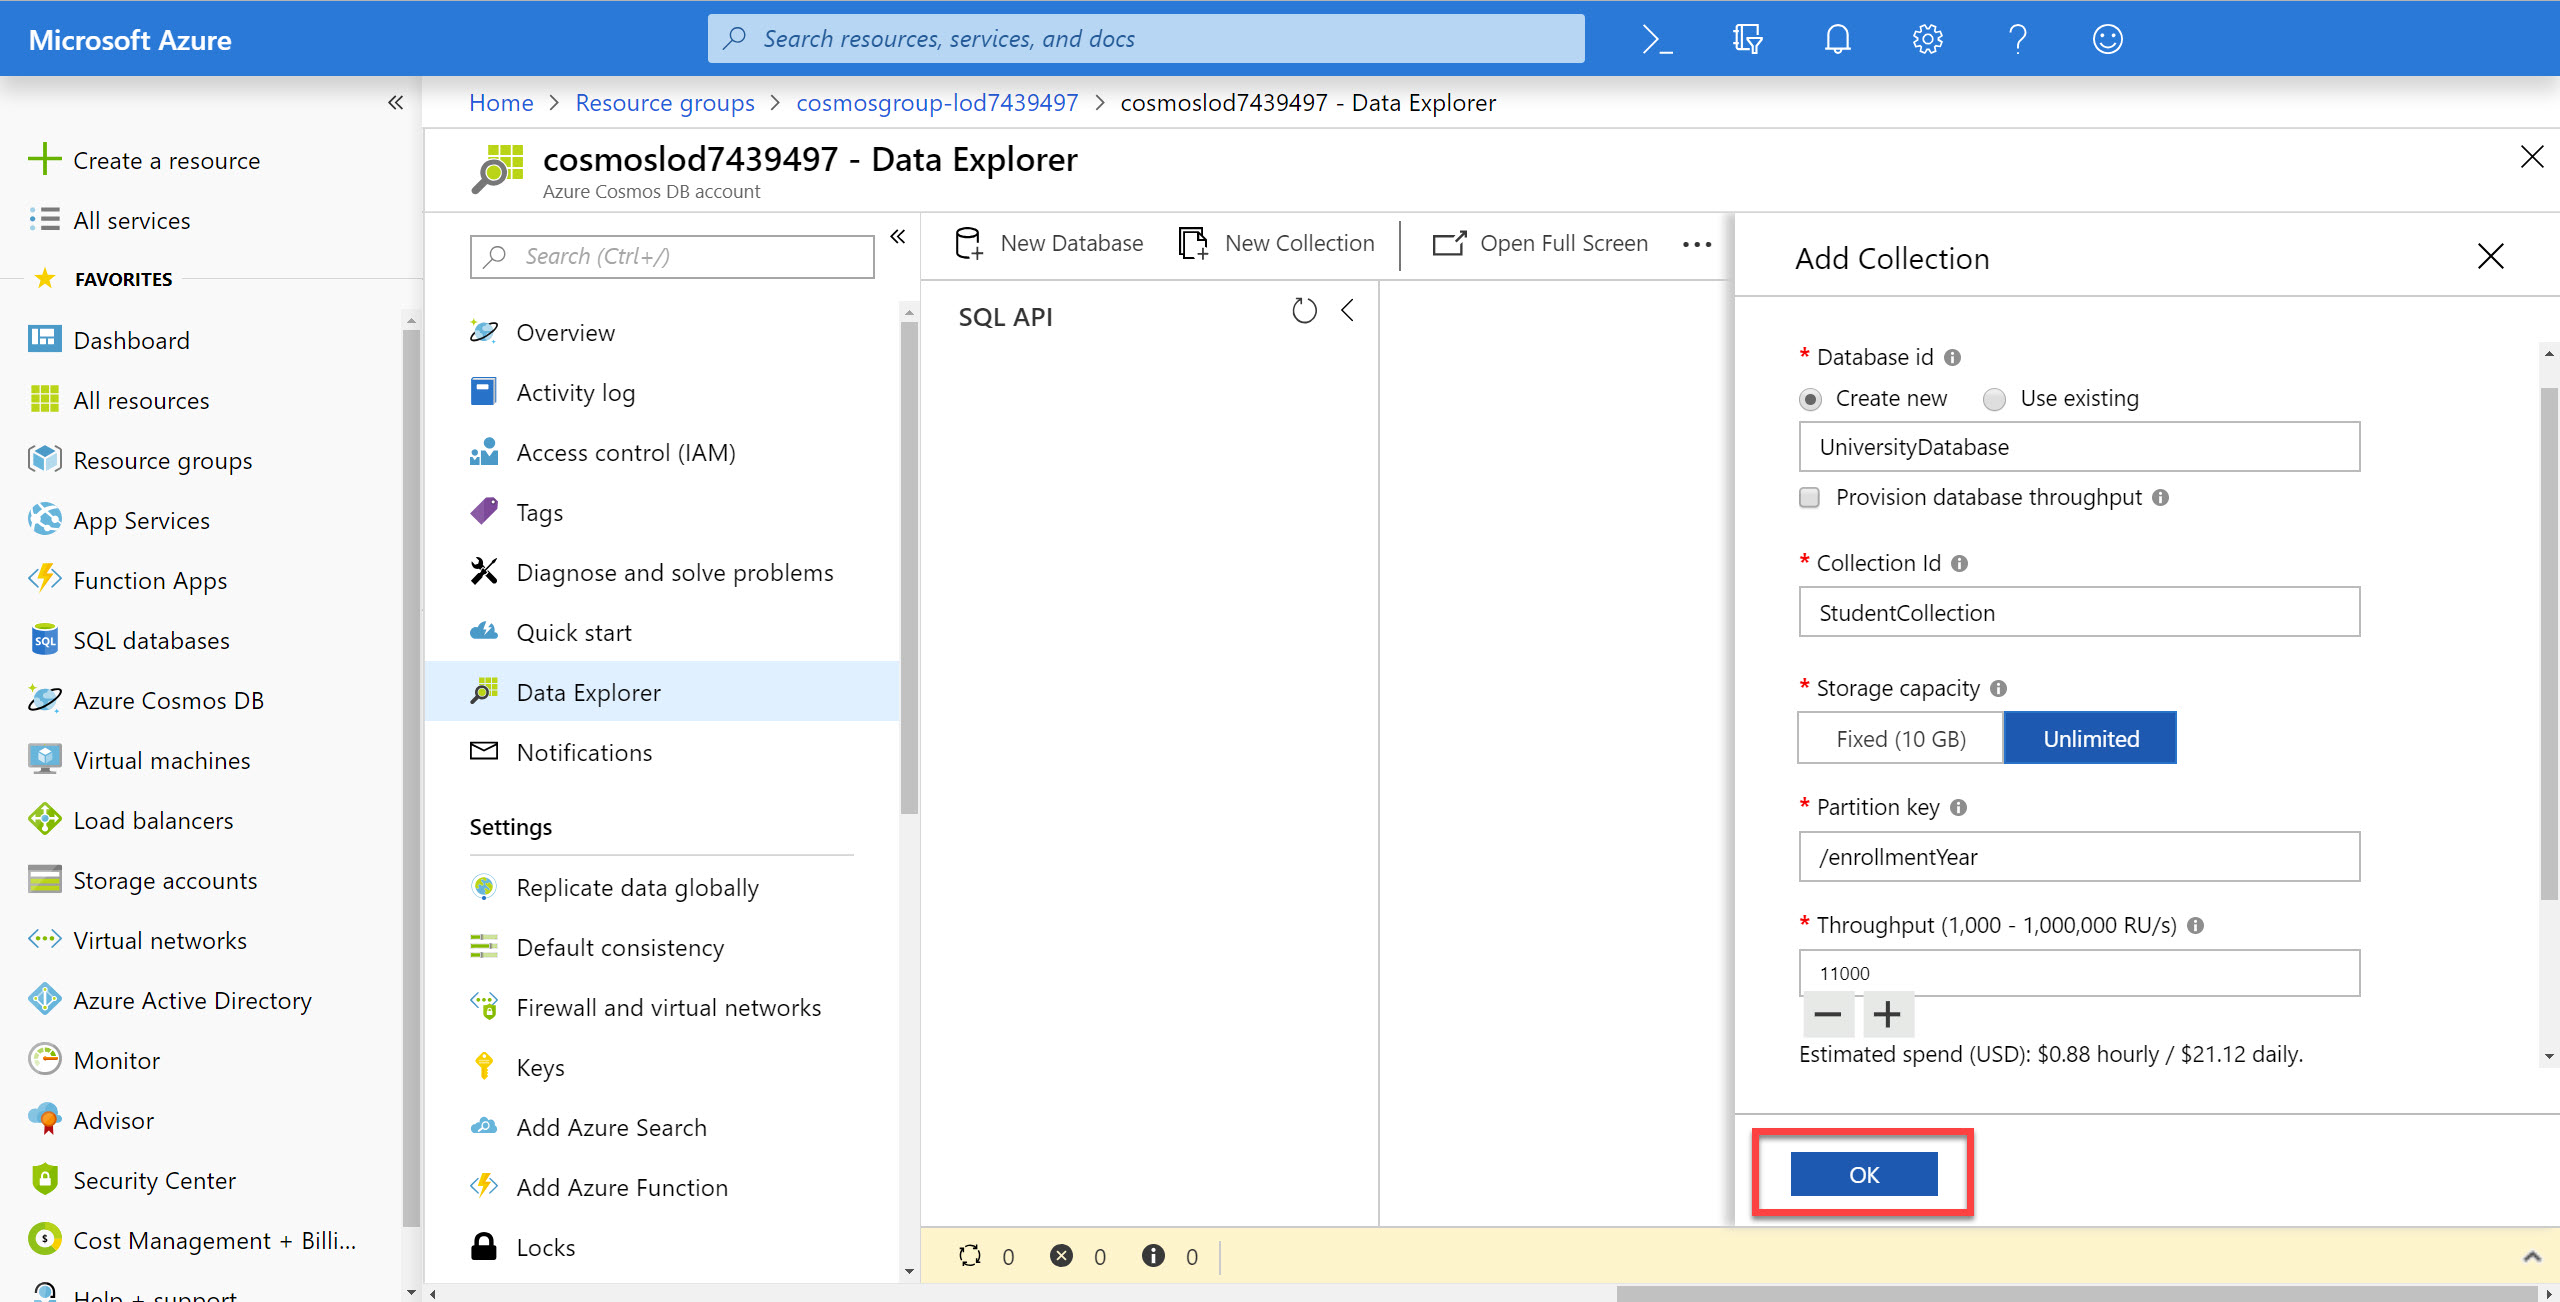
In the Database id field, select the Create new option and enter the value UniversityDatabase.
-
Ensure the Provision database throughput option is not selected.
Provisioning throughput for a database allows you to share the throughput among all the containers that belong to that database. Within an Azure Cosmos DB database, you can have a set of containers which shares the throughput as well as containers, which have dedicated throughput.
-
In the Collection Id field, enter the value StudentCollection.
-
In the Partition key field, enter the value
/enrollmentYear. -
In the Throughput field, enter the value
11000. -
Click the + Add Unique Key link.
-
In the new Unique Keys field, enter the value
/studentAlias. -
Click the OK button.
-
-
Wait for the creation of the new database and collection to finish before moving on with this lab.
Retrieve Account Credentials
The .NET SDK requires credentials to connect to your Azure Cosmos DB account. You will collect and store these credentials for use throughout the lab.
-
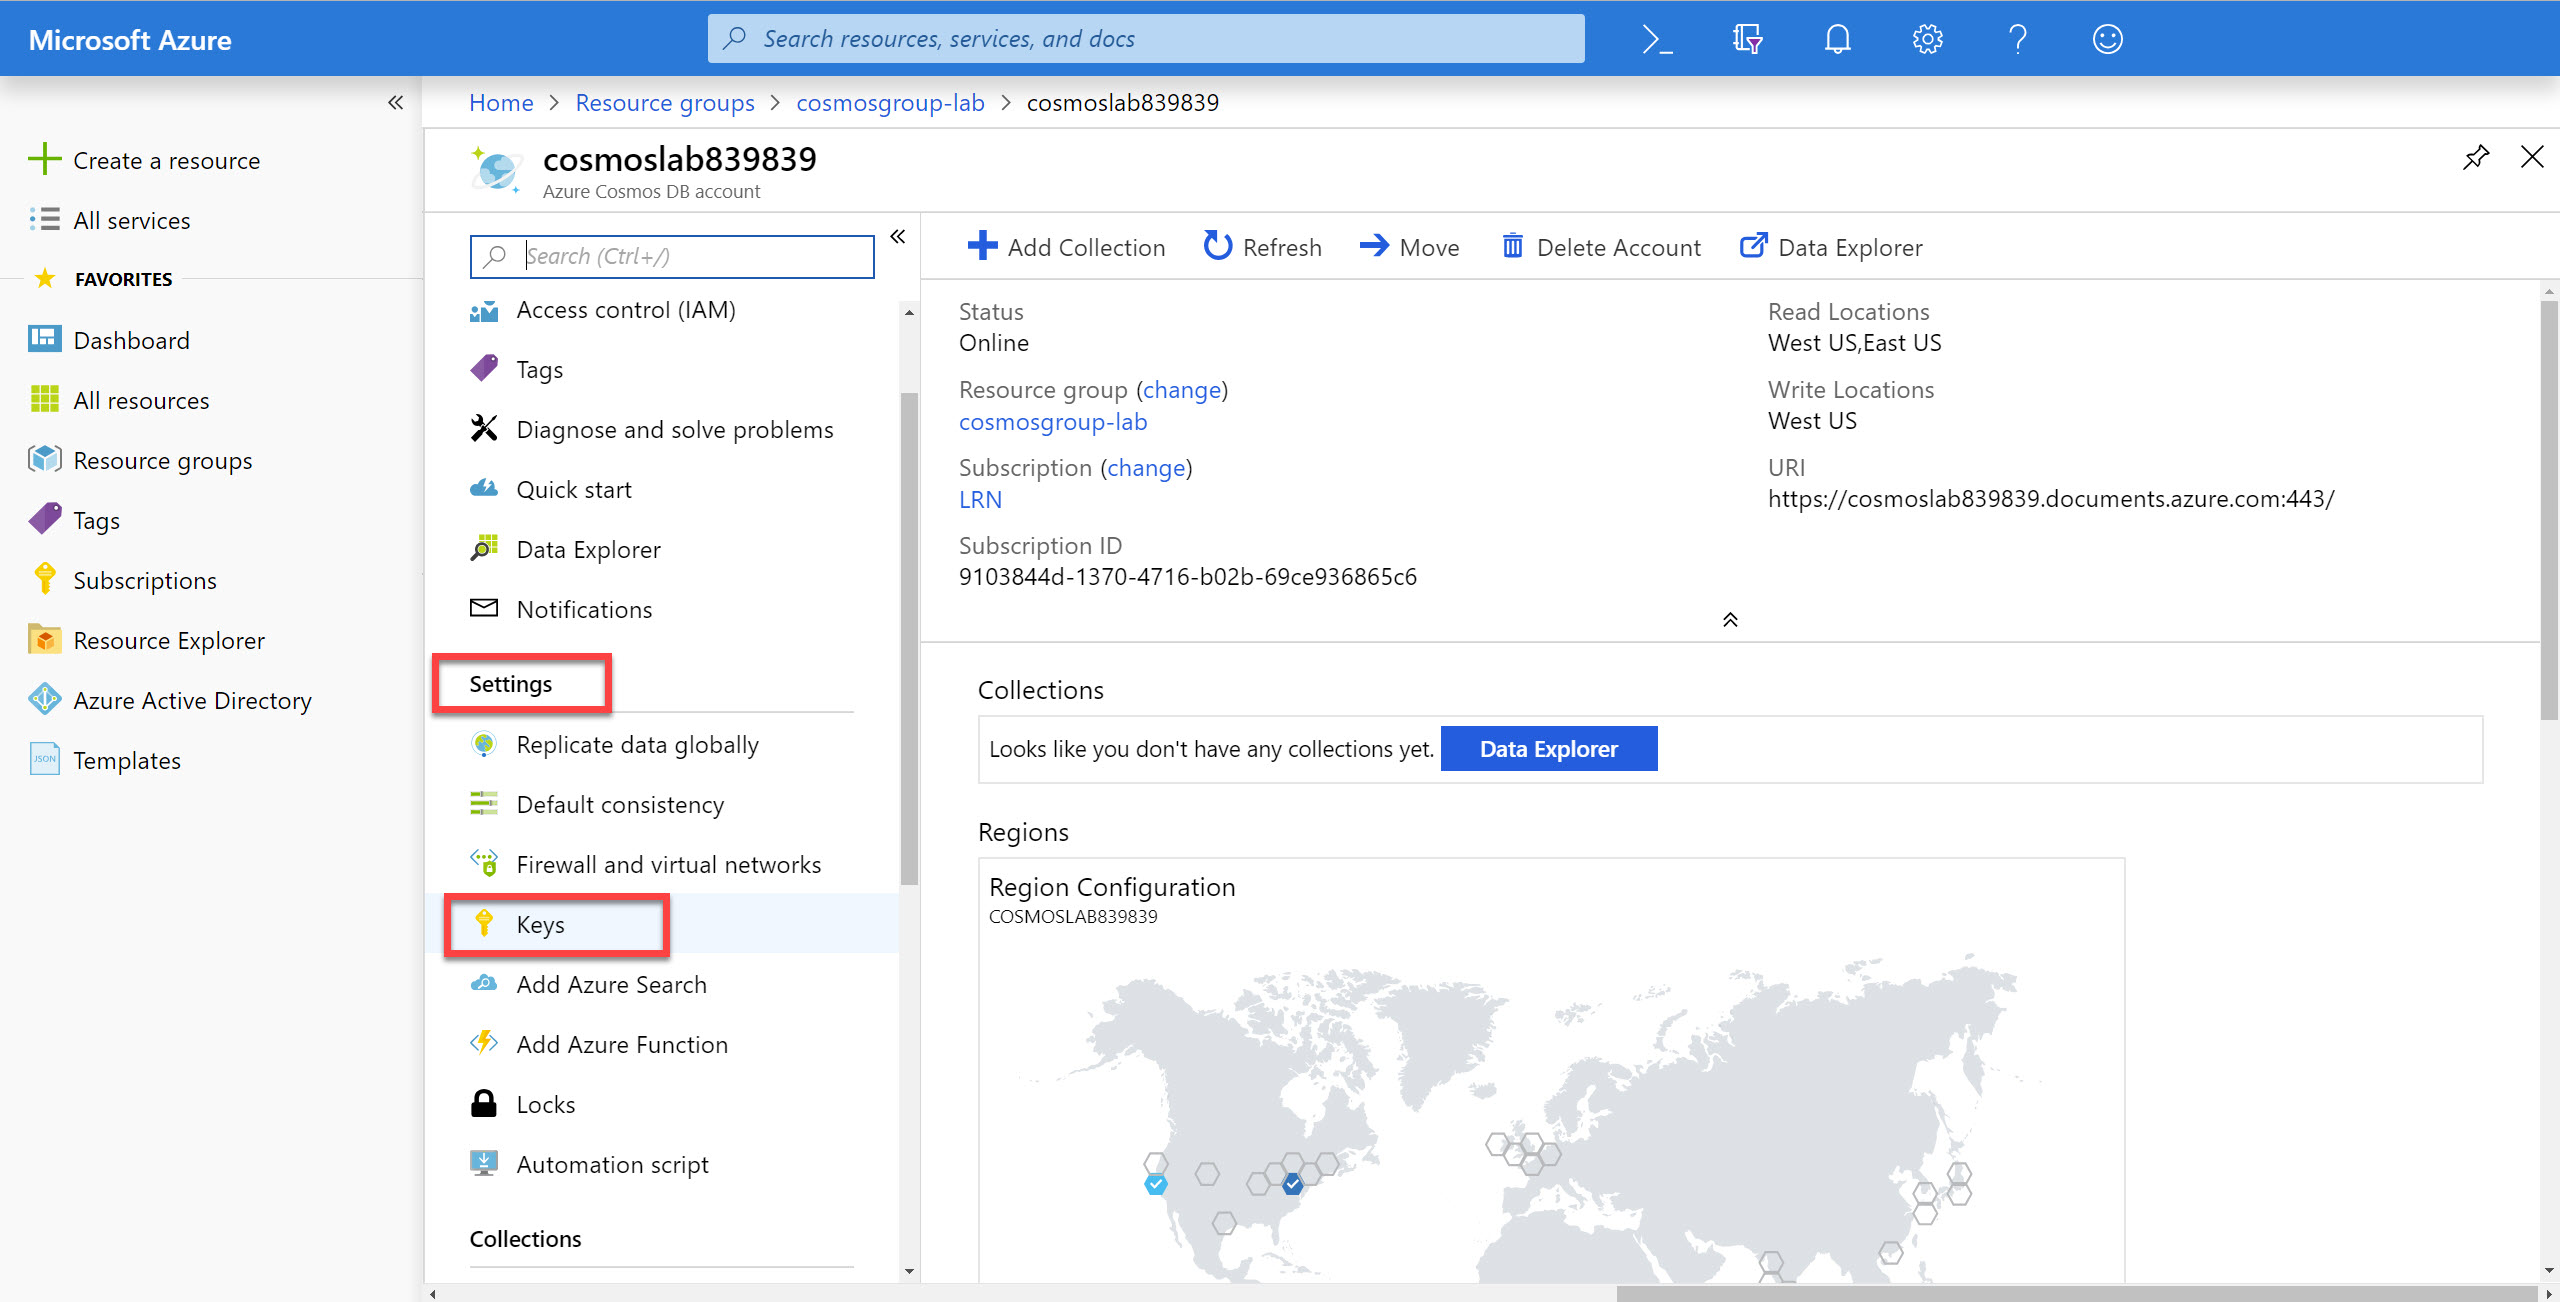
On the left side of the Azure Cosmos DB blade, locate the Settings section and click the Keys link.
-
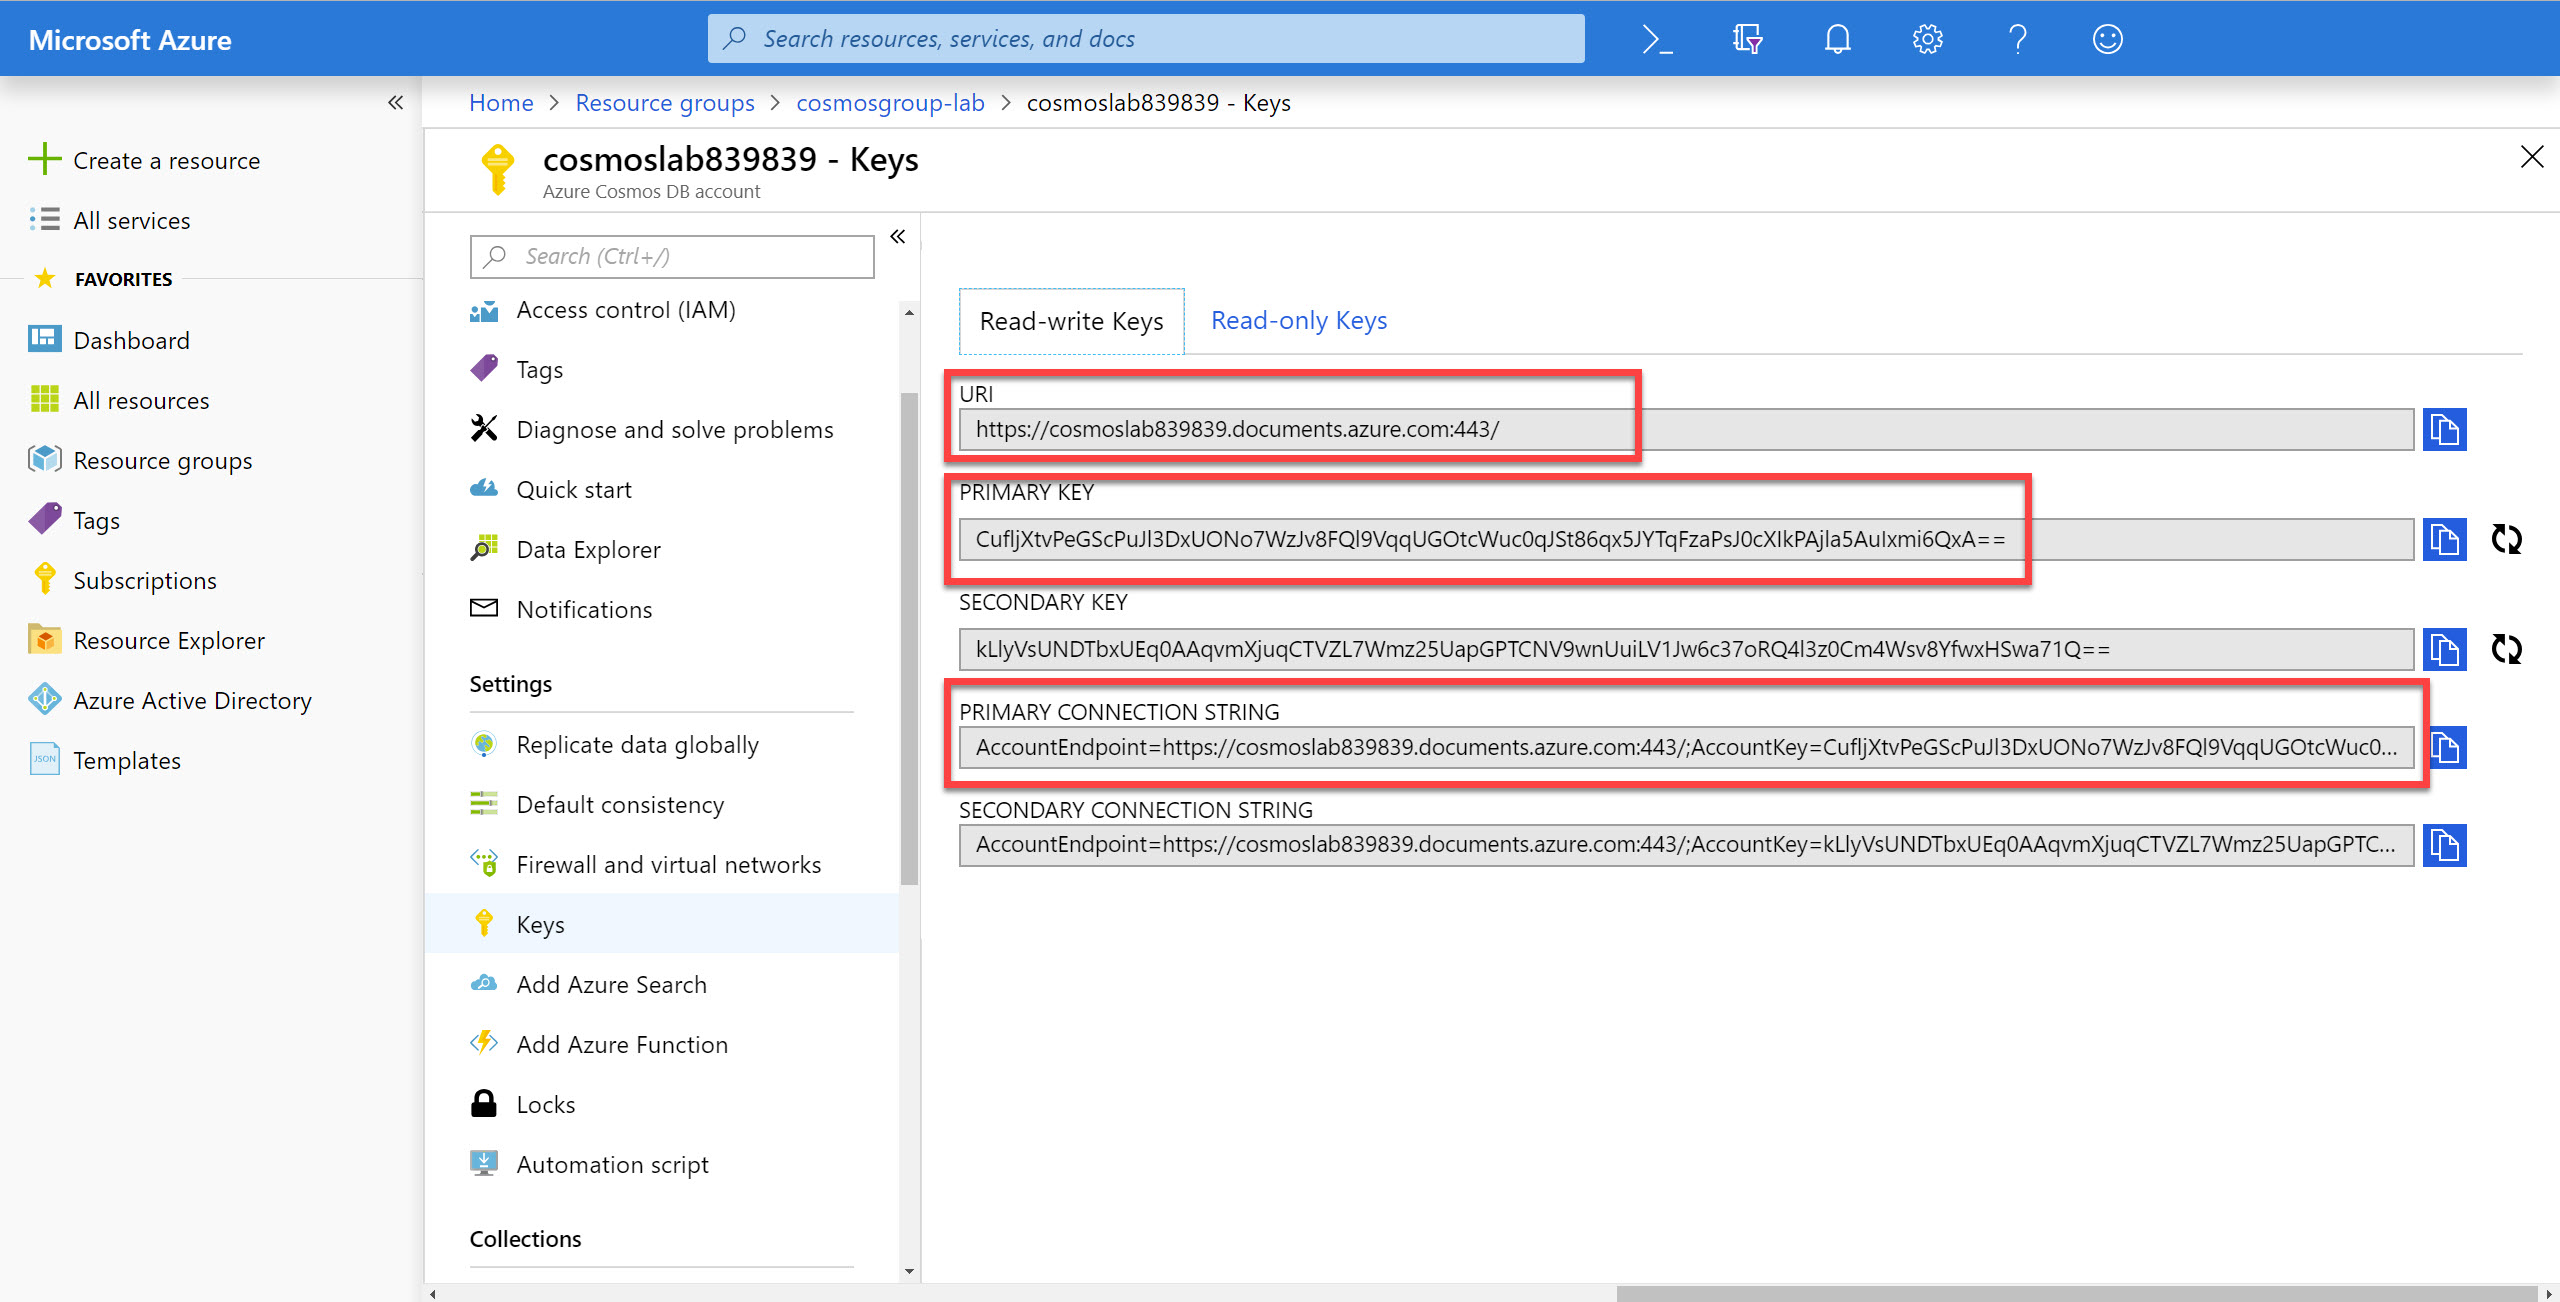
In the Keys pane, record the values in the CONNECTION STRING, URI and PRIMARY KEY fields. You will use these values later in this lab.
Import Lab Data Into Collection
You will use Azure Data Factory (ADF) to import the JSON array stored in the students.json file from Azure Blob Storage.
-
On the left side of the portal, click the Resource groups link.
To learn more about copying data to Cosmos DB with ADF, please read ADF’s documentation.
-
In the Resource groups blade, locate and select the cosmosgroup-lab Resource Group.
-
Click add to add a new resource
-
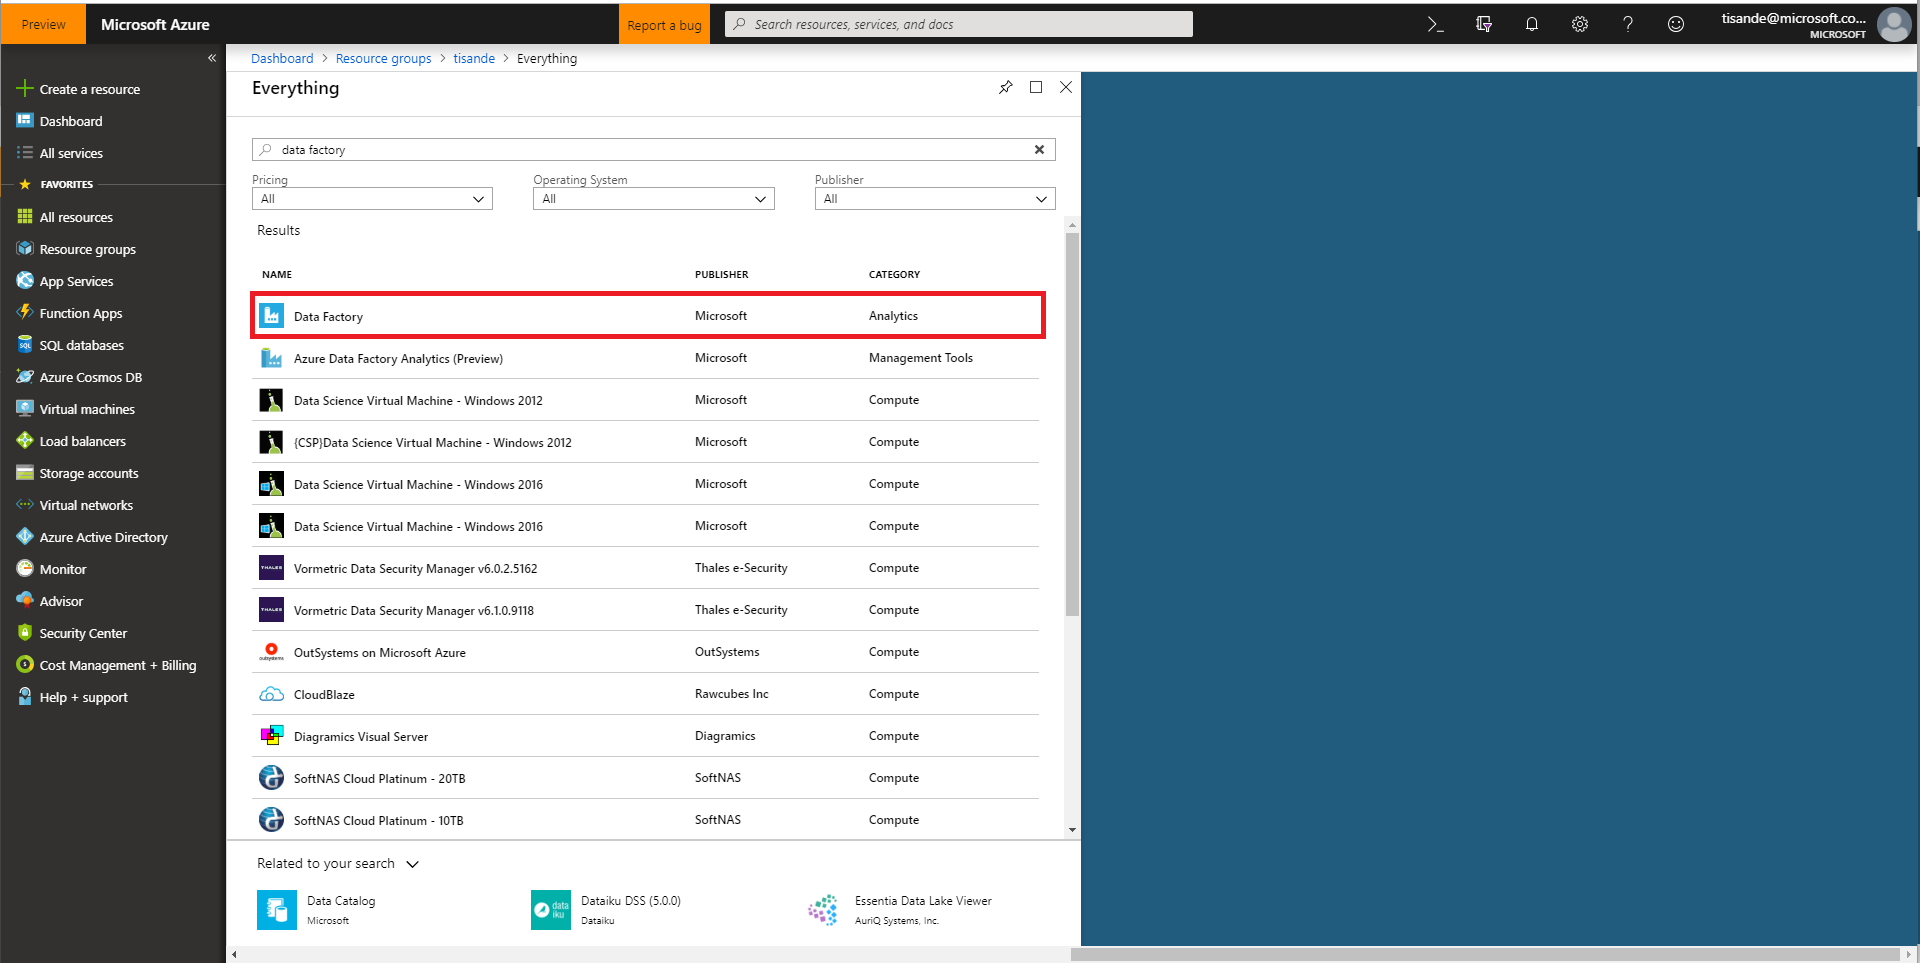
Search for Data Factory and select it
-
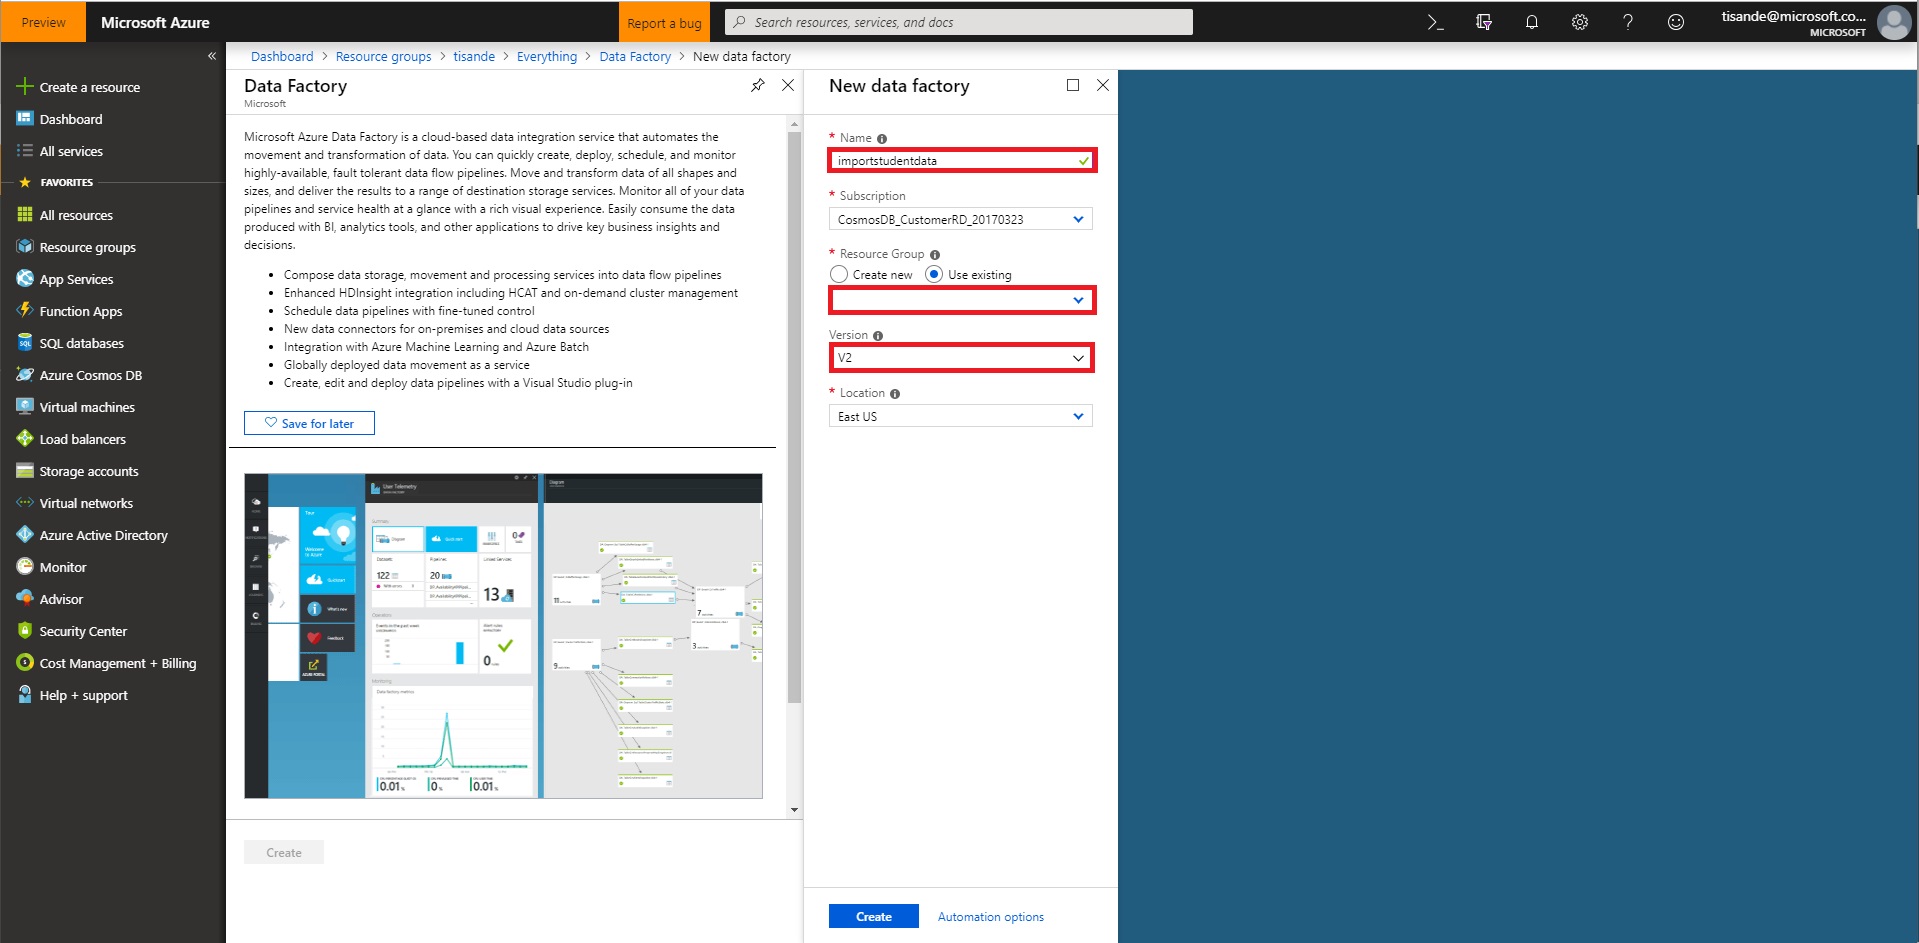
Create a new Data Factory. You should name this data factory importstudentdata and select the relevant Azure subscription. You should ensure your existing cosmosdblab-group resource group is selected as well as a Version V2. Select East US as the region. Click create.
-
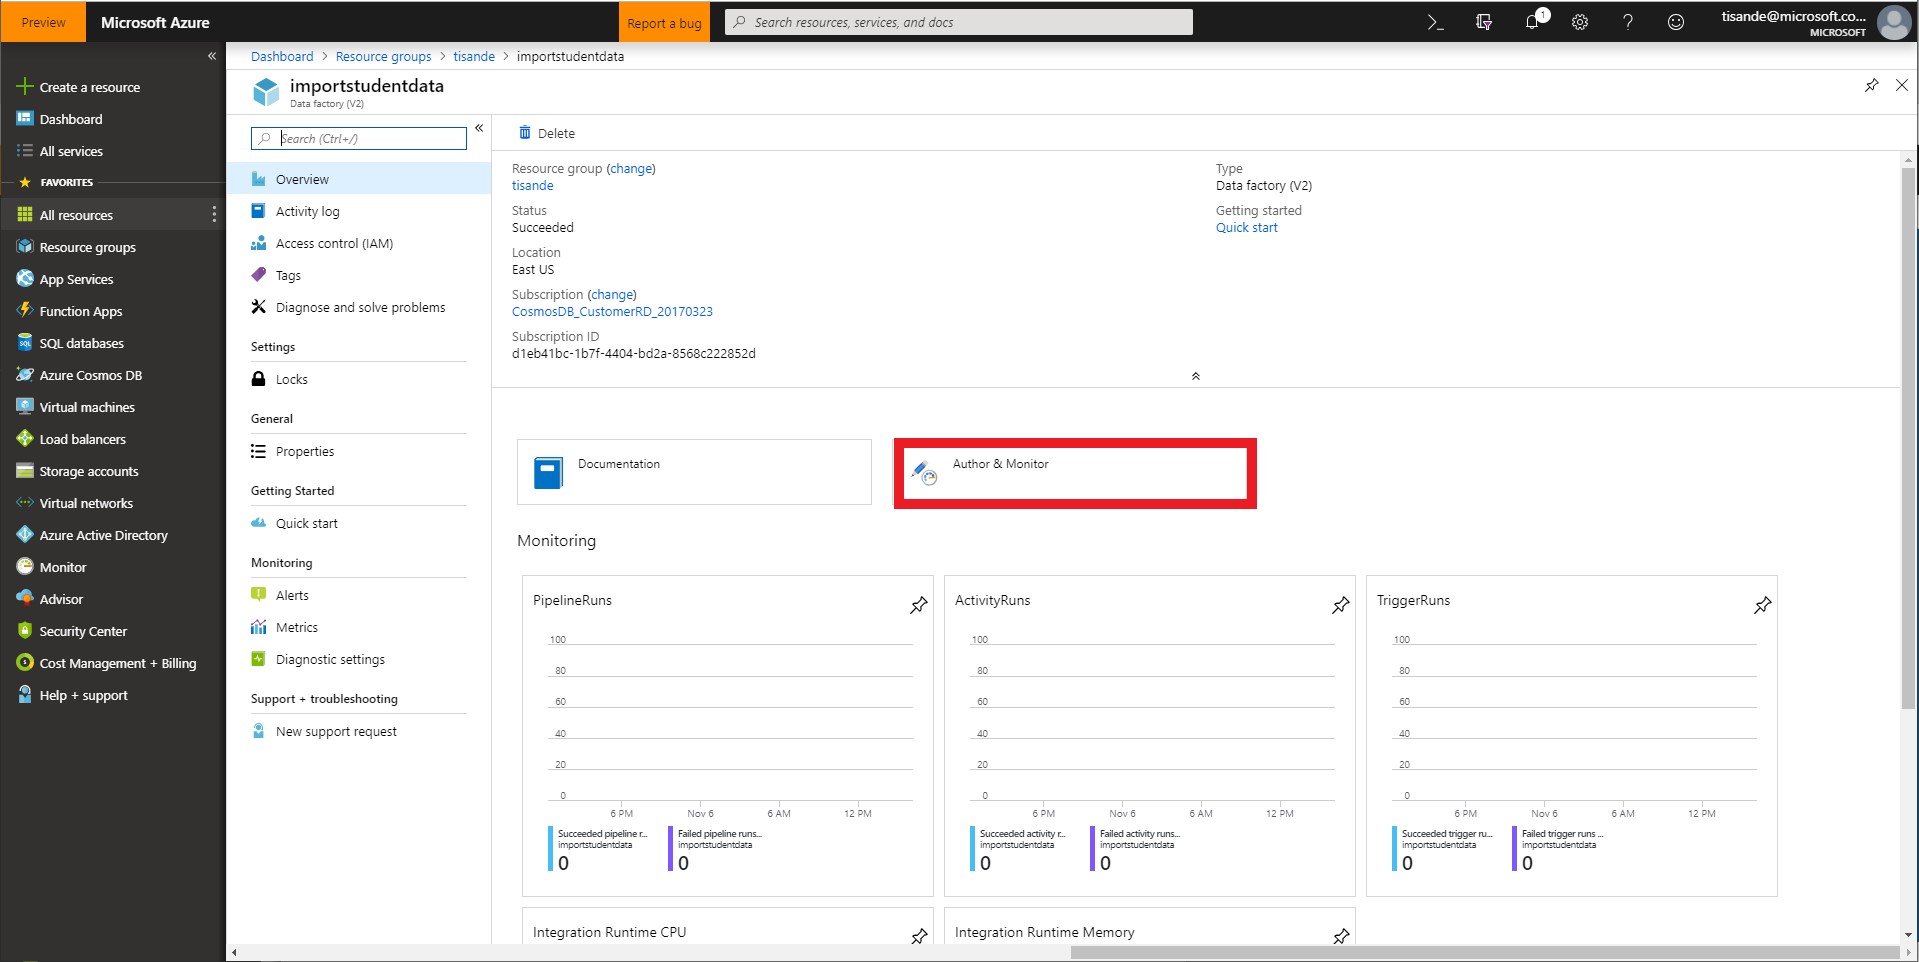
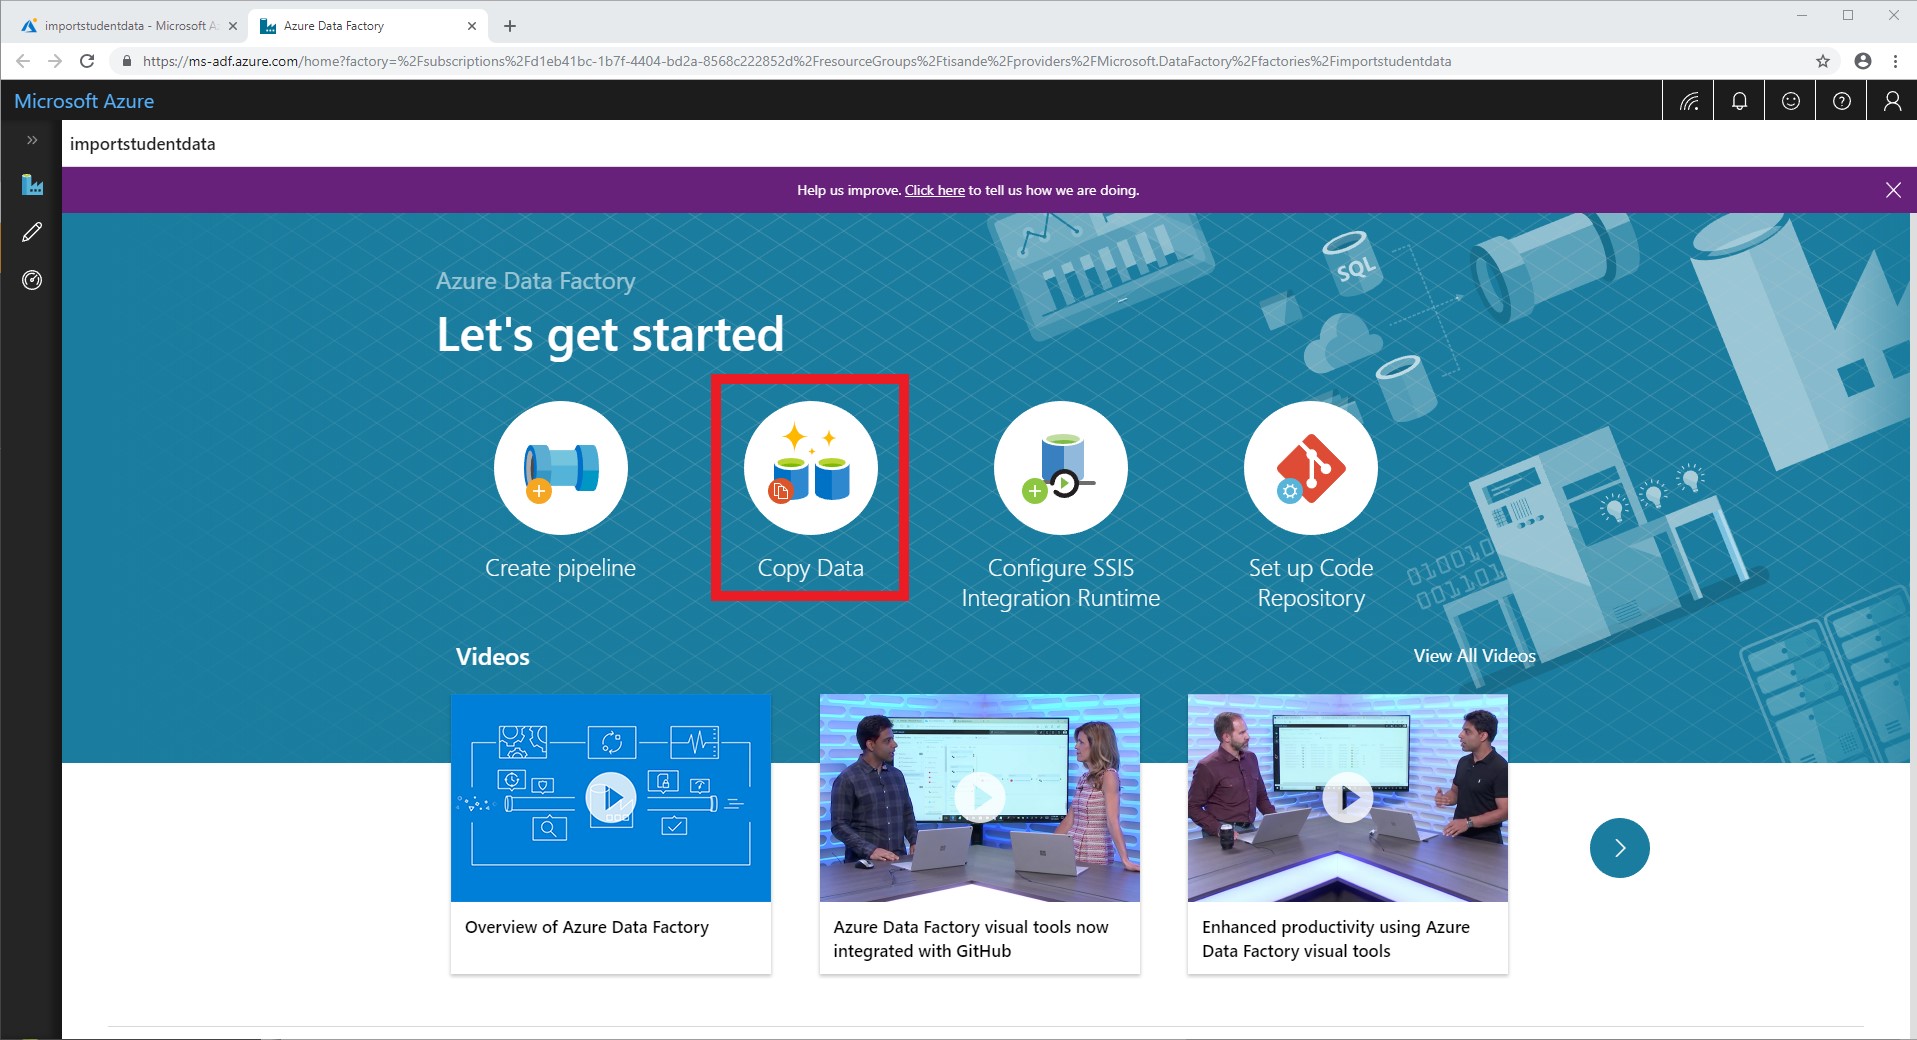
After creation, open your newly created Data Factory. Select Author & Monitor and you will launch ADF. You should see a screen similar to the screenshot below. Select Copy Data. We will be using ADF for a one-time copy of data from a source JSON file on Azure Blob Storage to a database in Cosmos DB’s SQL API. ADF can also be used for more frequent data transfers from Cosmos DB to other data stores.
-
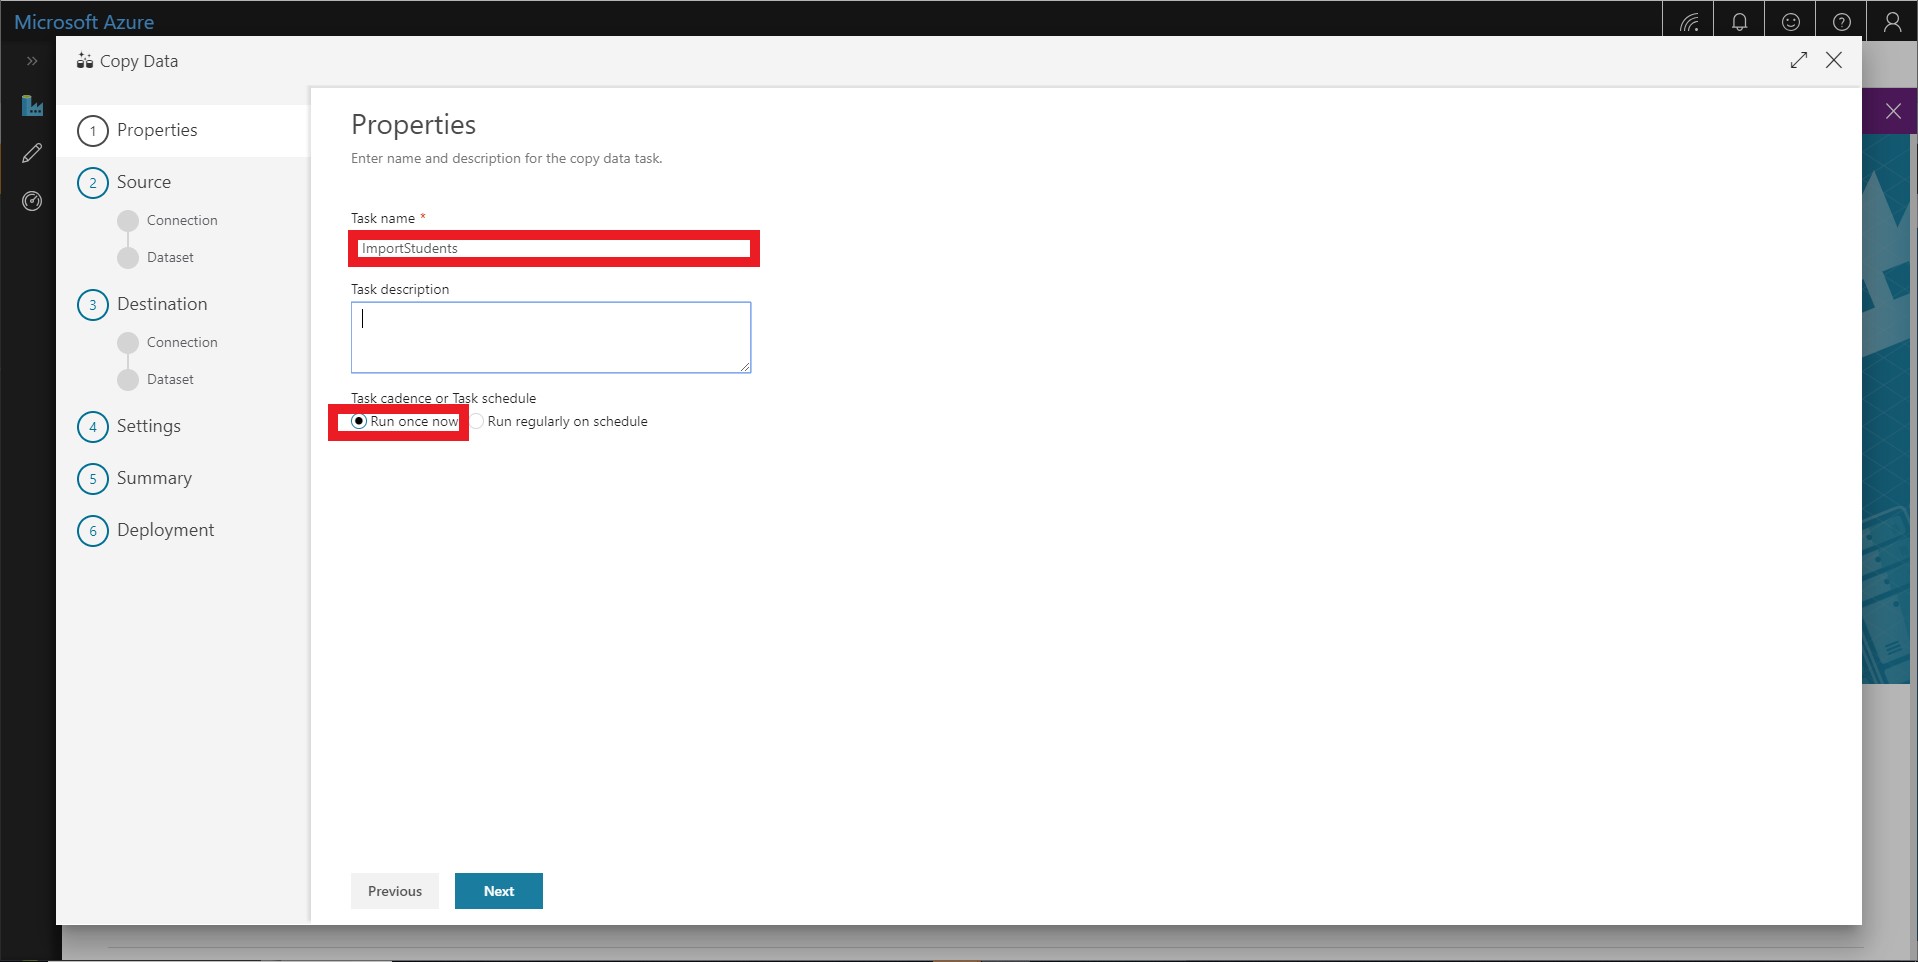
Edit basic properties for this data copy. You should name the task ImportStudents and select to Run once now
-
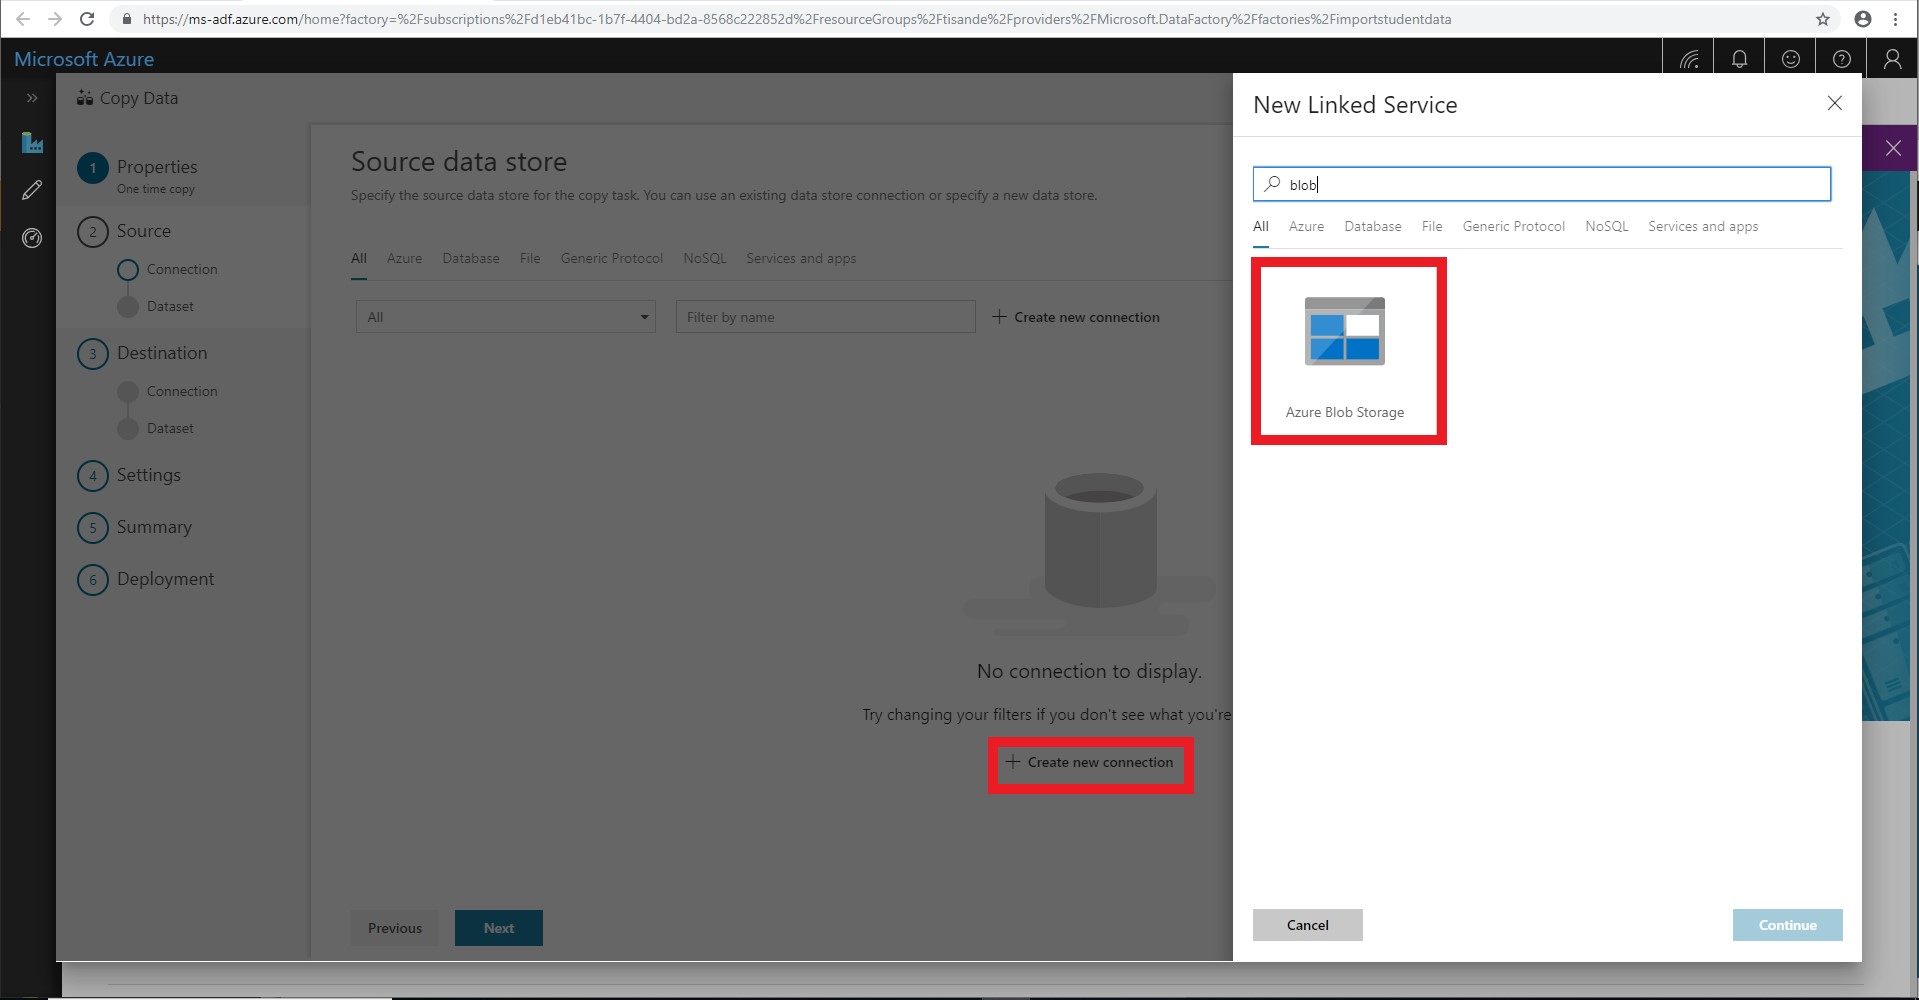
Create a new connection and select Azure Blob Storage. We will import data from a json file on Azure Blob Storage. In addition to Blob Storage, you can use ADF to migrate from a wide variety of sources. We will not cover migration from these sources in this tutorial.
-
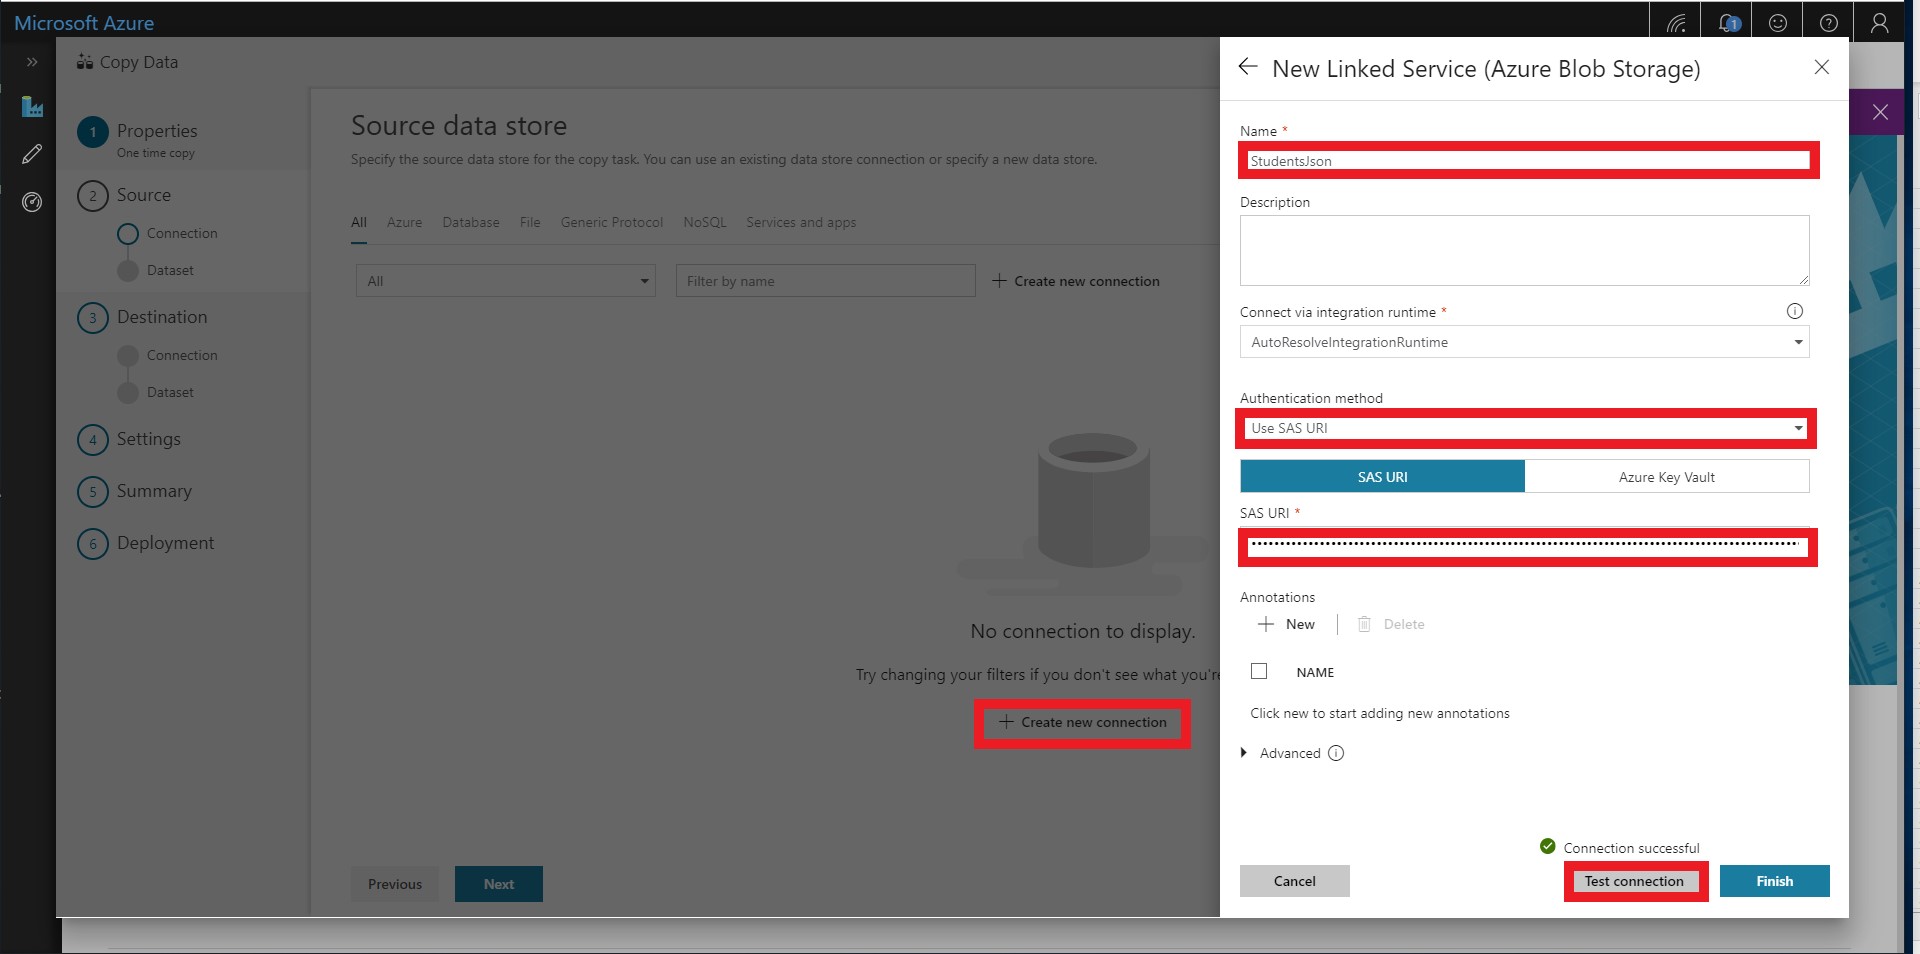
Name the source StudentsJson and select Use SAS URI as the Authentication method. Please use the following SAS URI for read-only access to this Blob Storage container: https://cosmoslabs.blob.core.windows.net/?sv=2018-03-28&ss=bfqt&srt=sco&sp=rl&se=2020-04-01T13:14:14Z&st=2018-11-06T06:14:14Z&spr=https&sig=8HltMx1smolMcSmOhfVdC3drxtmTkq2%2BfJ8574uK60A%3D
-
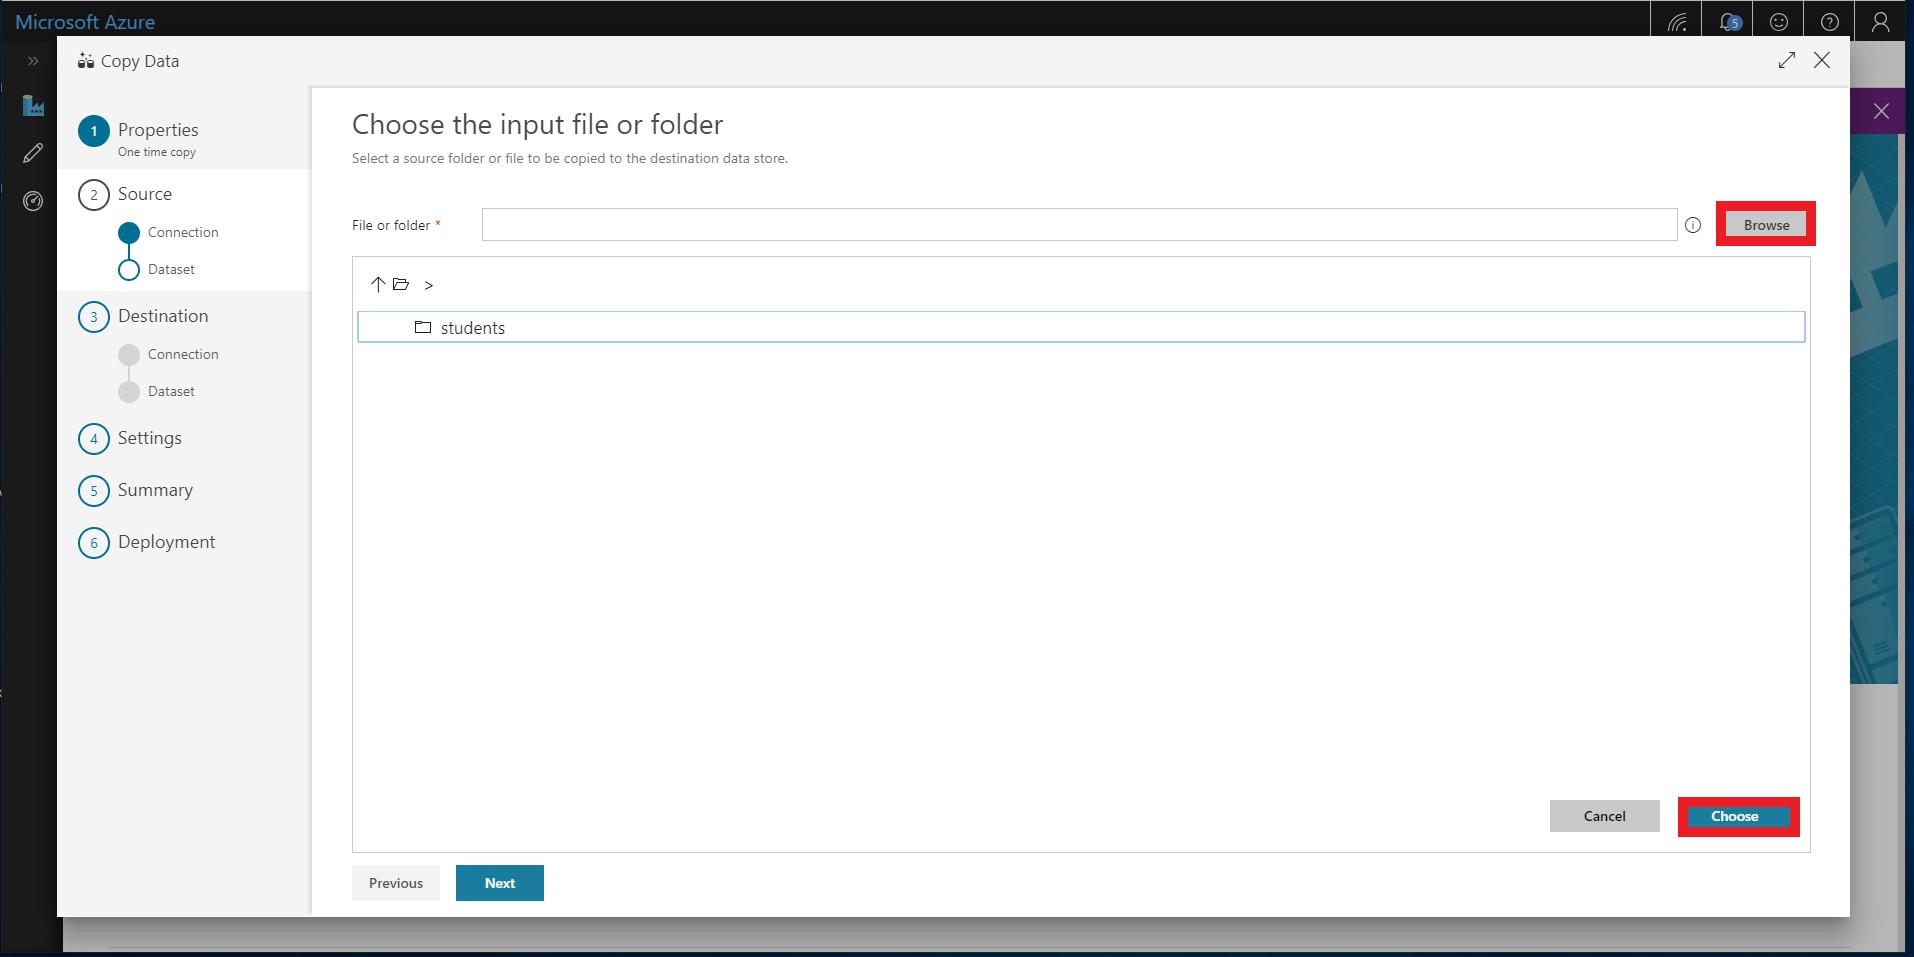
Select the students folder
-
Do not check Copy file recursively or Binary Copy. Also ensure that Compression Type is “none”.

-
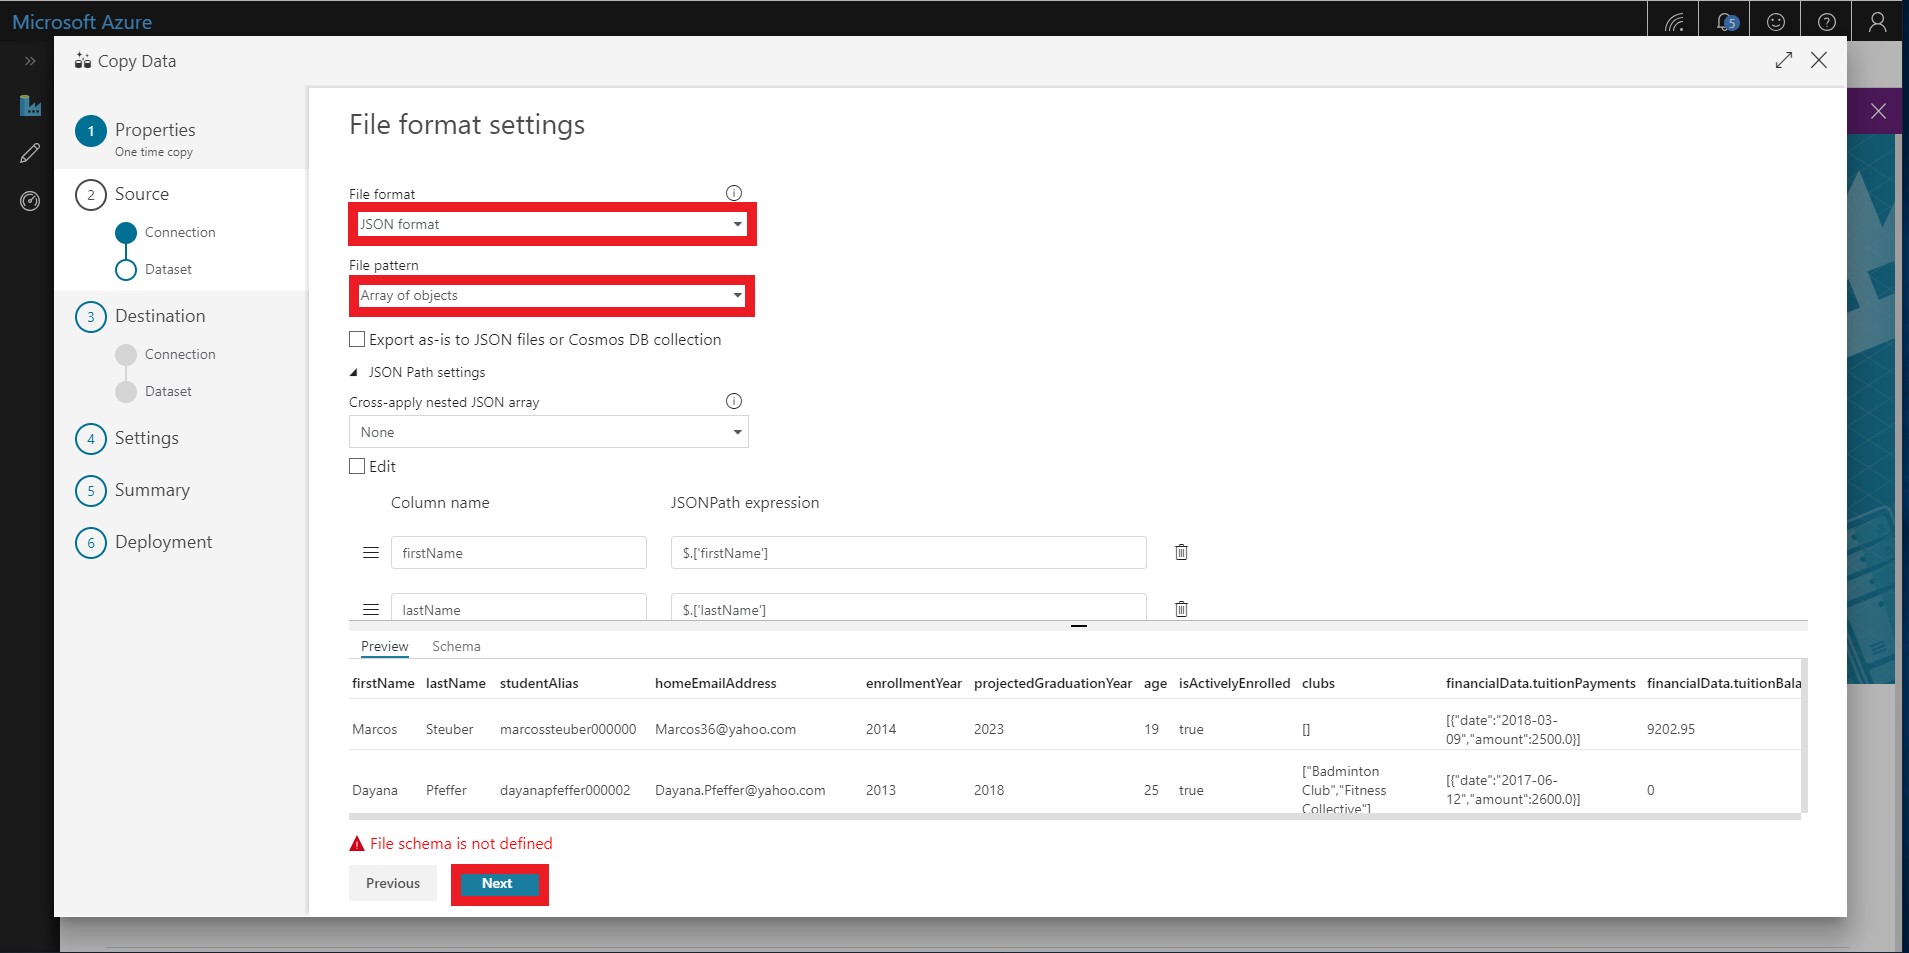
ADF should auto-detect the file format to be JSON. You can also select the file format as JSON format. You should also make sure you select Array of Objects as the File pattern.
-
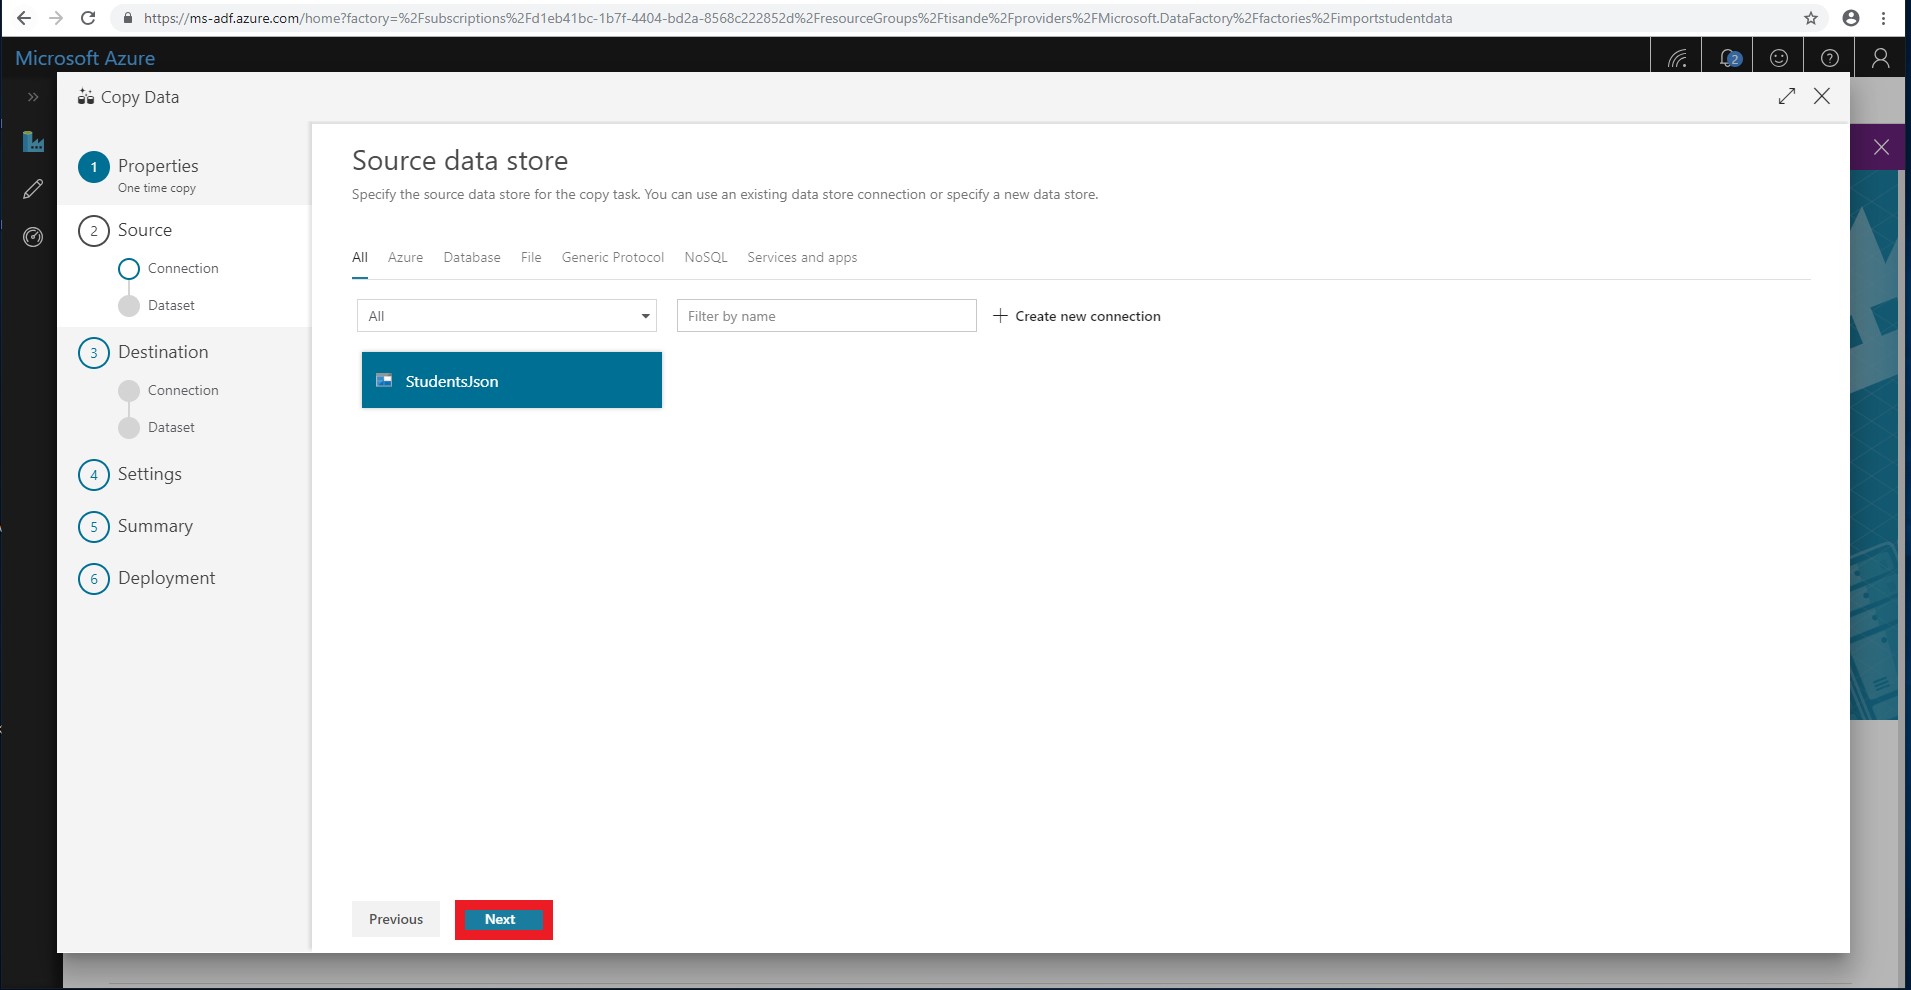
You have now successfully connected the Blob Storage container with the students.json file. You should select StudentsJson as the source and click Next.
-
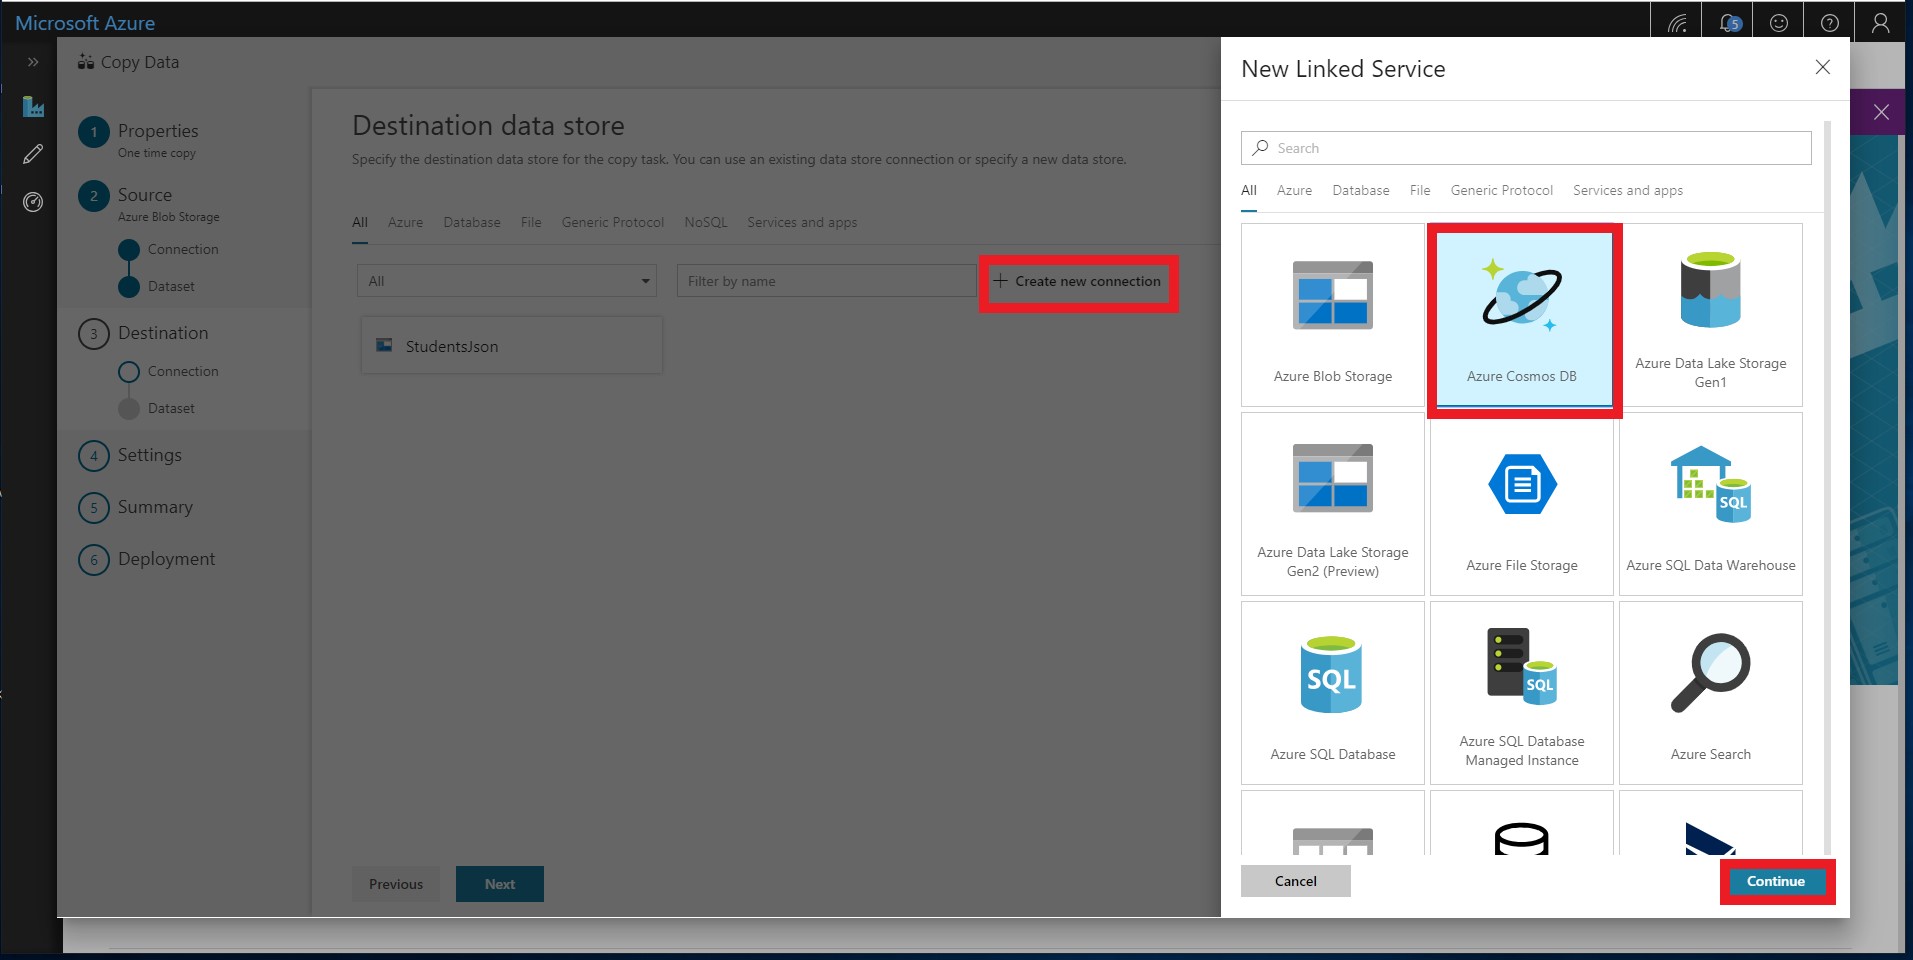
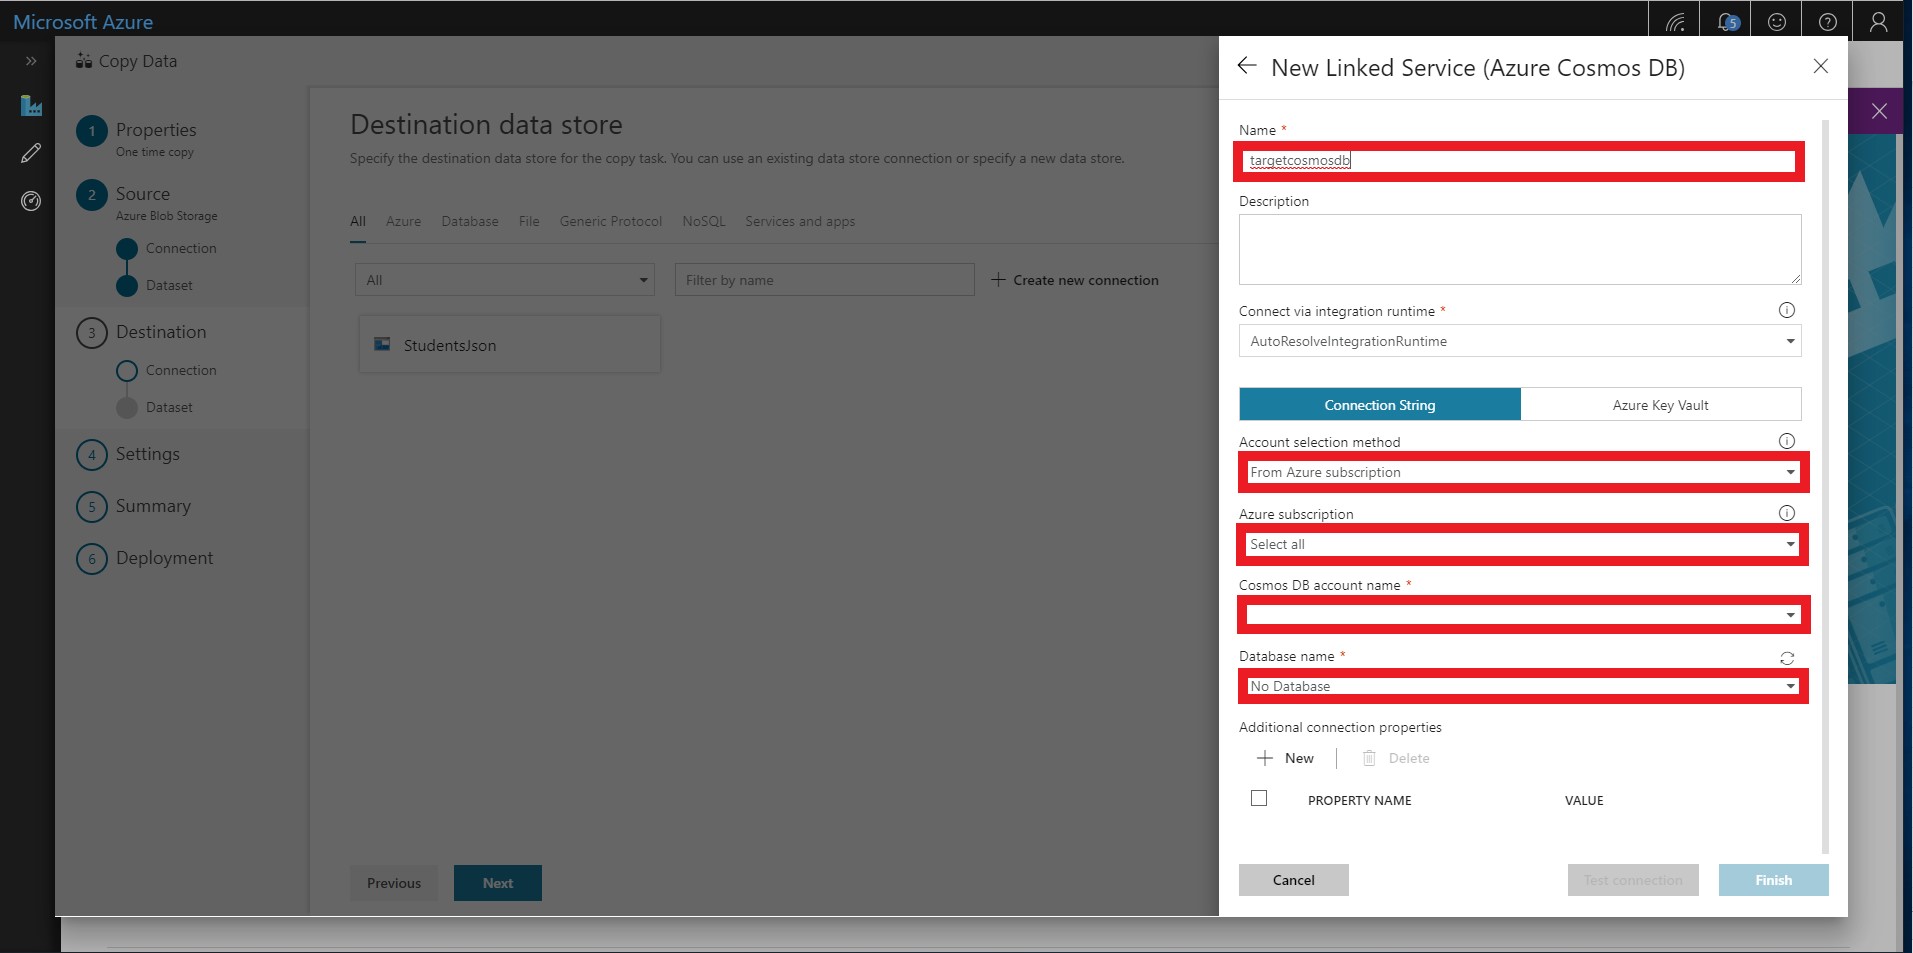
Add the Cosmos DB target data store by selecting Create new connection and selecting Azure Cosmos DB.
-
Name the linked service targetcosmosdb and select your Azure subscription and Cosmos DB account. You should also select the Cosmos DB database that you created earlier.
-
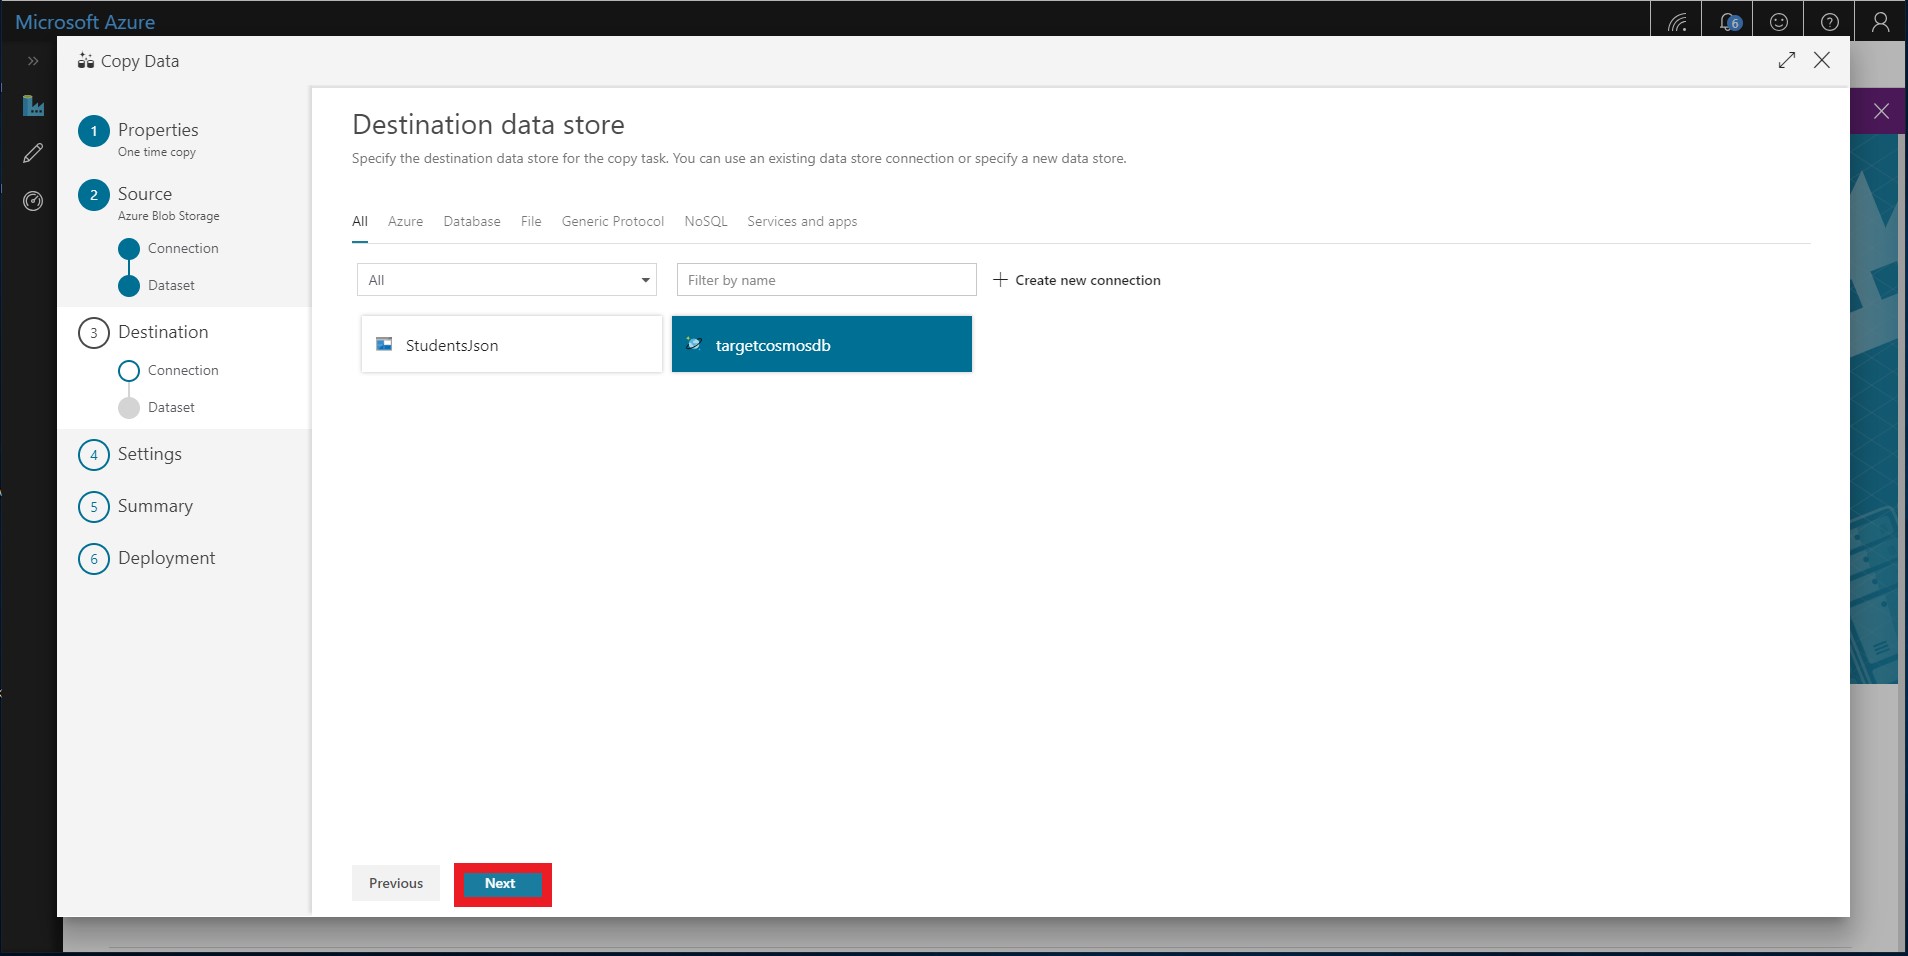
Select your newly created targetcosmosdb connection as the Destination date store.
-
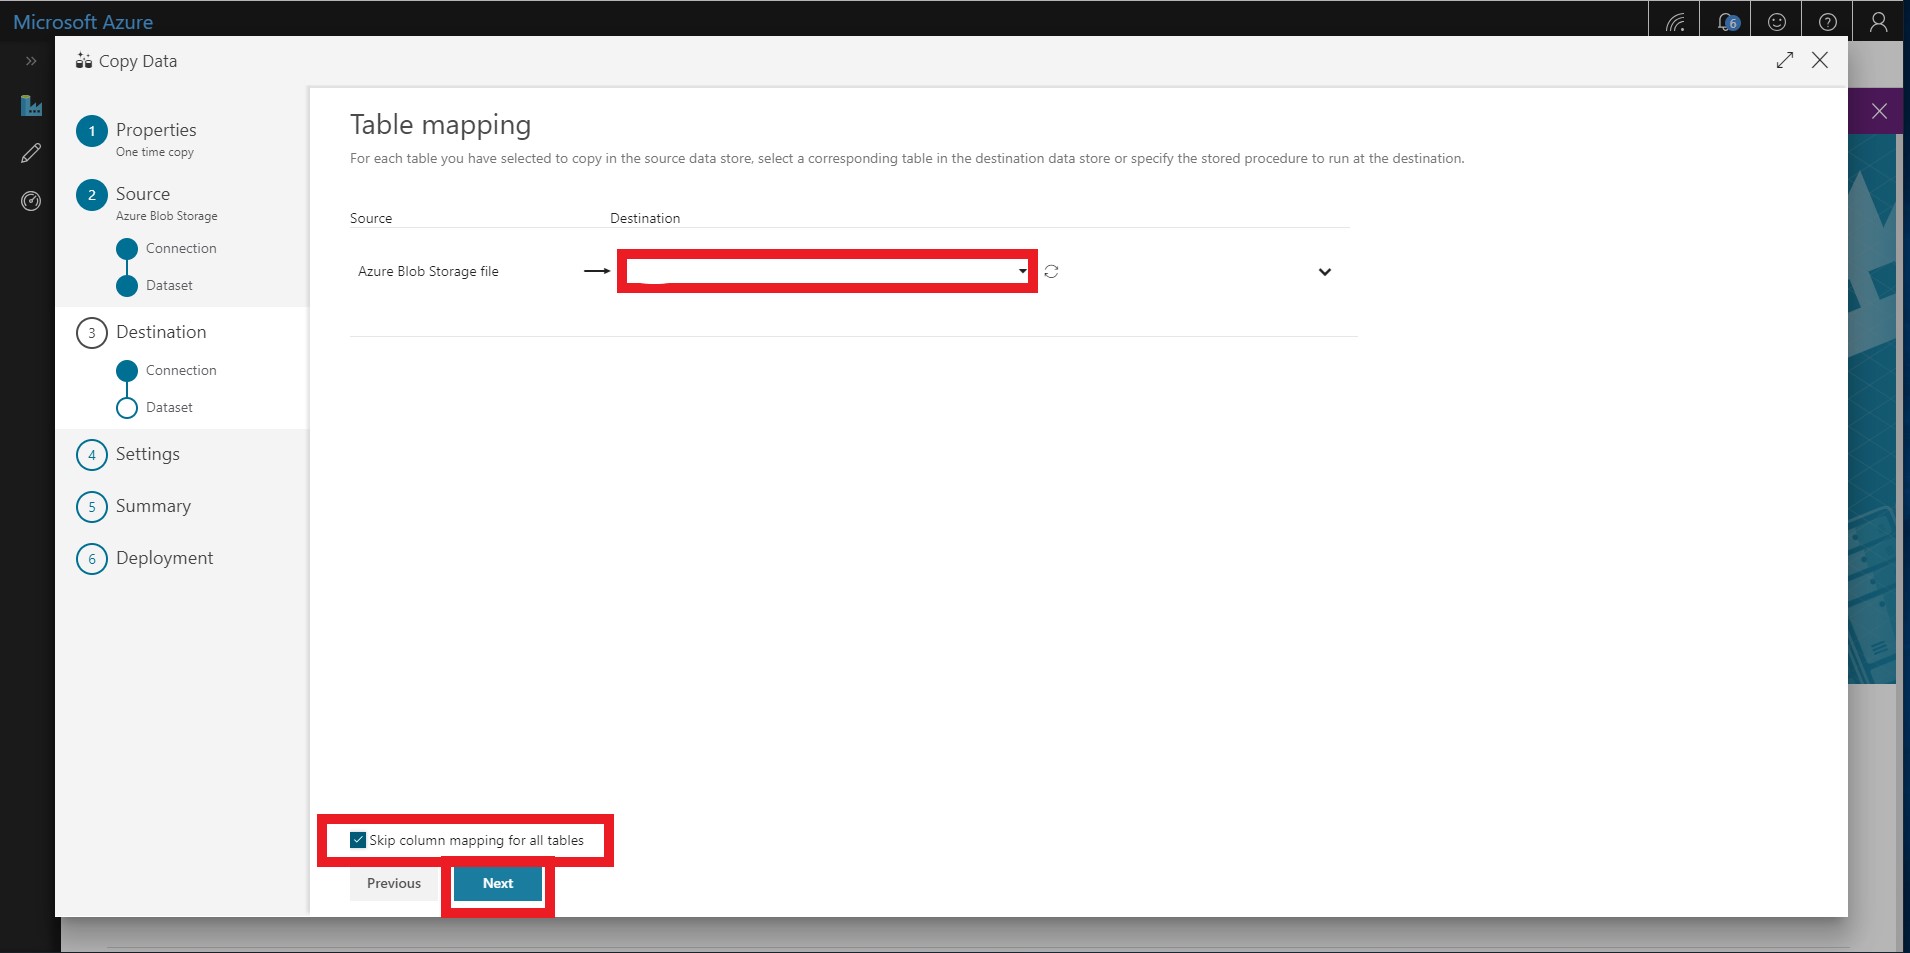
Select your collection from the drop-down menu. You will map your Blob storage file to the correct Cosmos DB collection.
-
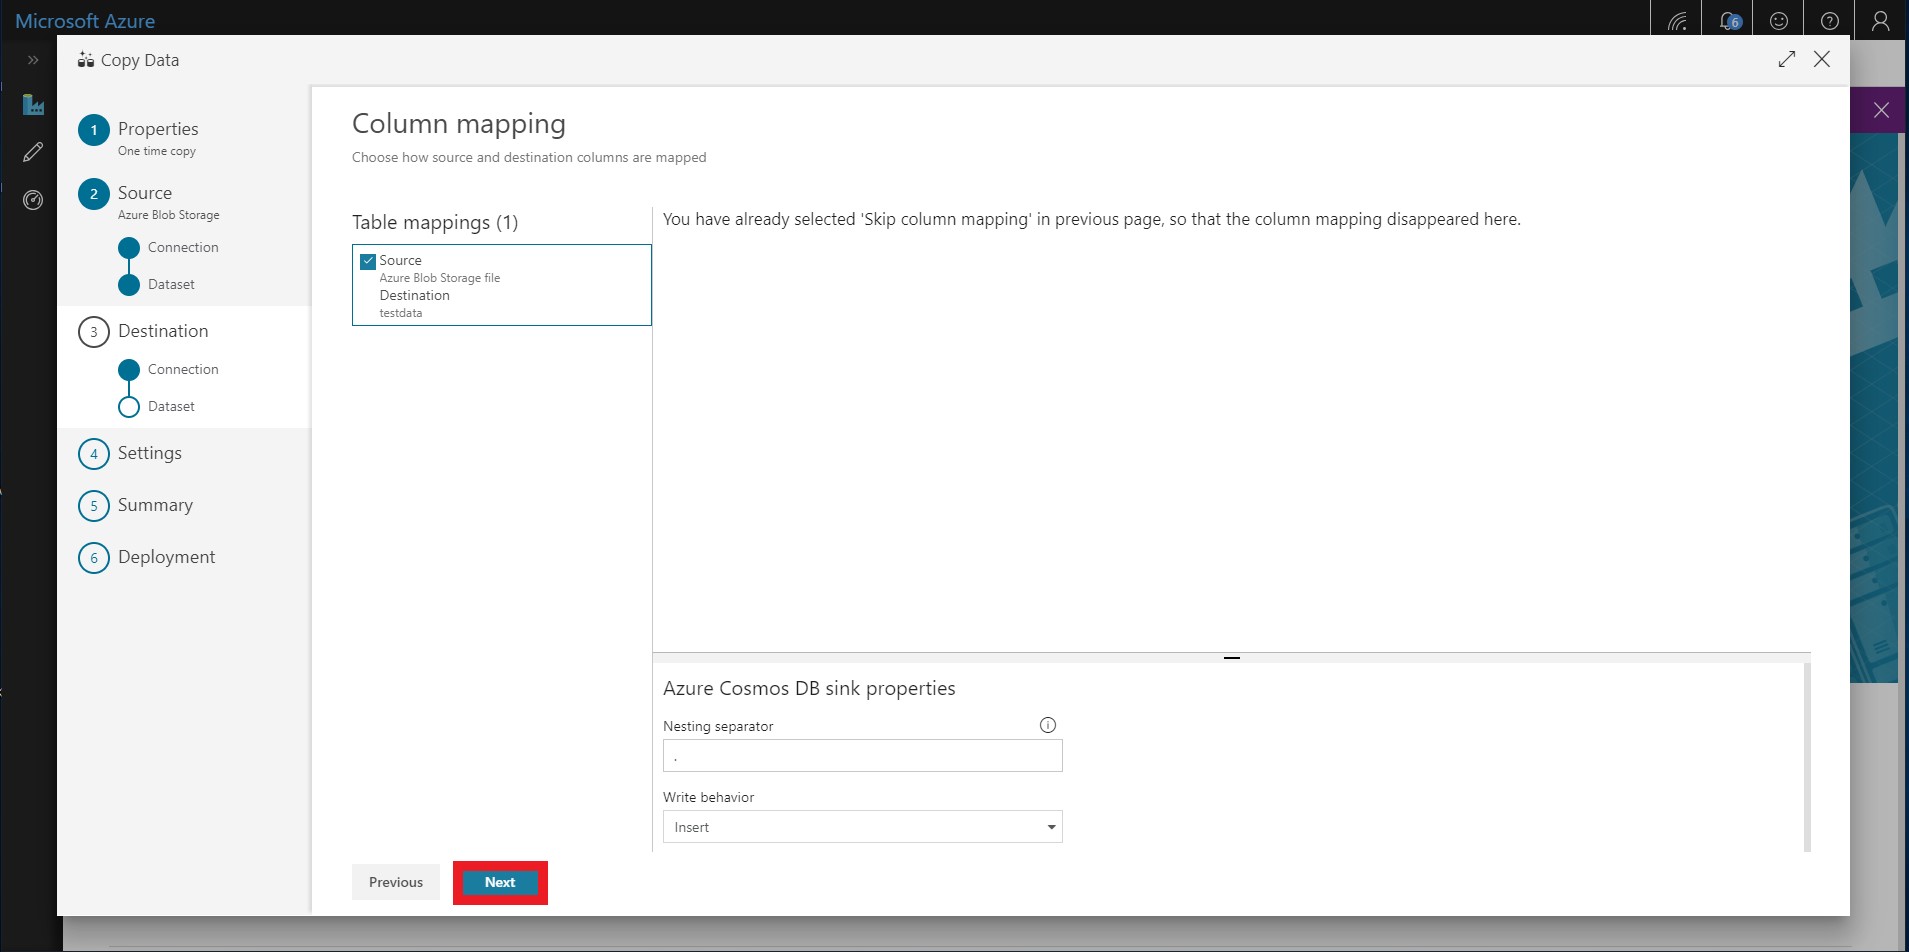
You should have selected to skip column mappings in a previous step. Click through this screen.
-
There is no need to change any settings. Click next.
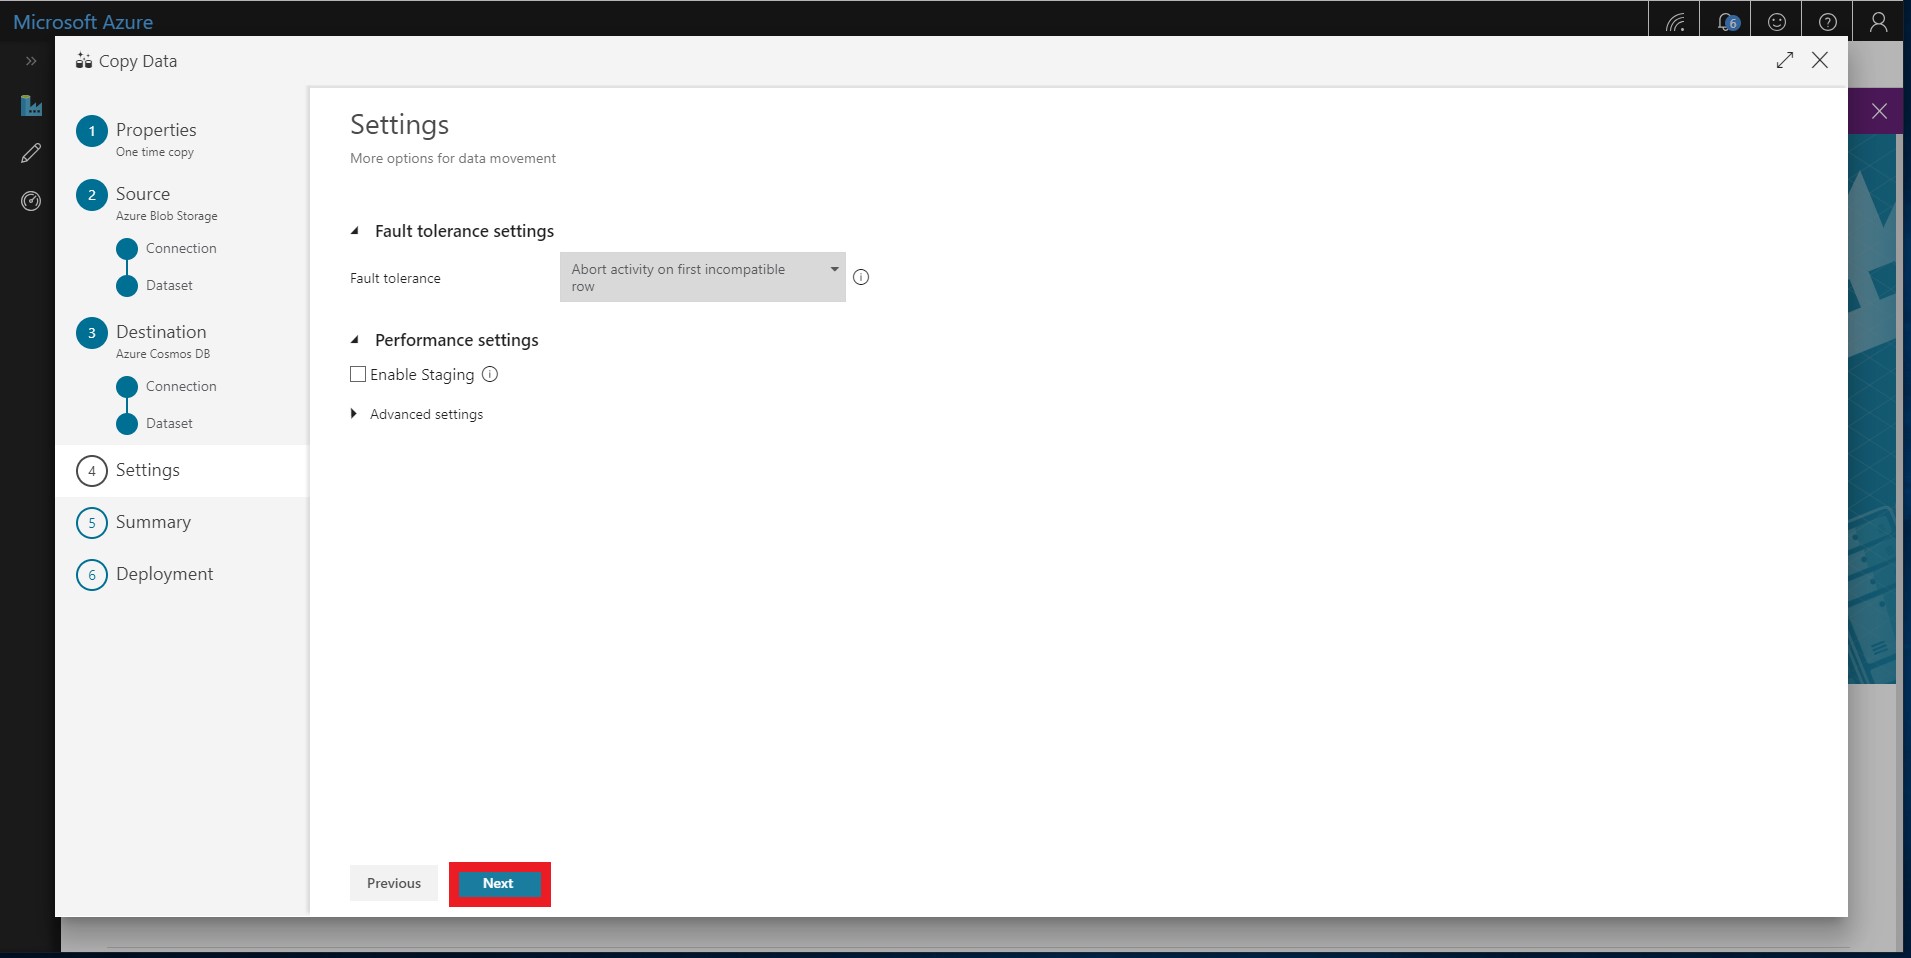
-
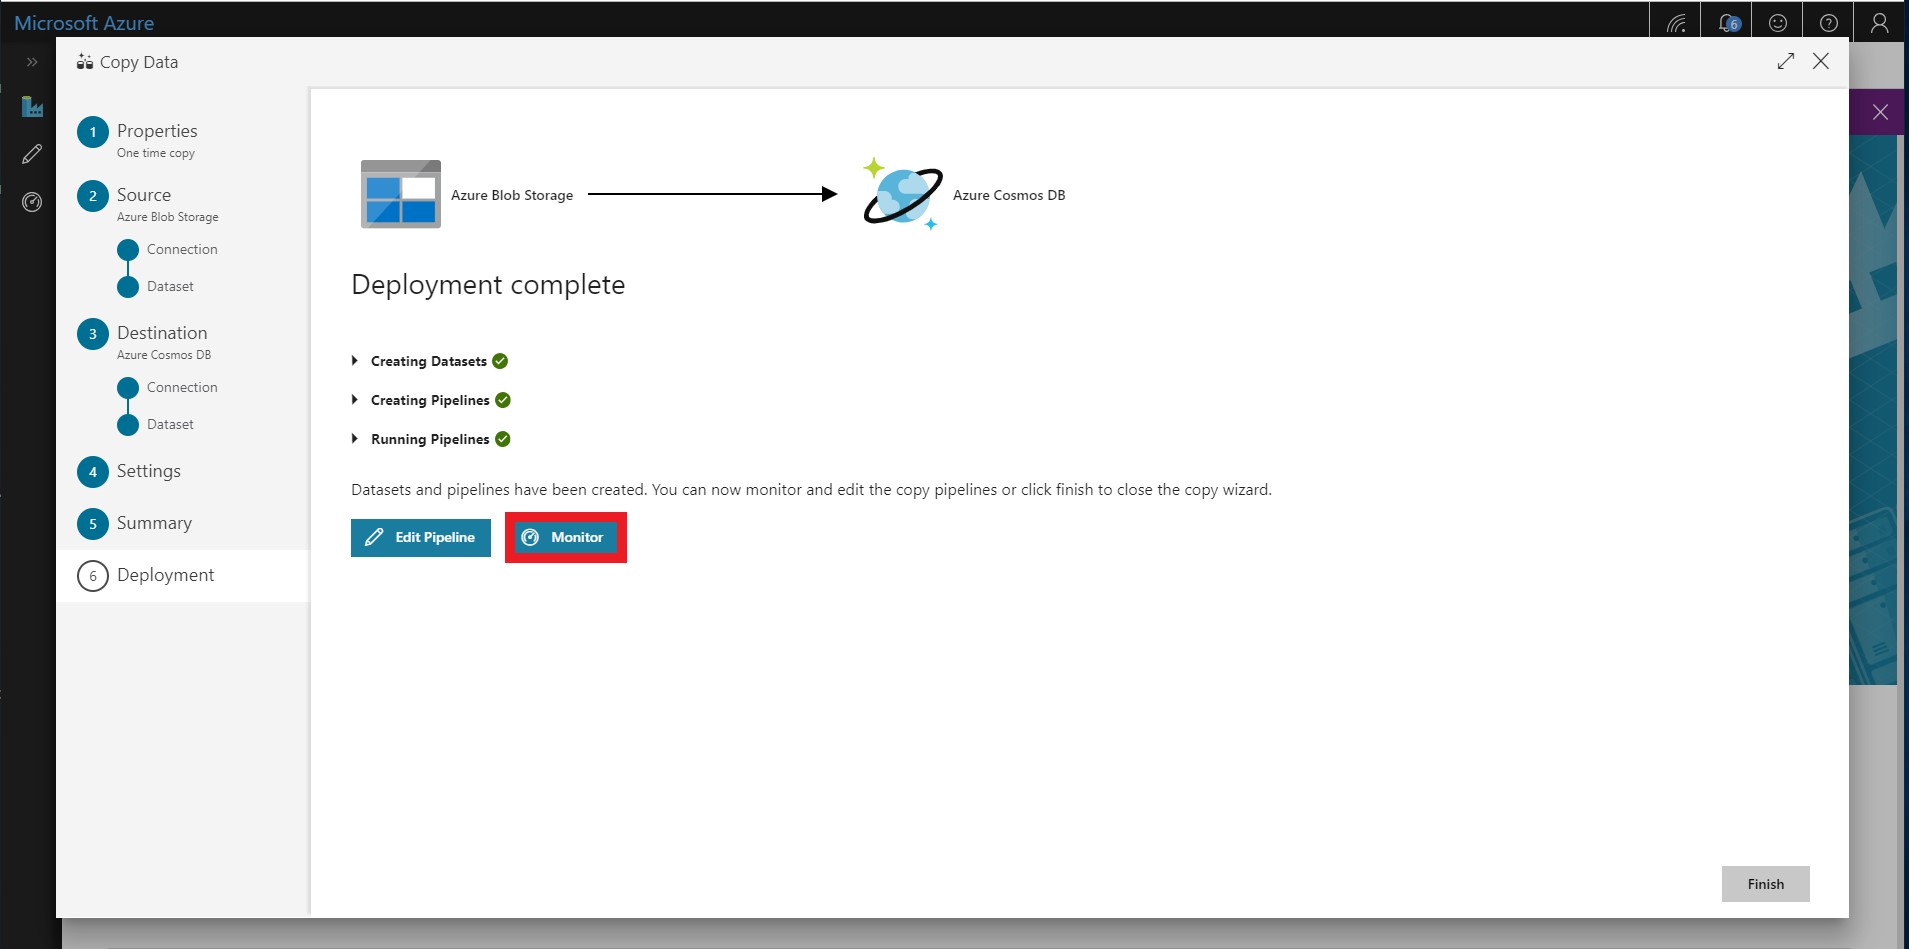
After deployment is complete, select Monitor.
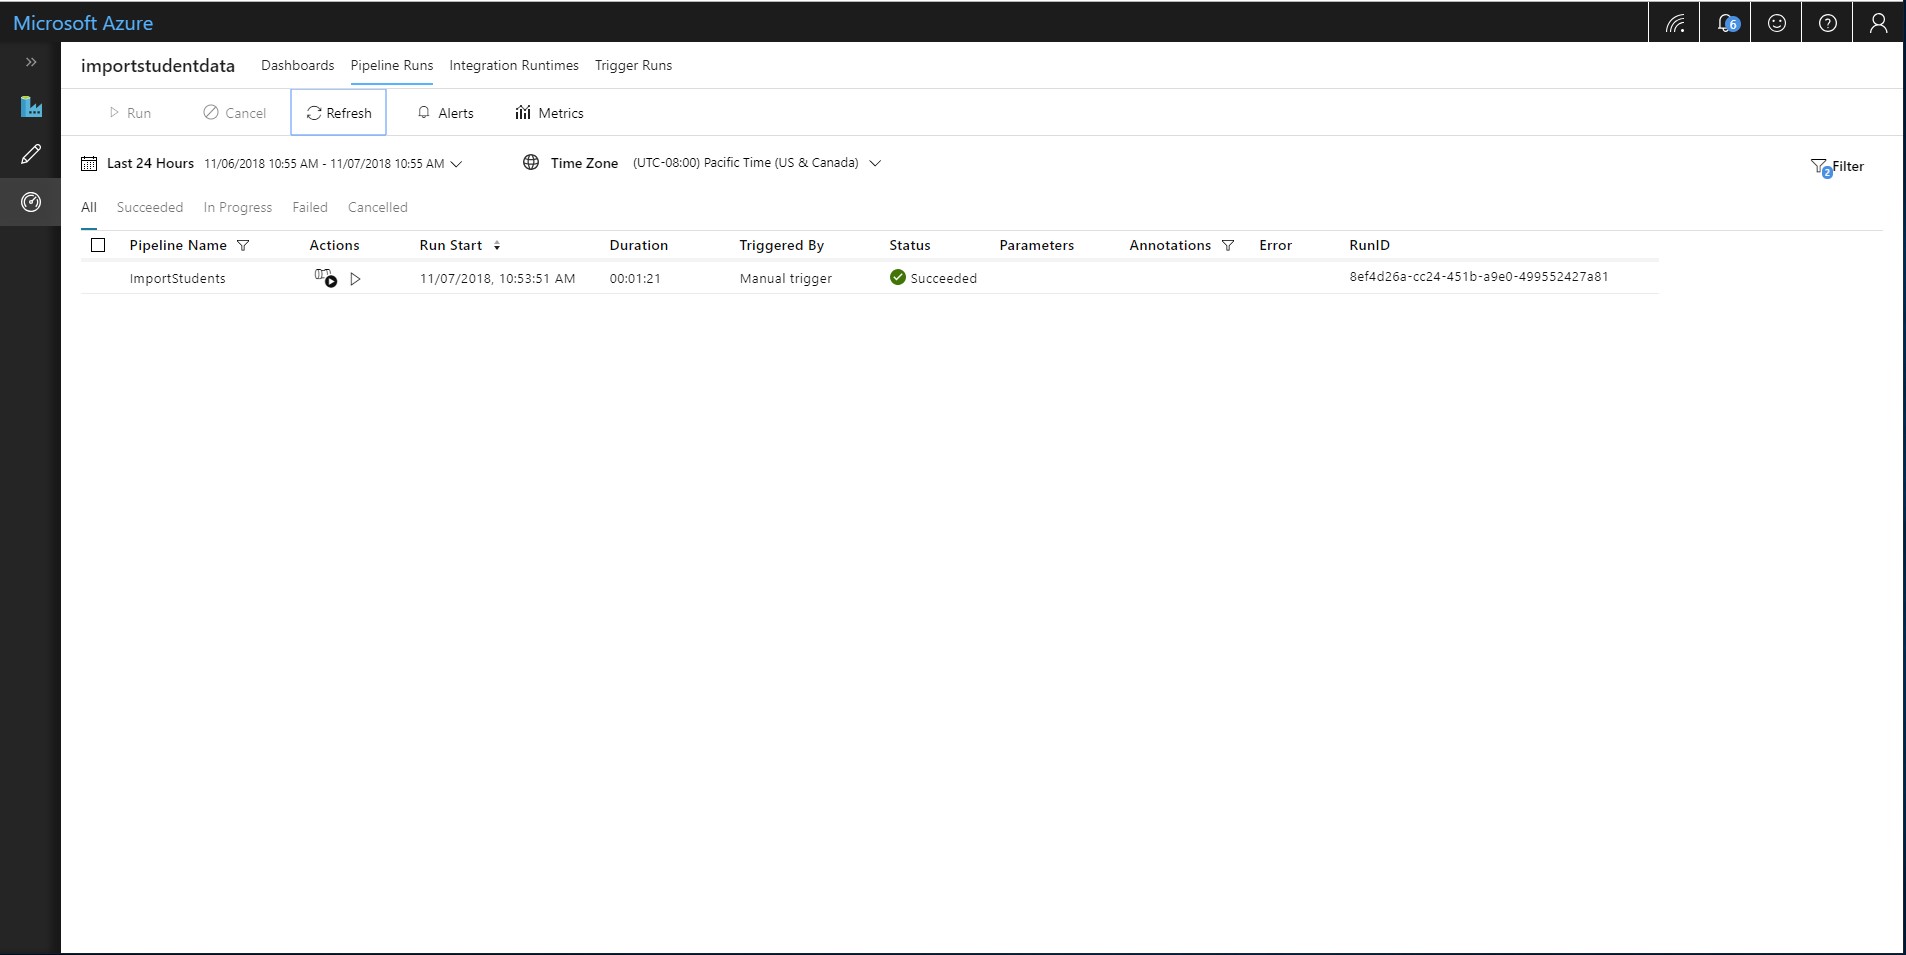
-
After a few minutes, refresh the page and the status for the ImportStudents pipeline should be listed as Succeeded.
-
Once the import process has completed, close the ADF. You will now proceed to execute simple queries on your imported data.
Executing Simple Queries
The Azure Cosmos DB Data Explorer allows you to view documents and run queries directly within the Azure Portal. In this exercise, you will use the Data Explorer to query the data stored in our collection.
Validate Imported Data
First, you will validate that the data was successfully imported into your collection using the Documents view in the Data Explorer.
-
Return to the Azure Portal (http://portal.azure.com).
-
On the left side of the portal, click the Resource groups link.
-
In the Resource groups blade, locate and select the cosmosgroup-lab Resource Group.
-
In the cosmosgroup-lab blade, select the Azure Cosmos DB account you recently created.
-
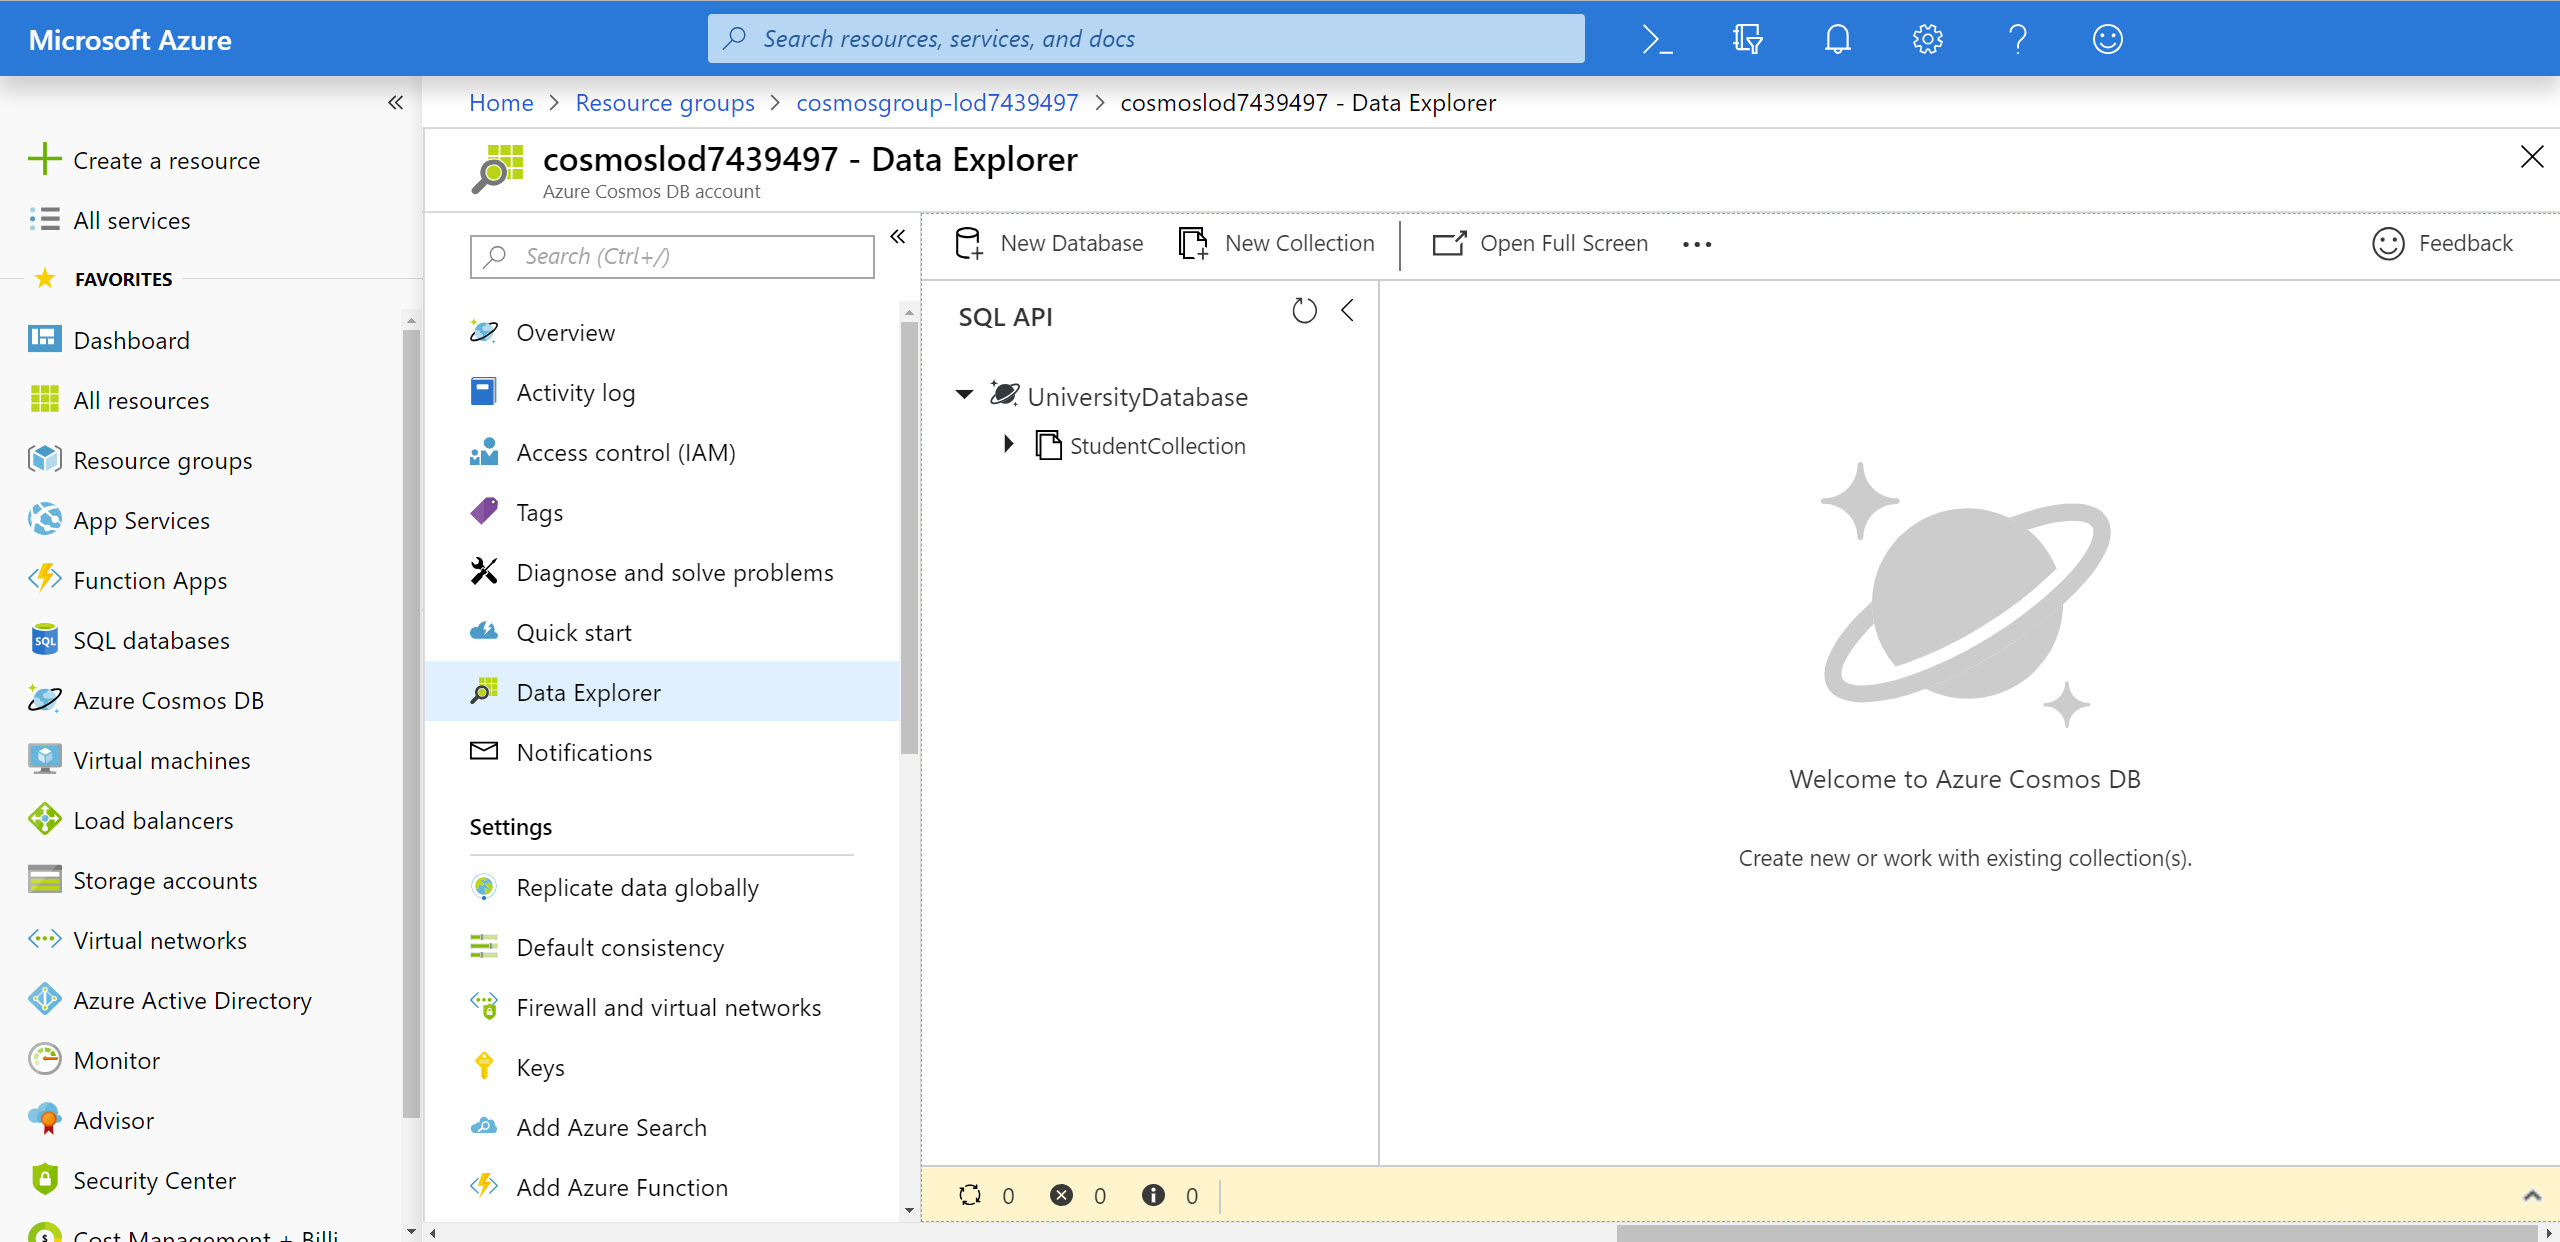
In the Azure Cosmos DB blade, locate and click the Data Explorer link on the left side of the blade.
-
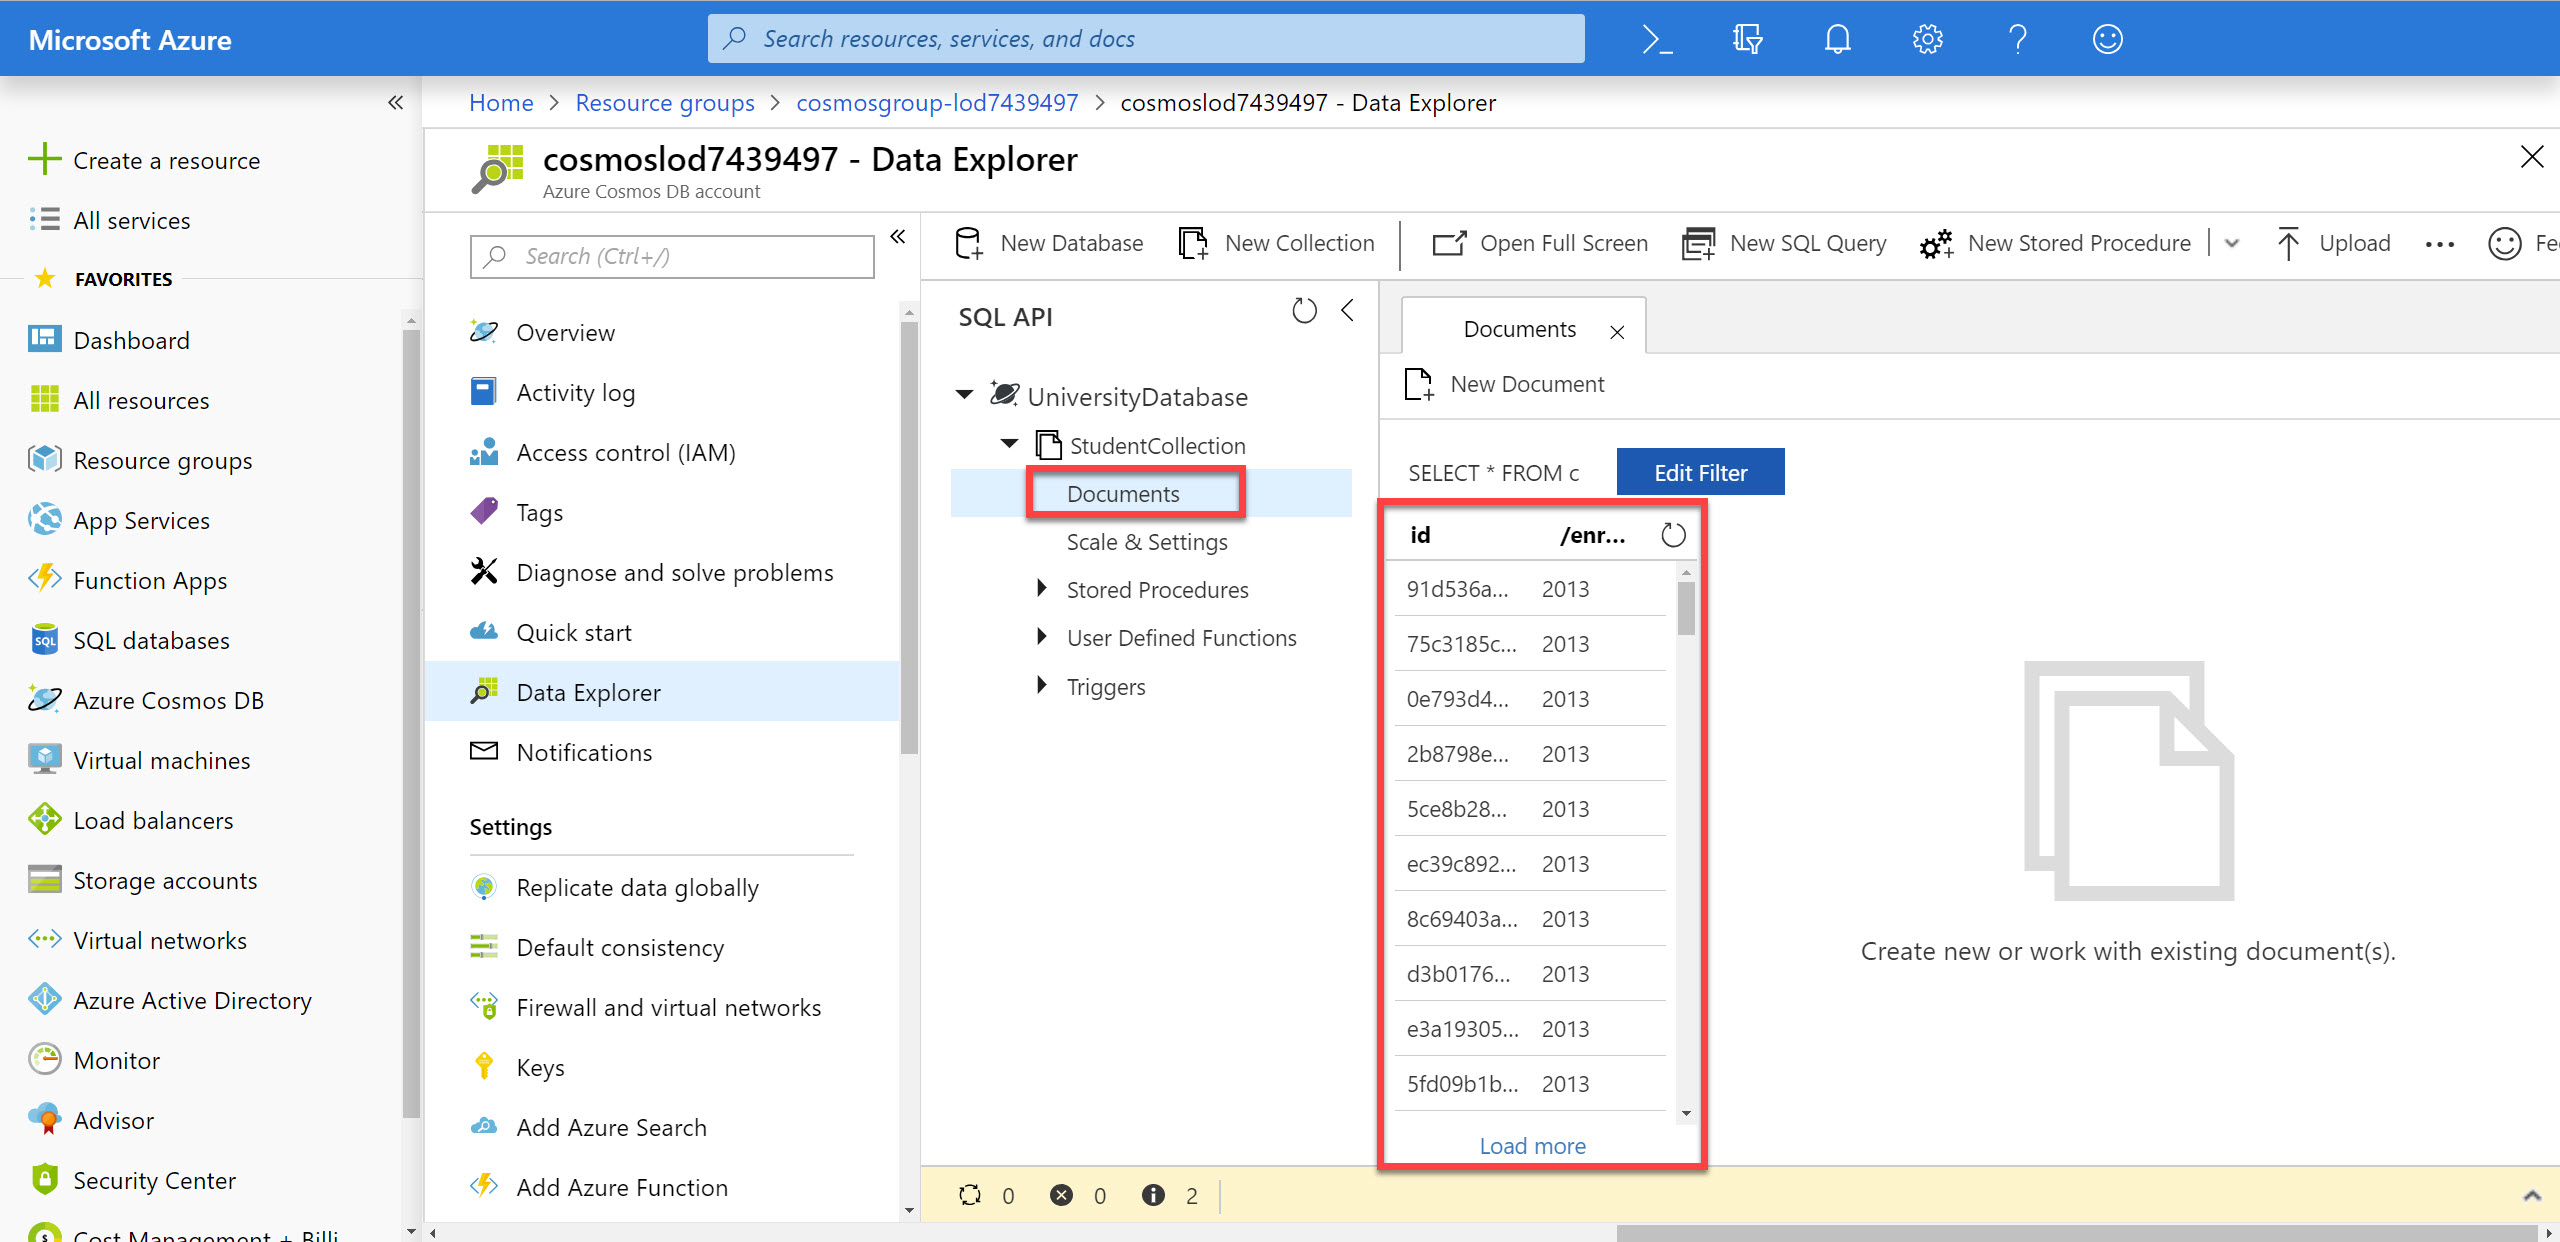
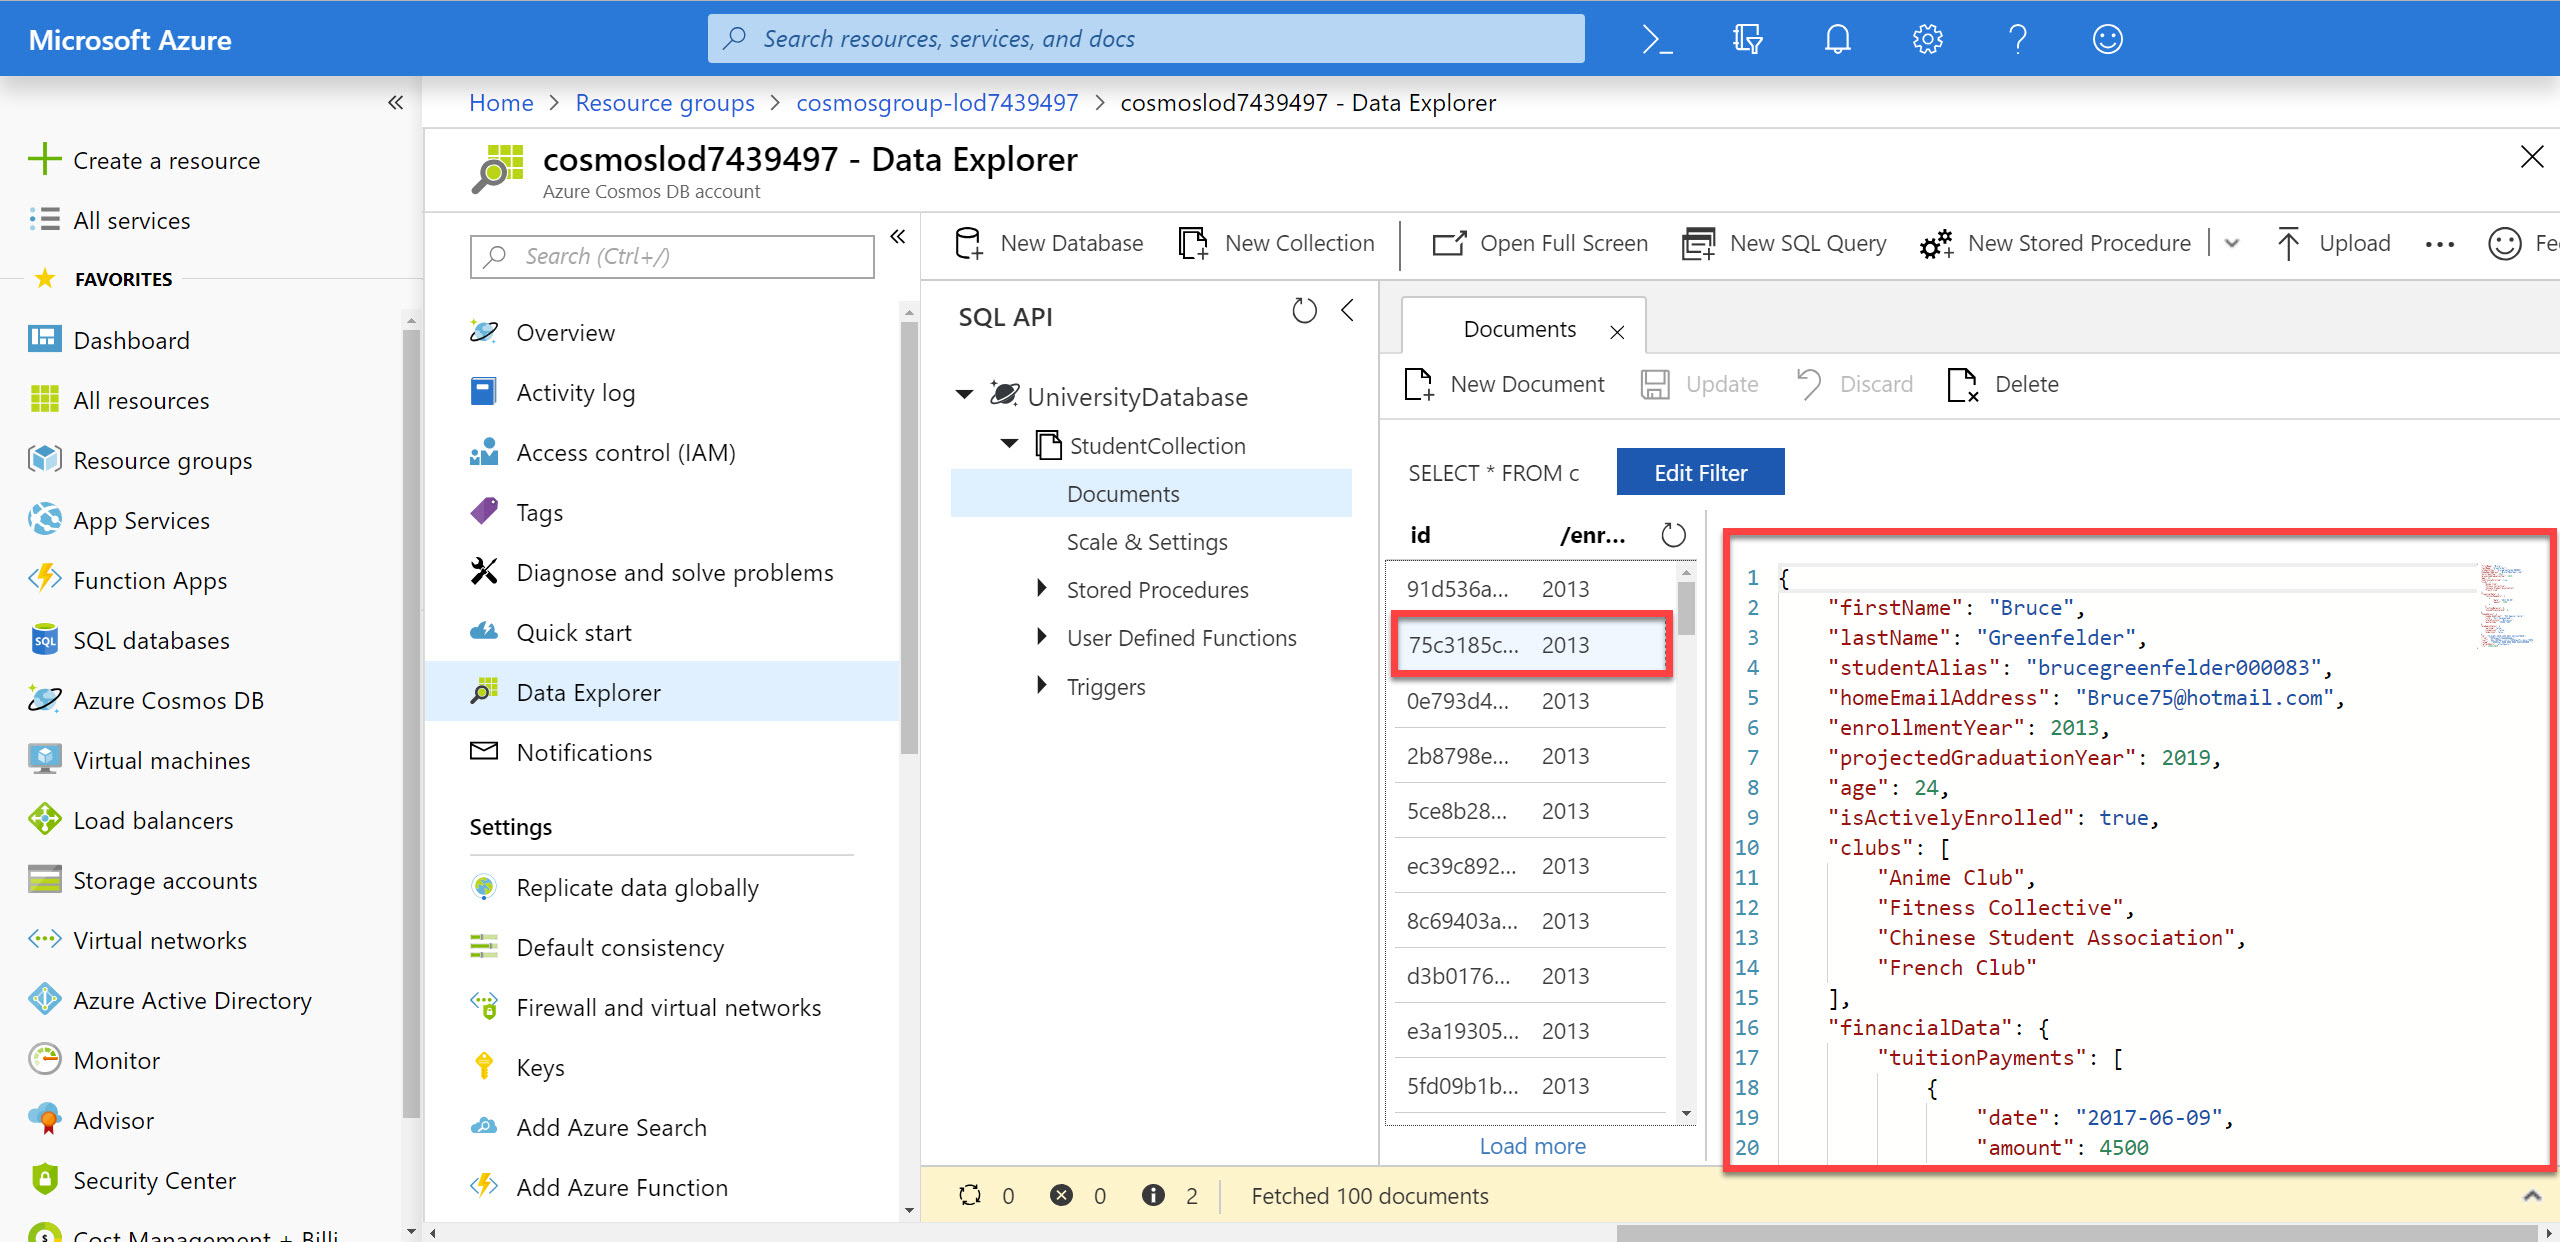
In the Data Explorer section, expand the UniversityDatabase database node and then expand the StudentCollection collection node.
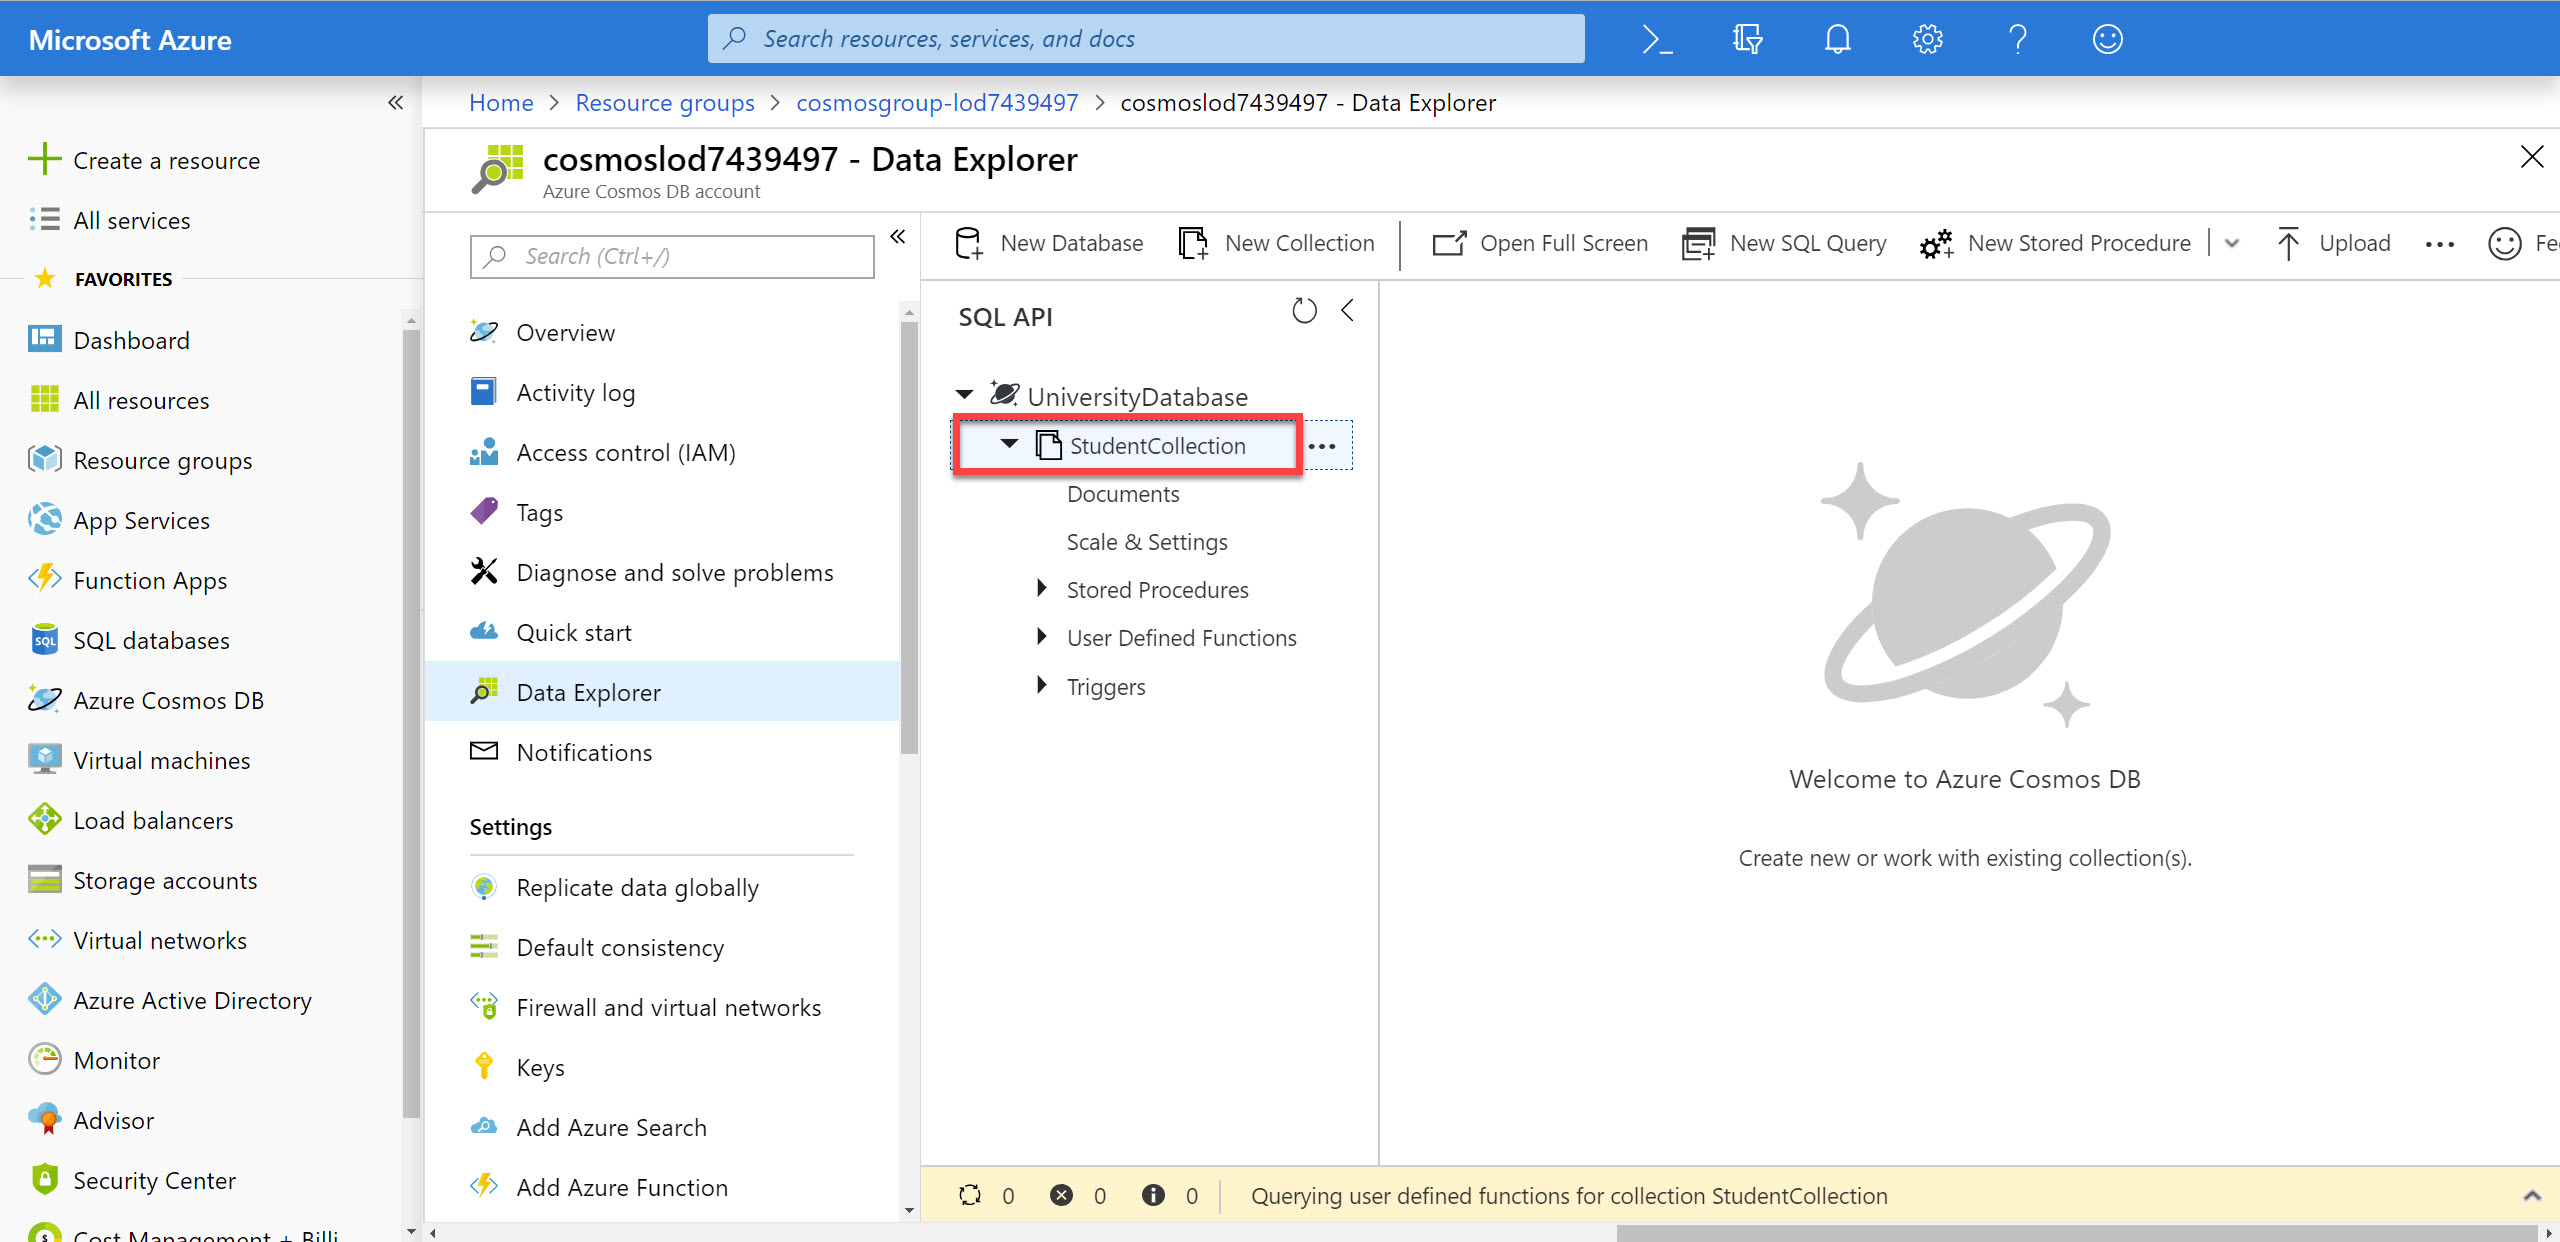
-
Within the StudentCollection node, click the Documents link to view a subset of the various documents in the collection. Select a few of the documents and observe the properties and structure of the documents.
Executing a Simple SELECT Queries
You will now use the query editor in the Data Explorer to execute a few simple SELECT queries using SQL syntax.
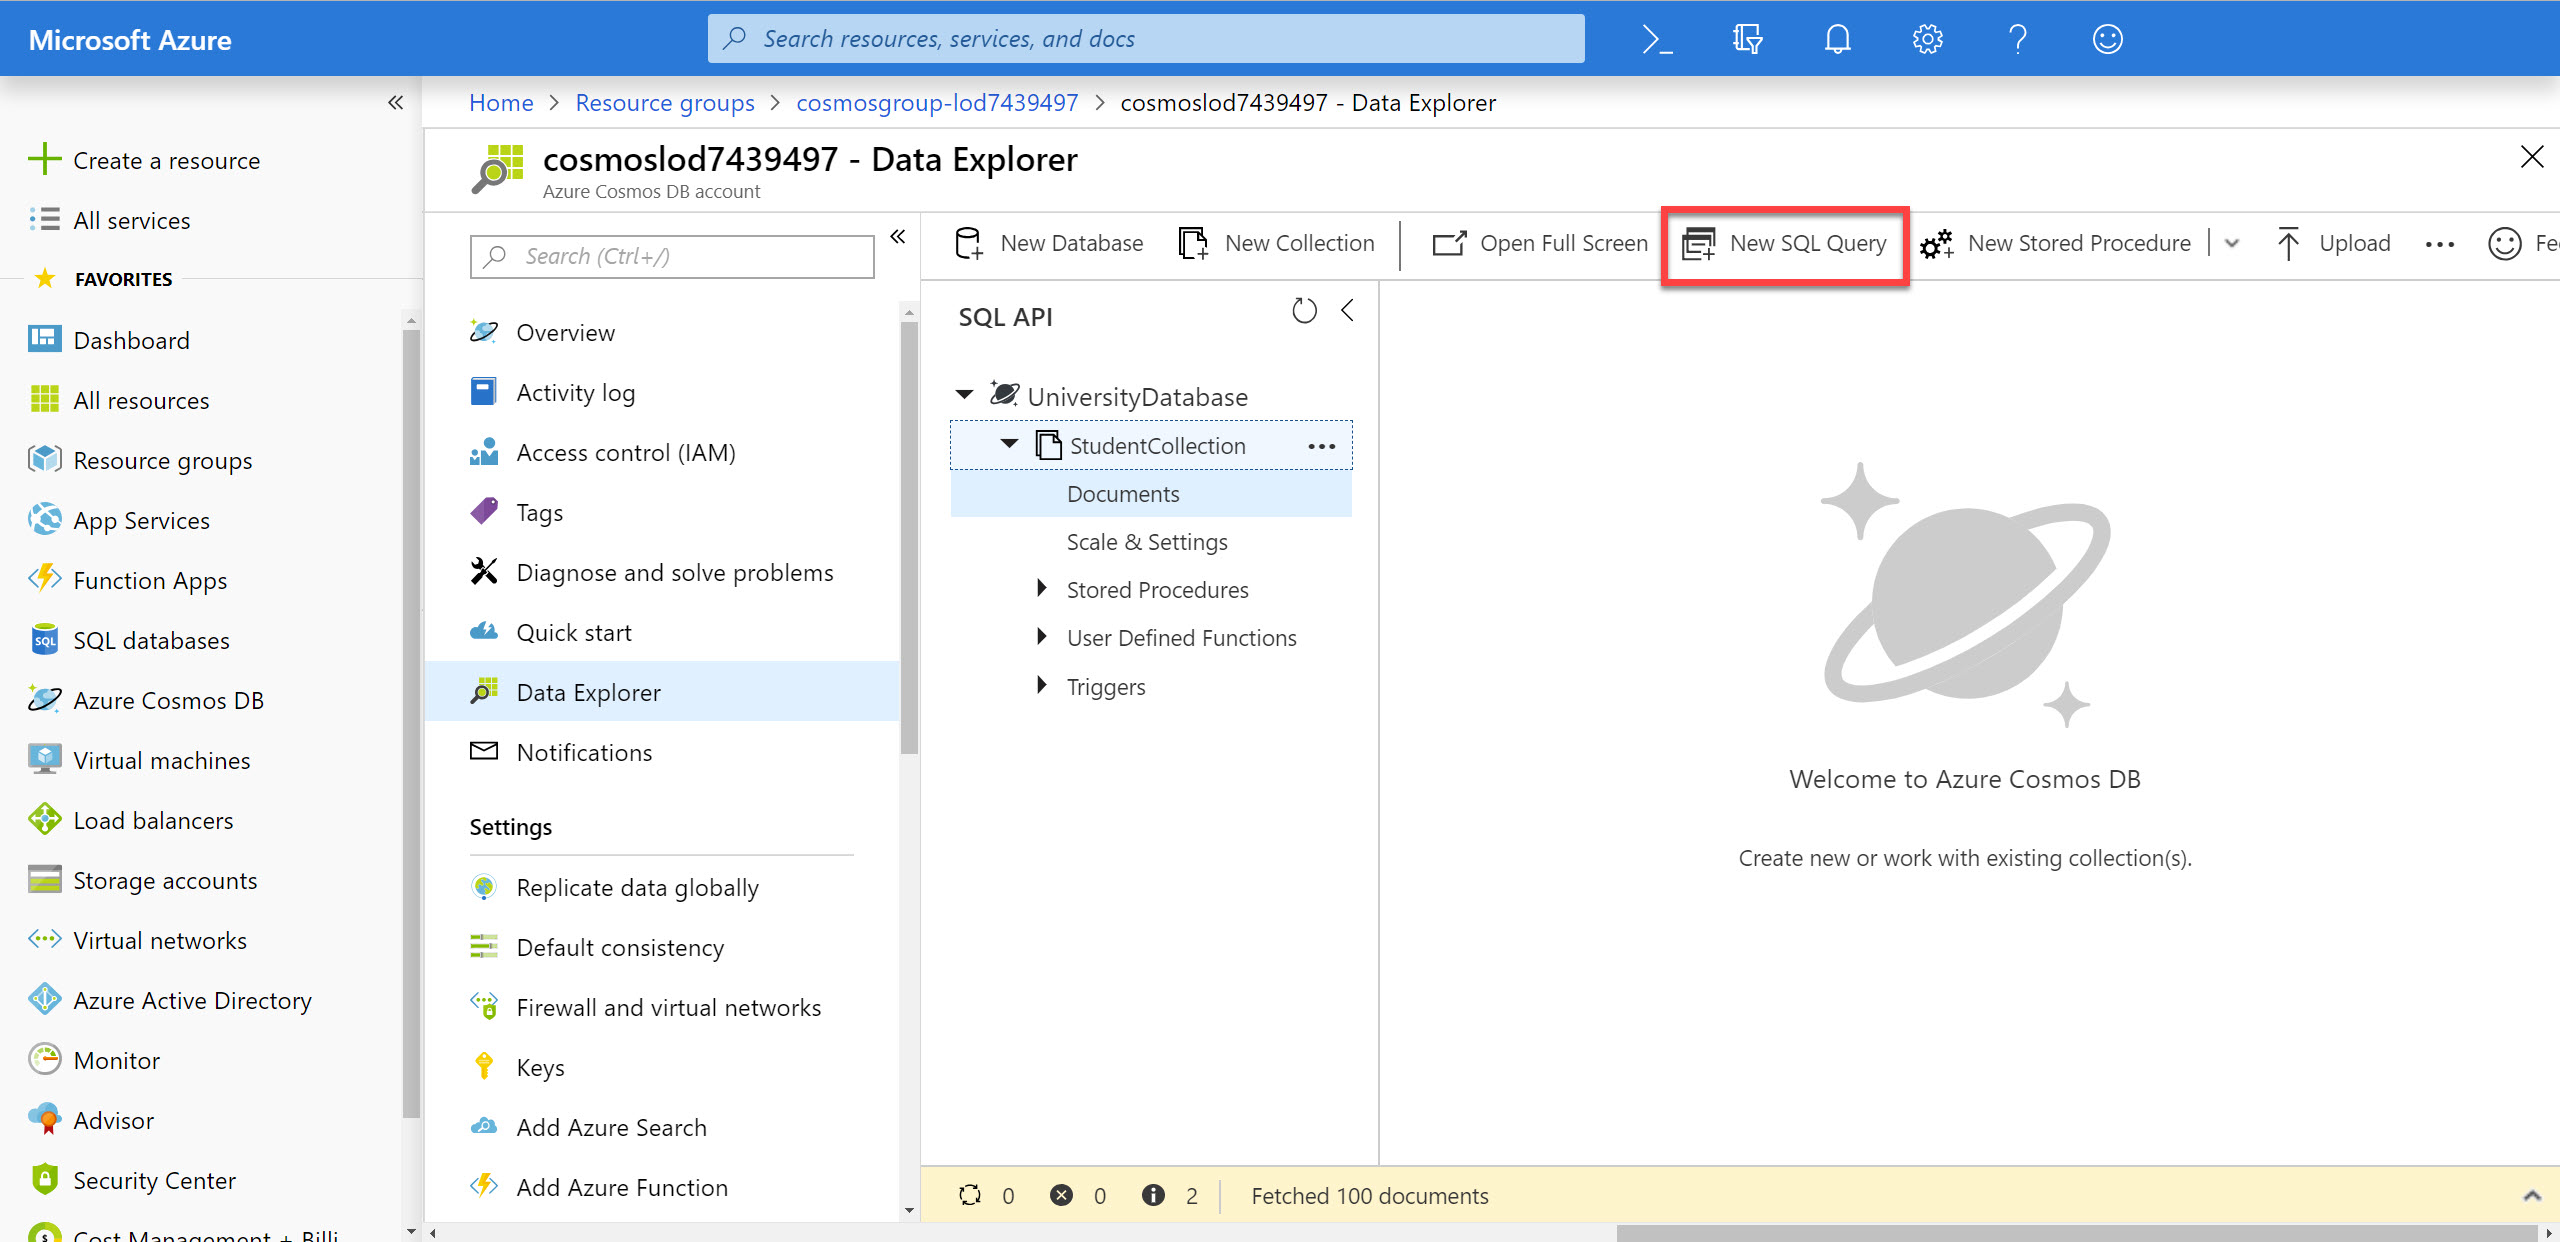
-
Click the New SQL Query button at the top of the Data Explorer section.
-
In the query tab, replace the contents of the query editor with the following SQL query:
SELECT * FROM students s WHERE s.enrollmentYear = 2017This first query will select all properties from all documents in the collection where the students where enrolled in 2017. You will notice that we are using the alias
sto refer to the collection.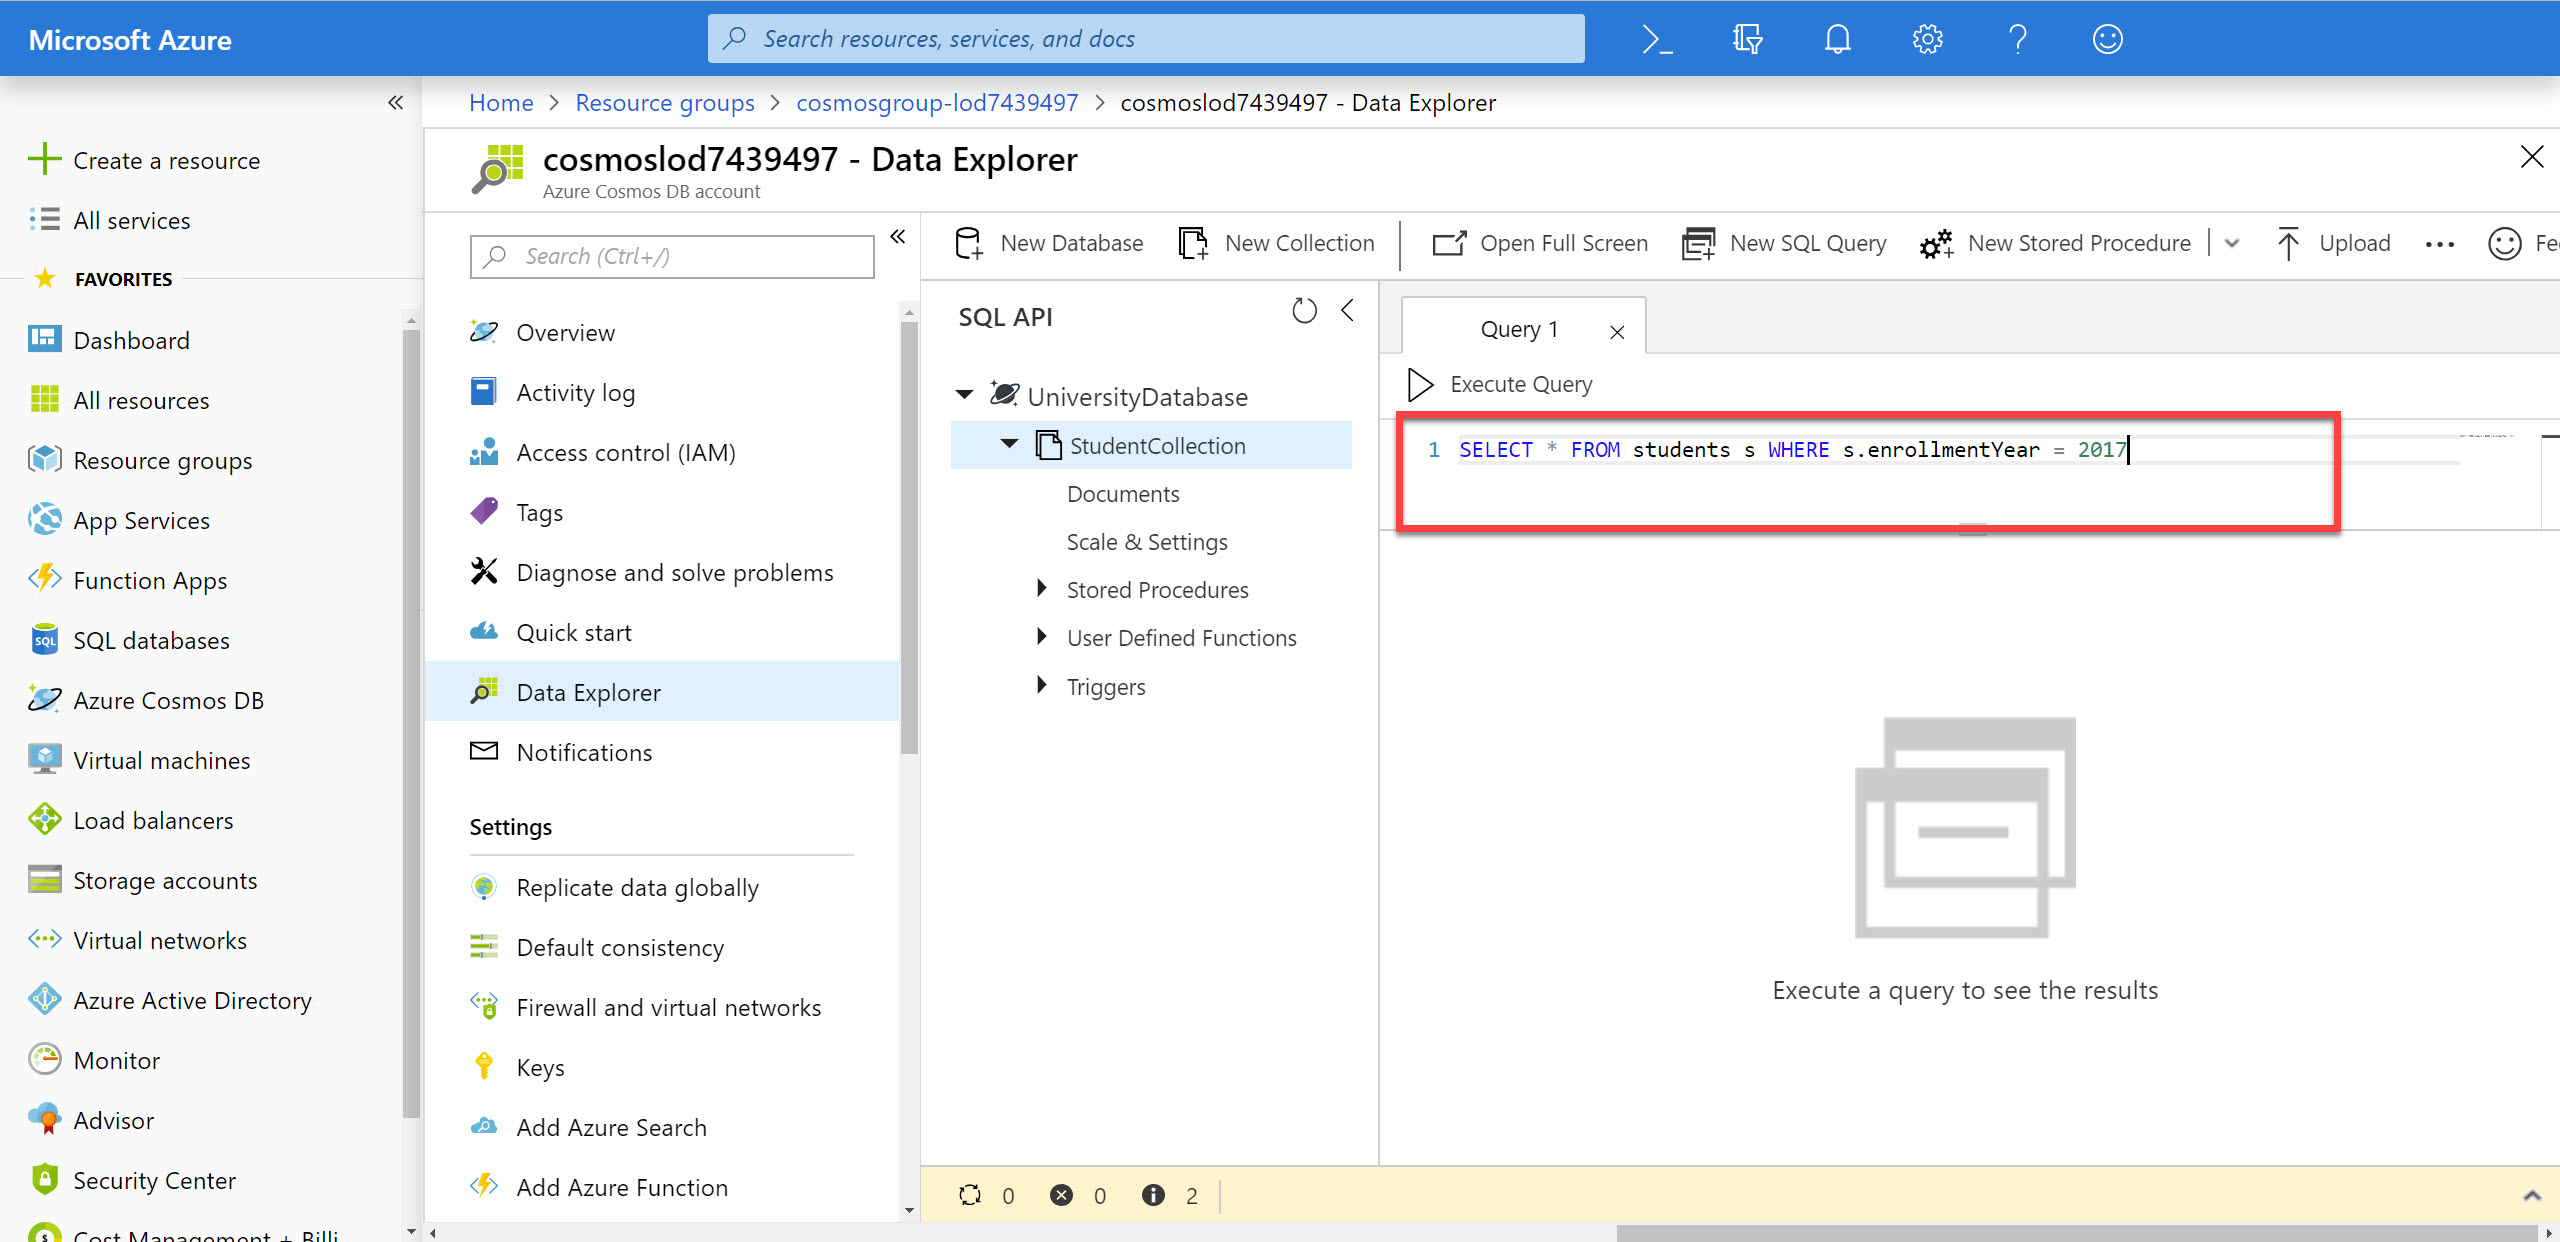
-
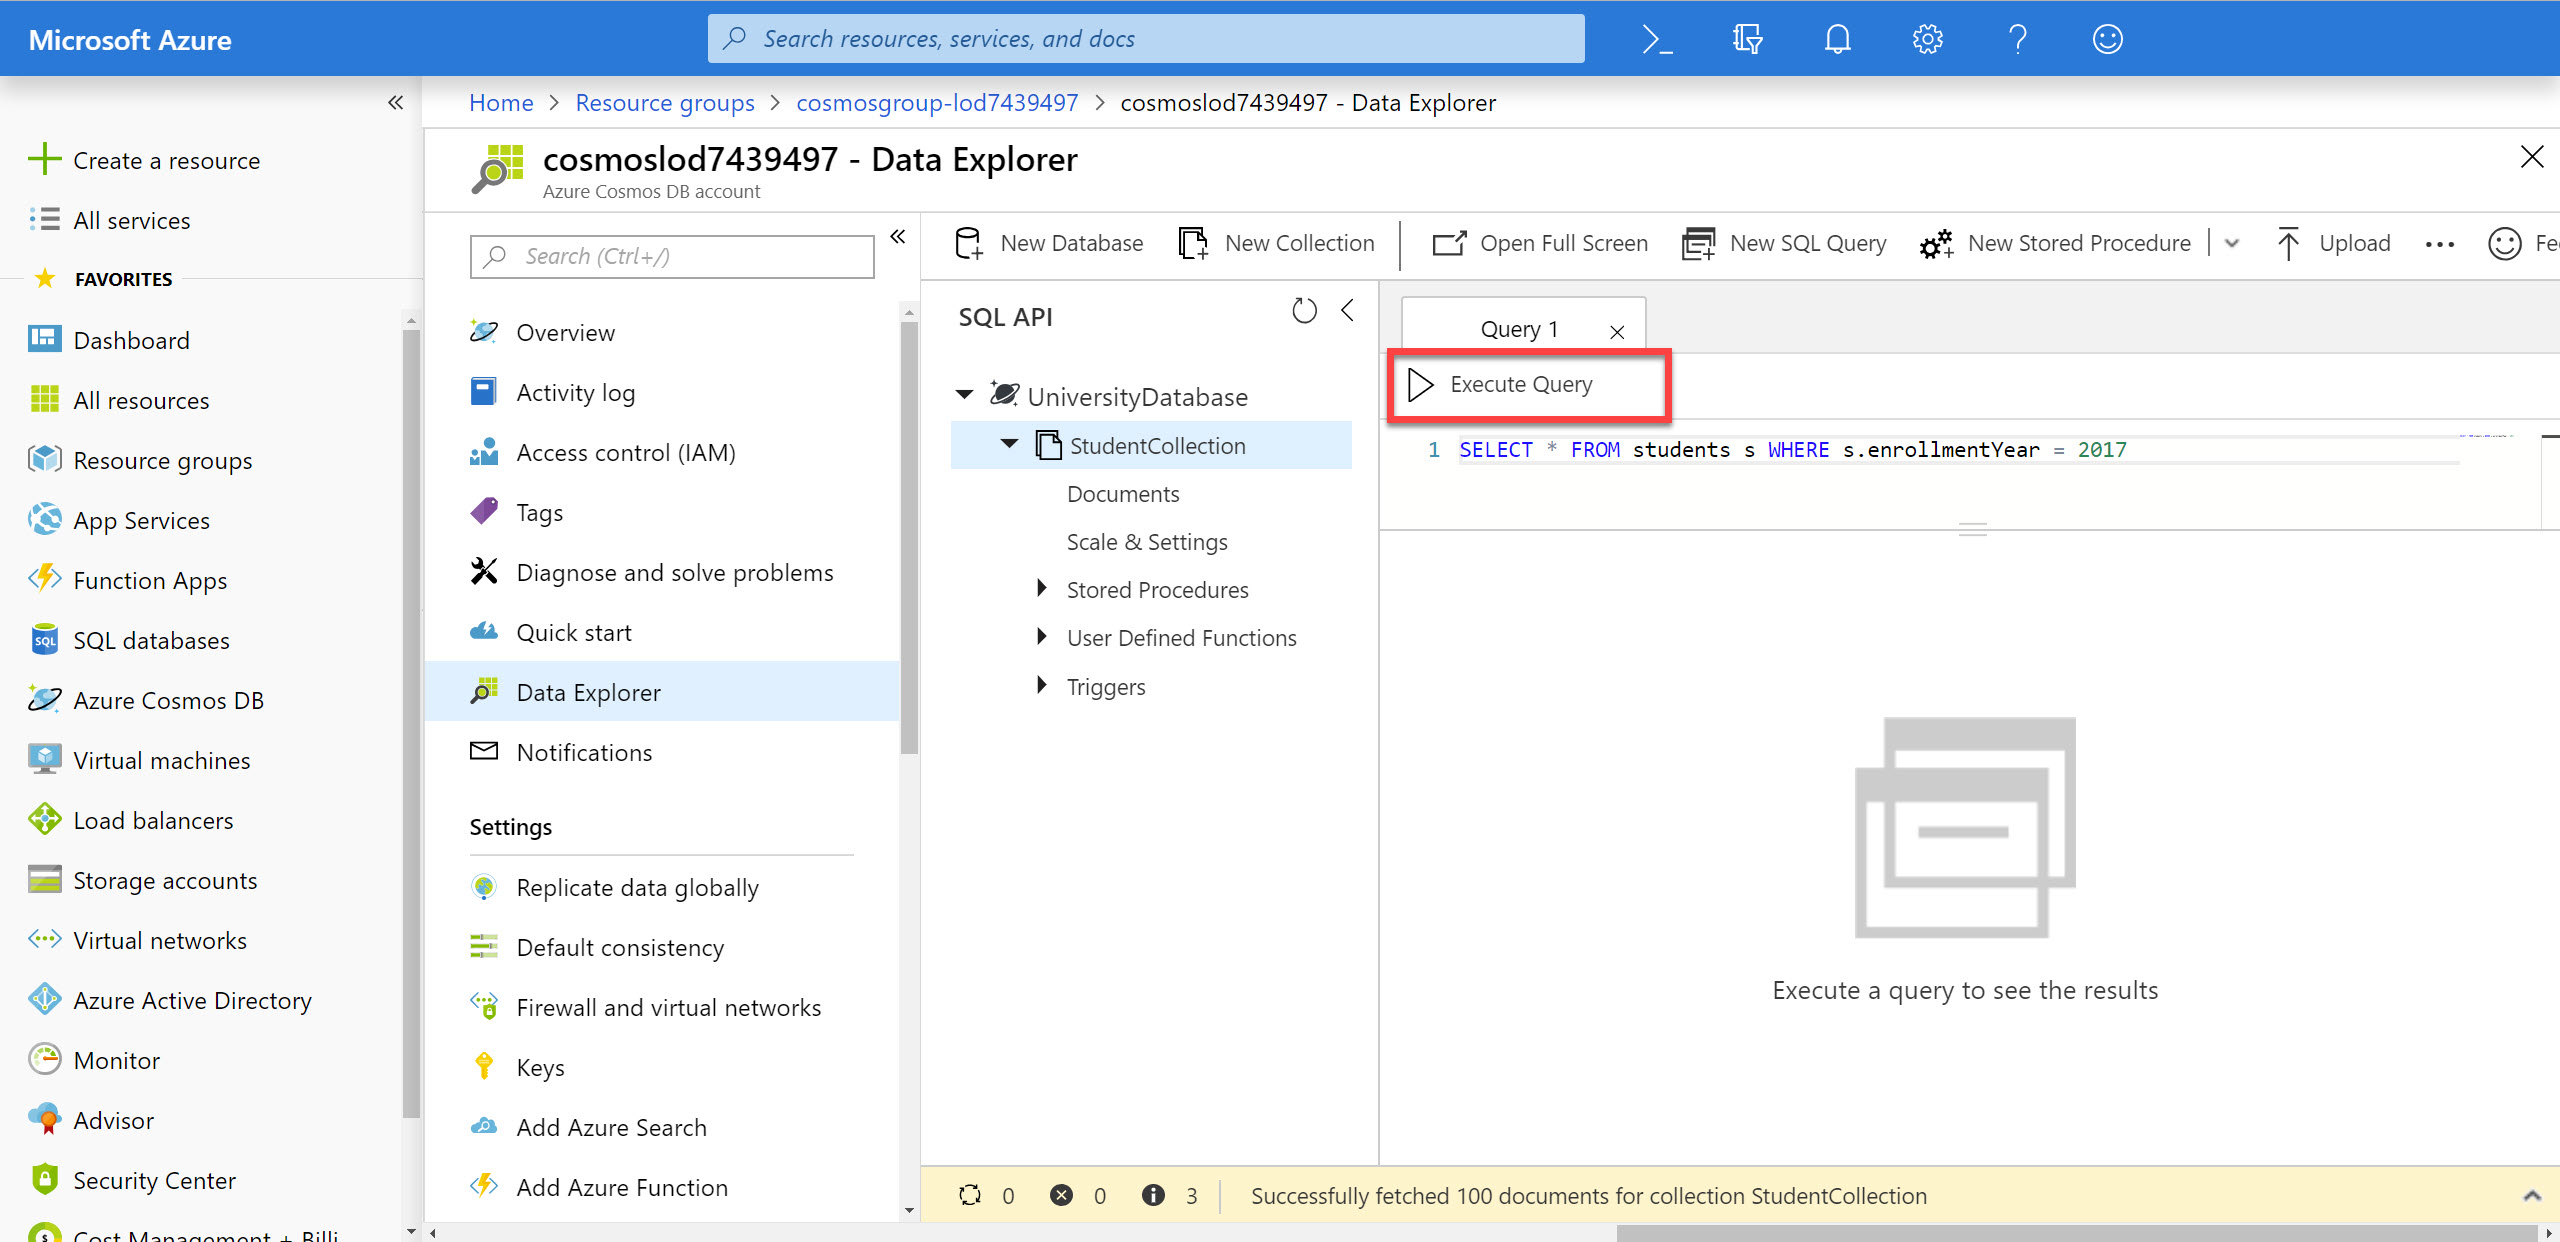
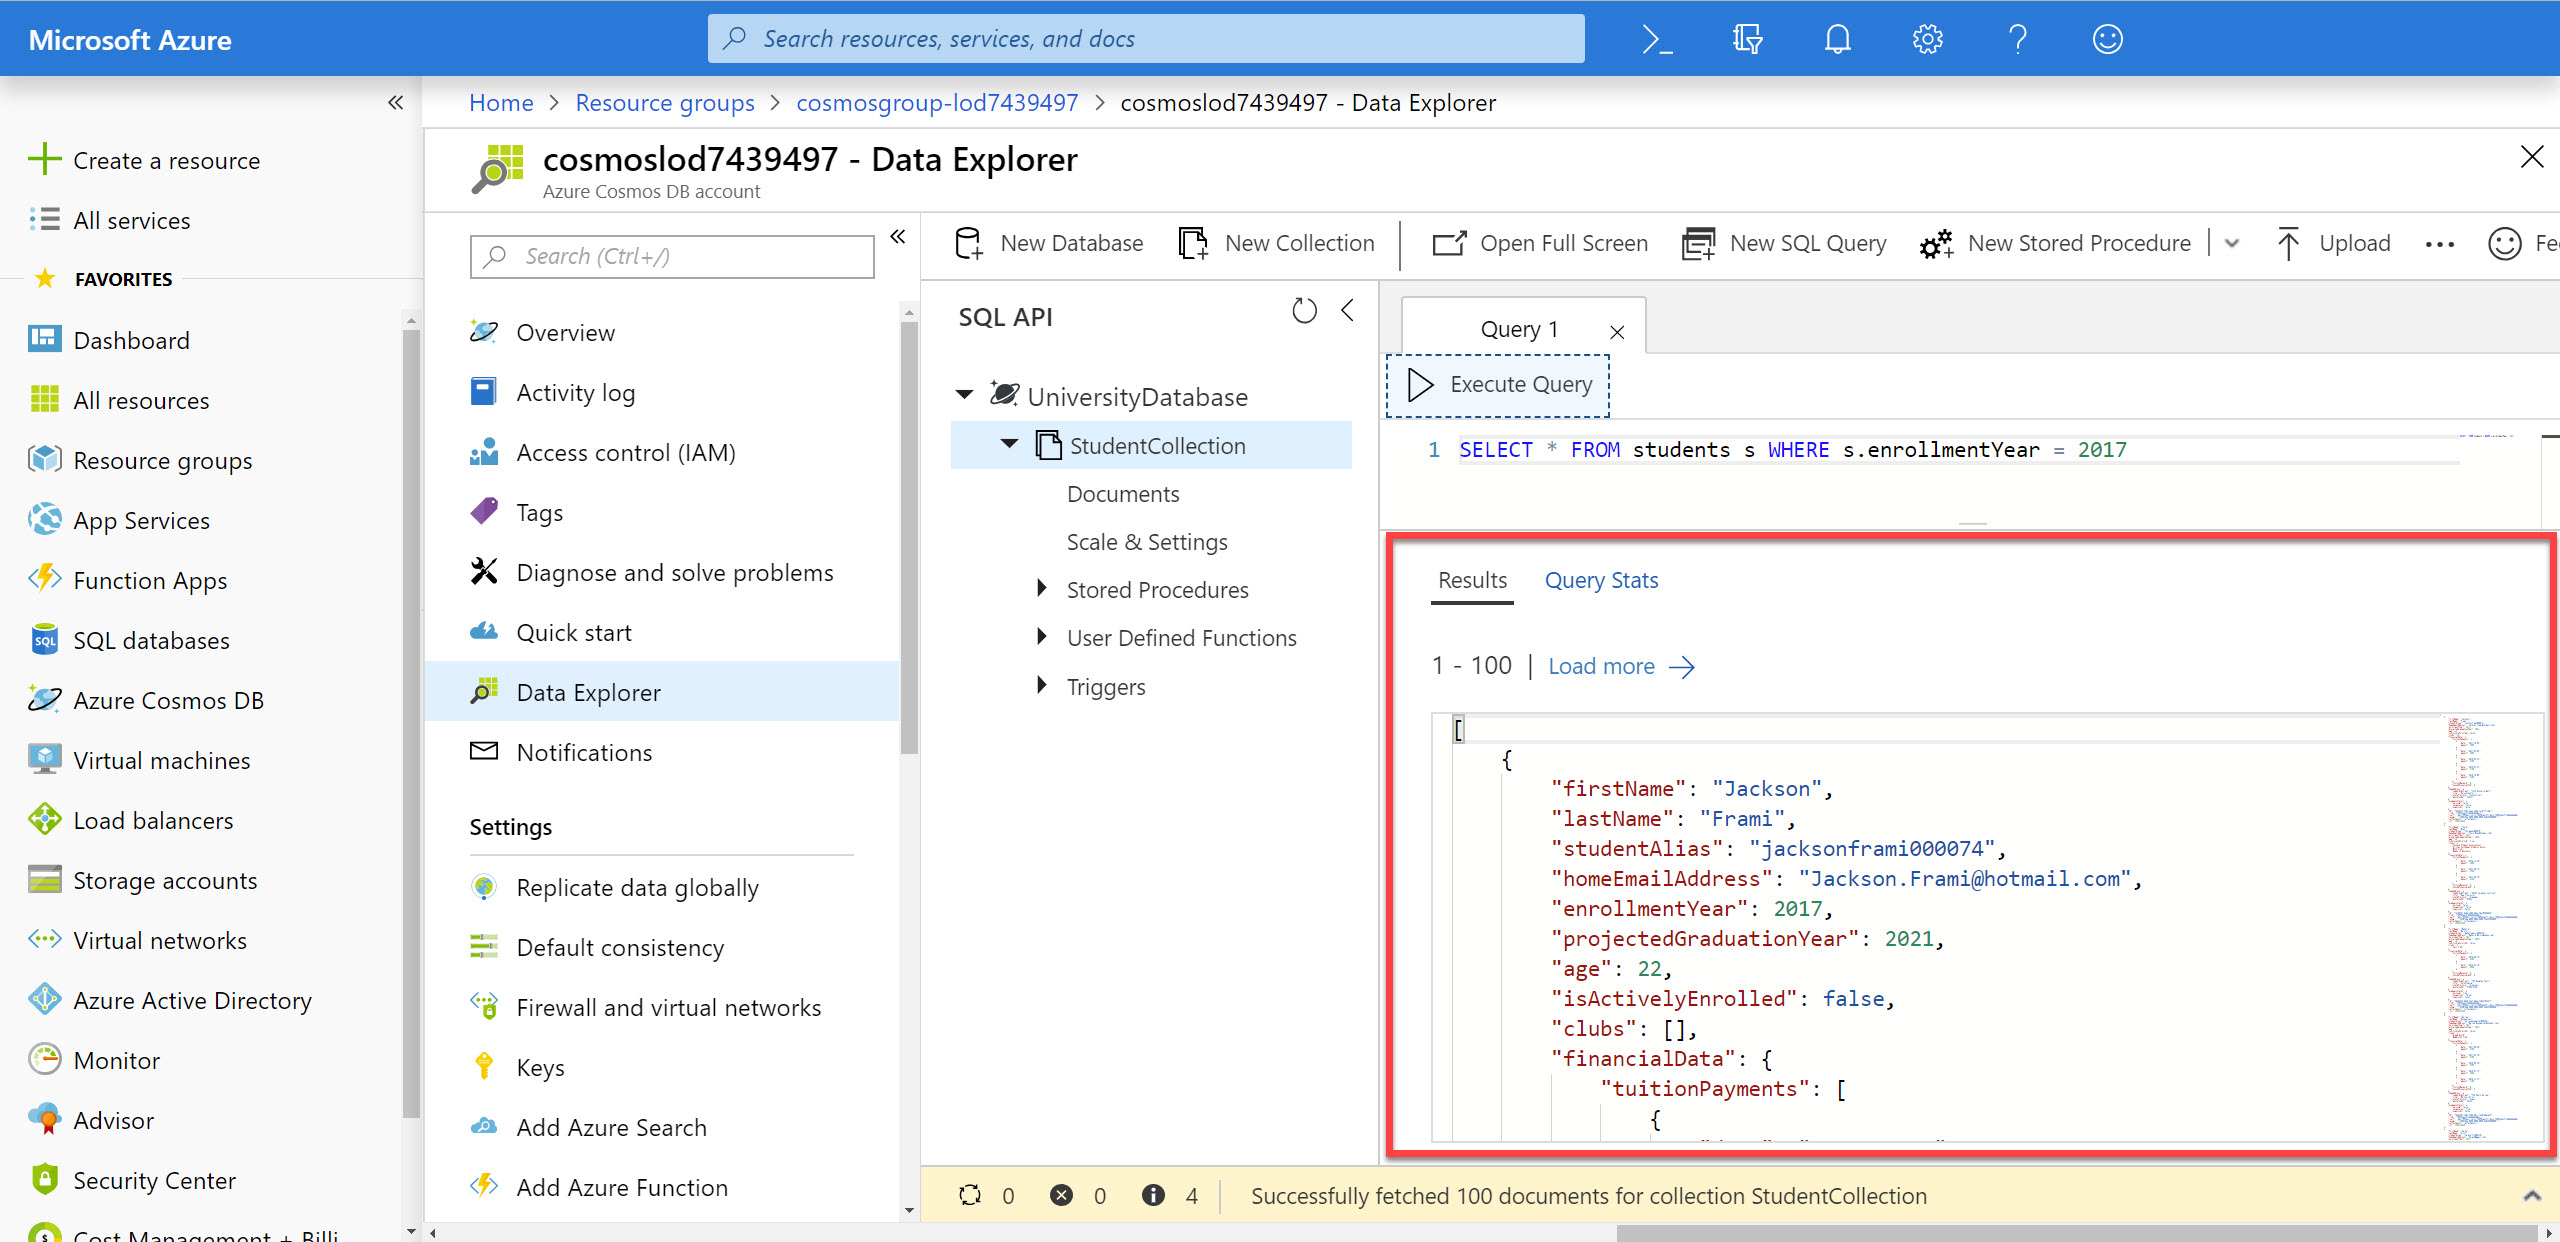
Click the Execute Query button in the query tab to run the query.
-
In the Results pane, observe the results of your query.
-
In the query editor, replace the current query with the following query:
SELECT * FROM students WHERE students.enrollmentYear = 2017In this query, we drop the
salias and use thestudentssource. When we execute this query, we should see the same results as the previous query. -
Click the Execute Query button in the query tab to run the query. In the Results pane, observe the results of your query.
-
In the query editor, replace the current query with the following query:
SELECT * FROM arbitraryname WHERE arbitraryname.enrollmentYear = 2017In this query, we will prove that the name used for the source can be any name you choose. We will use the name
arbitrarynamefor the source. When we execute this query, we should see the same results as the previous query. -
Click the Execute Query button in the query tab to run the query. In the Results pane, observe the results of your query.
-
In the query editor, replace the current query with the following query:
SELECT s.studentAlias FROM students s WHERE s.enrollmentYear = 2017Going back to
sas an alias, we will now create a query where we only select thestudentAliasproperty and return the value of that property in our result set. -
Click the Execute Query button in the query tab to run the query. In the Results pane, observe the results of your query.
-
In the query editor, replace the current query with the following query:
SELECT VALUE s.studentAlias FROM students s WHERE s.enrollmentYear = 2017In some scenarios, you may need to return a flattened array as the result of your query. This query uses the
VALUEkeyword to flatten the array by taking the single returned (string) property and creating a string array. -
Click the Execute Query button in the query tab to run the query. In the Results pane, observe the results of your query.
Implicitly Executing a Cross-Partition Query
The Data Explorer will allow you to create a cross-partition query without the need to manually configure any settings. You will now use the query editor in the Data Explorer to perform single or multi-partition queries
-
Back in the query tab, replace the contents of the query editor with the following SQL query:
SELECT * FROM students s WHERE s.enrollmentYear = 2016Since we know that our partition key is
/enrollmentYear, we know that any query that targets a single valid value for theenrollmentYearproperty will be a single partition query. -
Click the Execute Query button in the query tab to run the query. In the Results pane, observe the results of your query.
Observe the Request Charge (in RU/s) for the executed query.
-
In the query editor, replace the current query with the following query:
SELECT * FROM students sIf we want to execute a blanket query that will fan-out to all partitions, we simply can drop our
WHEREclause that filters on a single valid value for our partition key path. -
Click the Execute Query button in the query tab to run the query. In the Results pane, observe the results of your query.
Observe the Request Charge (in RU/s) for the executed query. You will notice that the charge is relatively greater for this query.
-
Back in the query tab, replace the contents of the query editor with the following SQL query:
SELECT * FROM students s WHERE s.enrollmentYear IN (2015, 2016, 2017)Observe the Request Charge (in RU/s) for the executed query. You will notice that the charge is greater than a single partition but far less than a fan-out across all partitions.
-
Click the Execute Query button in the query tab to run the query. In the Results pane, observe the results of your query.
Observe the Request Charge (in RU/s) for the executed query.
Use Built-In Functions
There are a large variety of built-in functions available in the SQL query syntax for the SQL API in Azure Cosmos DB. We will focus on a single function in this task but you can learn more about the others here: https://docs.microsoft.com/azure/cosmos-db/sql-api-sql-query-reference
-
In the query editor, replace the current query with the following query:
SELECT s.studentAlias FROM students s WHERE s.enrollmentYear = 2015Our goal is to get the school-issued e-mail address for all students who enrolled in 2015. We can issue a simple query to start that will return the login alias for each student.
-
Click the Execute Query button in the query tab to run the query. In the Results pane, observe the results of your query.
-
In the query editor, replace the current query with the following query:
SELECT CONCAT(s.studentAlias, '@contoso.edu') AS email FROM students s WHERE s.enrollmentYear = 2015To get the school-issued e-mail address, we will need to concatenate the
@contoso.edustring to the end of each alias. We can perform this action using theCONCATbuilt-in function. -
Click the Execute Query button in the query tab to run the query. In the Results pane, observe the results of your query.
-
In the query editor, replace the current query with the following query:
SELECT VALUE CONCAT(s.studentAlias, '@contoso.edu') FROM students s WHERE s.enrollmentYear = 2015In most client-side applications, you likely would only need an array of strings as opposed to an array of objects. We can use the
VALUEkeyword here to flatten our result set. -
Click the Execute Query button in the query tab to run the query. In the Results pane, observe the results of your query.
Projecting Query Results
In some use cases, we may need to reshape the structure of our result JSON array to a structure that our libraries or third-party APIs can parse. We will focus on a single query and re-shape the results into various formats using the native JSON capabilities in the SQL query syntax.
-
In the query editor, replace the current query with the following query:
 SELECT
     CONCAT(s.firstName, " ", s.lastName),
     s.academicStatus.warning,
     s.academicStatus.suspension,
     s.academicStatus.expulsion,
     s.enrollmentYear,
     s.projectedGraduationYear
 FROM students s WHERE s.enrollmentYear = 2014
In this first query, we want to determine the current status of every student who enrolled in 2014. Our goal here is to eventually have a flattened, simple-to-understand view of every student and their current academic status.
-
Click the Execute Query button in the query tab to run the query. In the Results pane, observe the results of your query.
You will quickly notice that the value representing the name of the student, using the
CONCATfunction, has a placeholder property name instead of a simple string. -
In the query editor, replace the current query with the following query:
 SELECT
     CONCAT(s.firstName, " ", s.lastName) AS name,
     s.academicStatus.warning,
     s.academicStatus.suspension,
     s.academicStatus.expulsion,
     s.enrollmentYear,
     s.projectedGraduationYear
 FROM students s WHERE s.enrollmentYear = 2014
We will update our previous query by naming our property that uses a built-in function.
-
Click the Execute Query button in the query tab to run the query. In the Results pane, observe the results of your query.
-
In the query editor, replace the current query with the following query:
 SELECT {
     "name": CONCAT(s.firstName, " ", s.lastName),
     "isWarned": s.academicStatus.warning,
     "isSuspended": s.academicStatus.suspension,
     "isExpelled": s.academicStatus.expulsion,
     "enrollment": {
         "start": s.enrollmentYear,
         "end": s.projectedGraduationYear
     }
 } AS studentStatus
 FROM students s WHERE s.enrollmentYear = 2014
Another alternative way to specify the structure of our JSON document is to use the curly braces from JSON. At this point, we are defining the structure of the JSON result directly in our query.
-
Click the Execute Query button in the query tab to run the query. In the Results pane, observe the results of your query.
You should notice that our JSON object is still “wrapped” in another JSON object. Essentially, we have an array of the parent type with a property named
studentStatusthat contains the actual data we want. -
In the query editor, replace the current query with the following query:
 SELECT VALUE {
     "name": CONCAT(s.firstName, " ", s.lastName),
     "isWarned": s.academicStatus.warning,
     "isSuspended": s.academicStatus.suspension,
     "isExpelled": s.academicStatus.expulsion,
     "enrollment": {
         "start": s.enrollmentYear,
         "end": s.projectedGraduationYear
     }
 } FROM students s WHERE s.enrollmentYear = 2014
If we want to “unwrap” our JSON data and flatten to a simple array of like-structured objects, we need to use the
VALUEkeyword. -
Click the Execute Query button in the query tab to run the query. In the Results pane, observe the results of your query.
Use Java Async SDK to Query Azure Cosmos DB
After using the Azure Portal’s Data Explorer to query an Azure Cosmos DB collection, you are now going to use the Java Async SDK to issue similar queries.
Create a Java Project
-
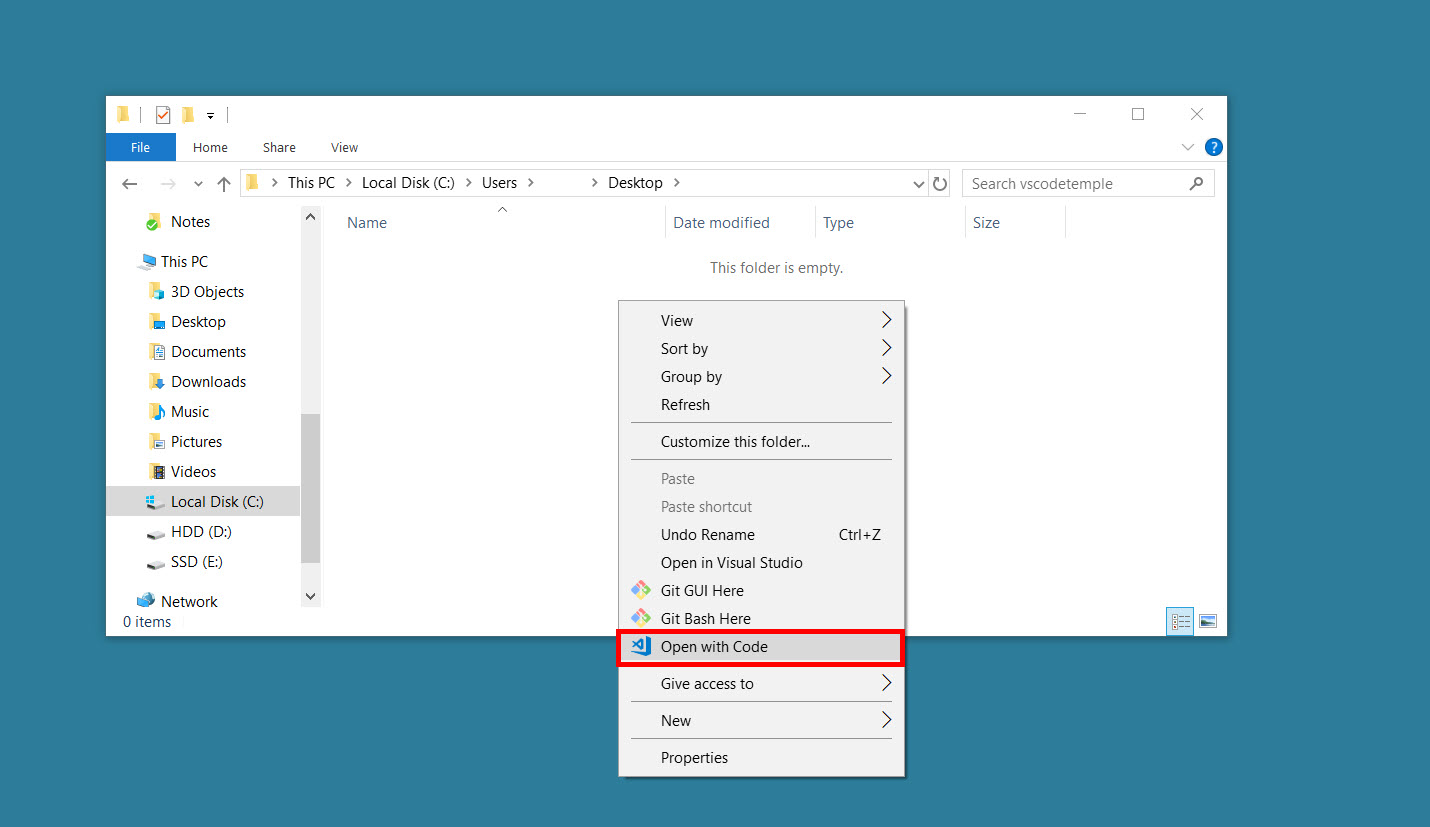
On your local machine, create a new folder that will be used to contain the content of your Java project.
-
In the new folder, right-click the folder and select the Open with Code menu option.
Alternatively, you can run a command prompt in your current directory and execute the
code .command. -
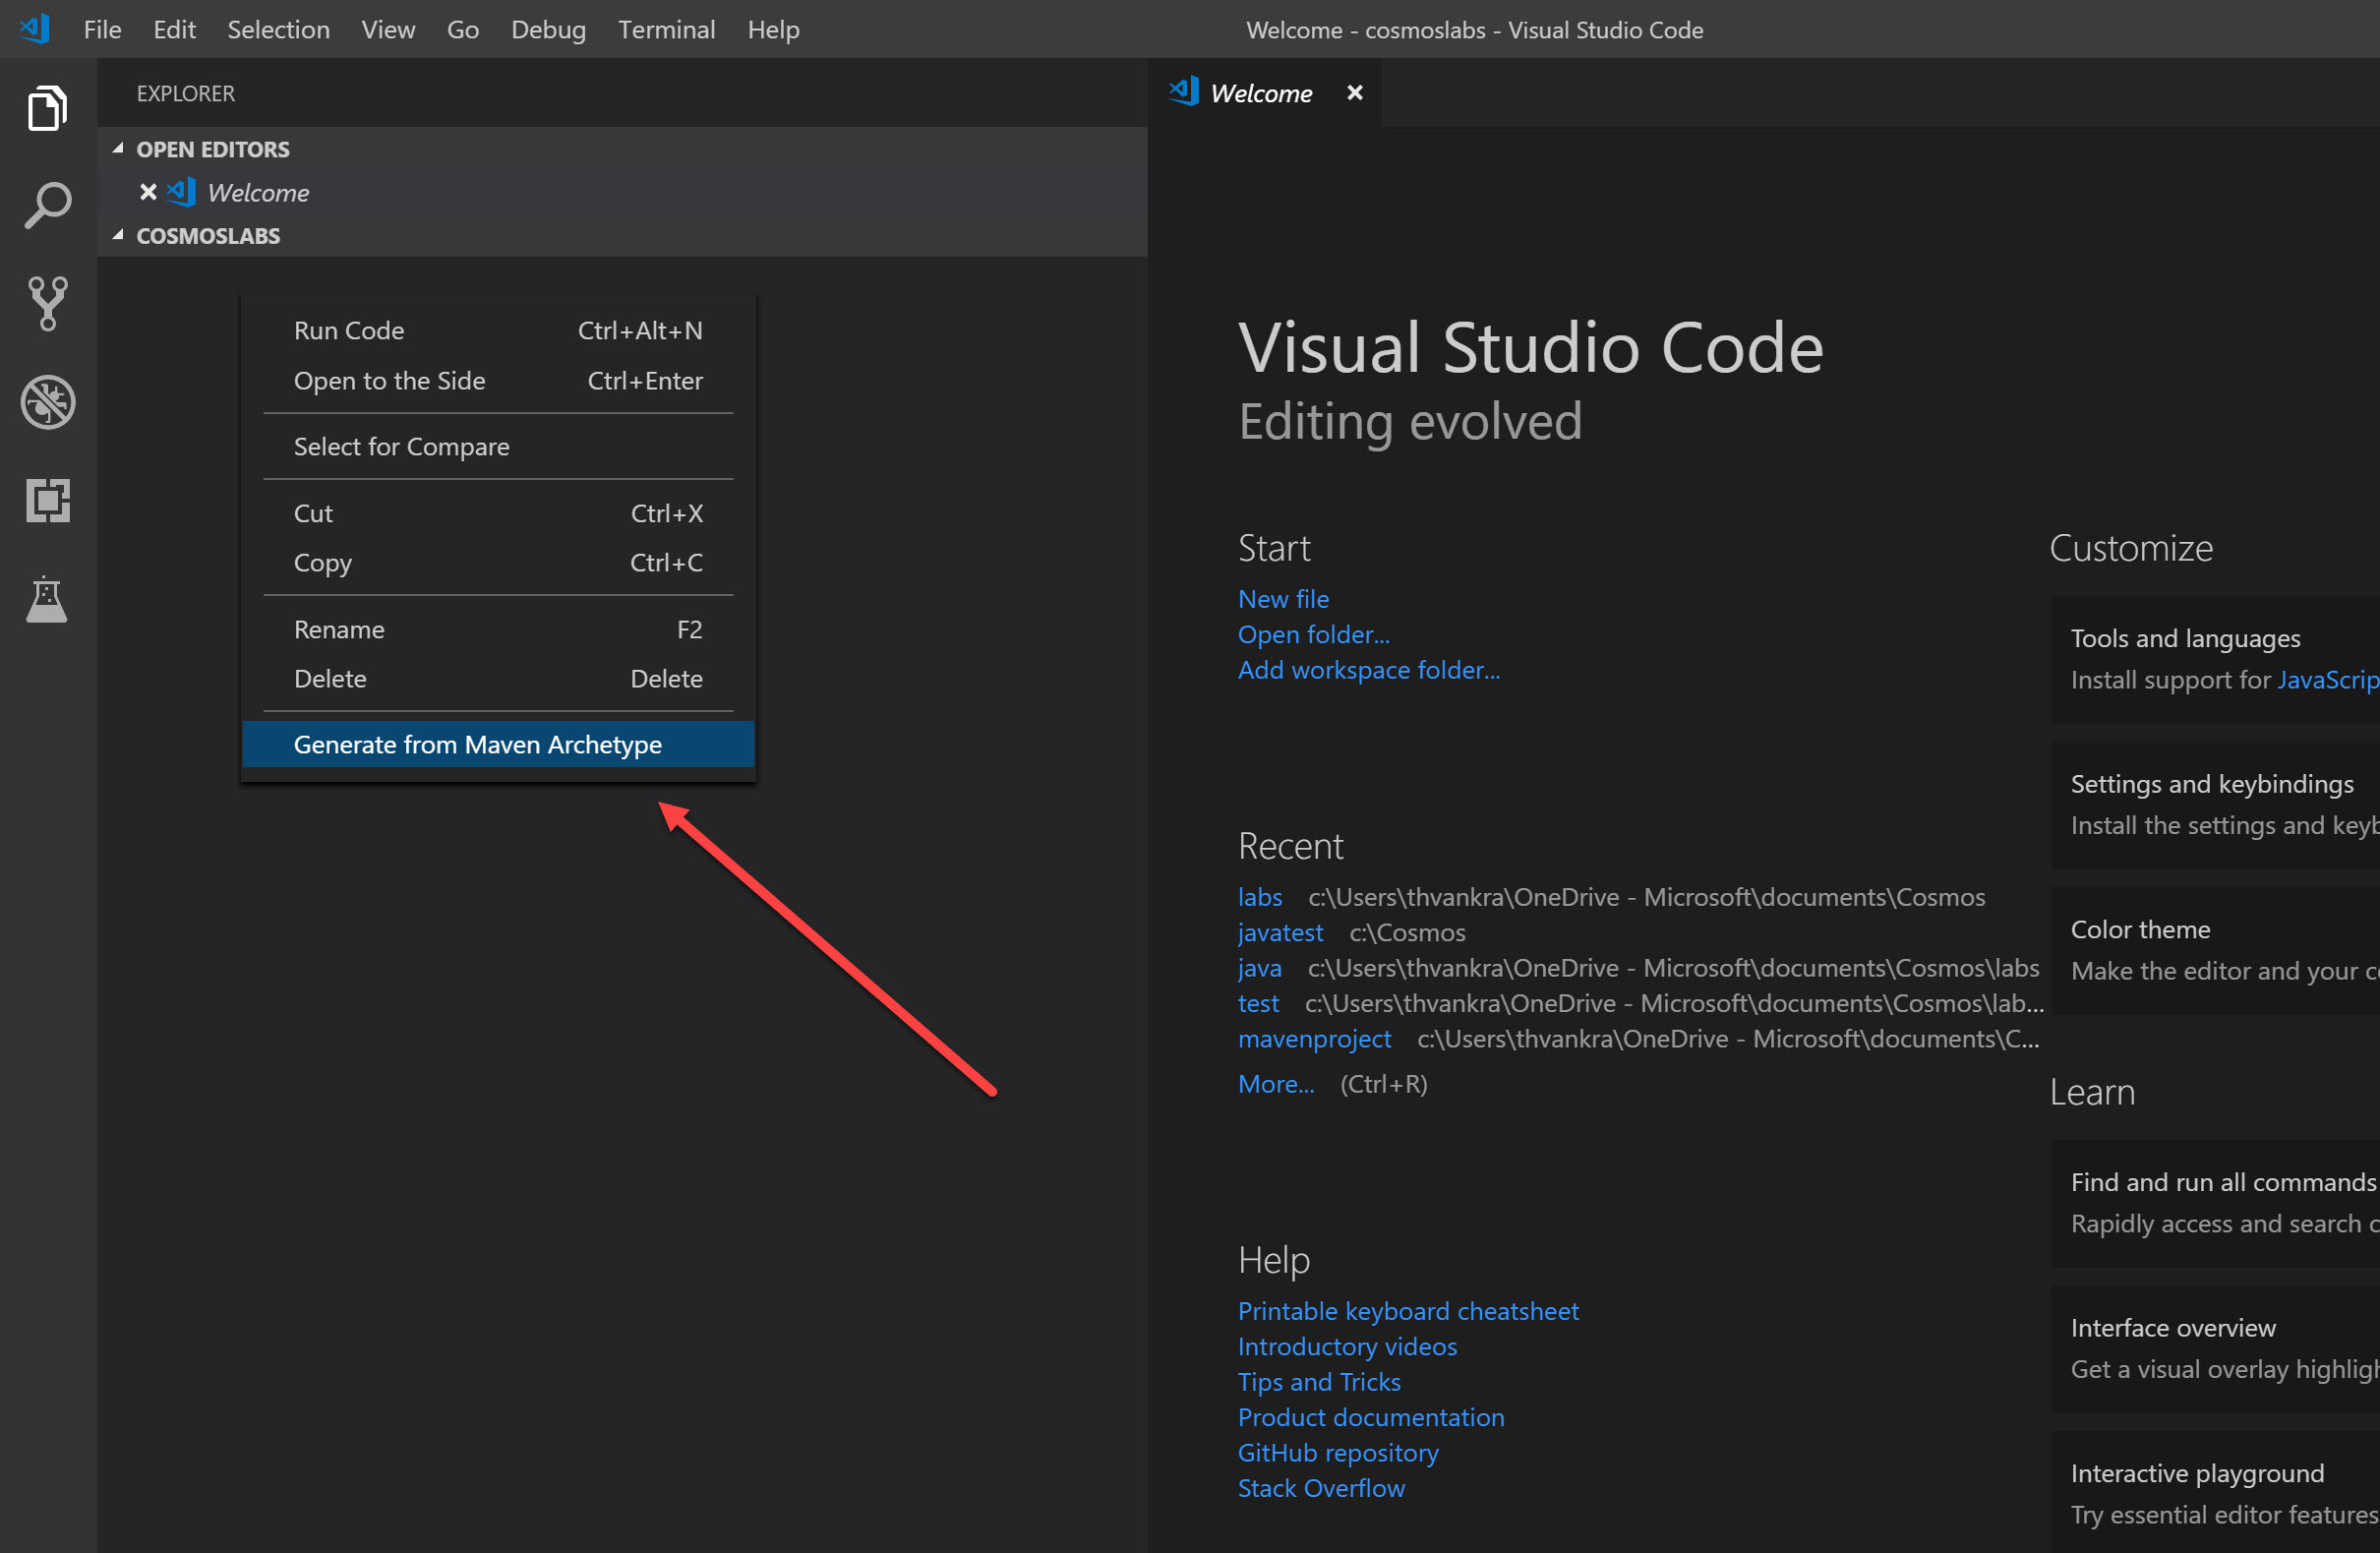
In the Visual Studio Code window that appears, right-click the Explorer under the folder you created, and select “Generate from Maven Archetype”:
-
From the options that appear, select “maven-archetype-quickstart”, and then select the directory you created for the project when prompted. Maven will then prompt you to provide values for group id, artifact id, version, package. Fill these in when prompted and then confirm:

-
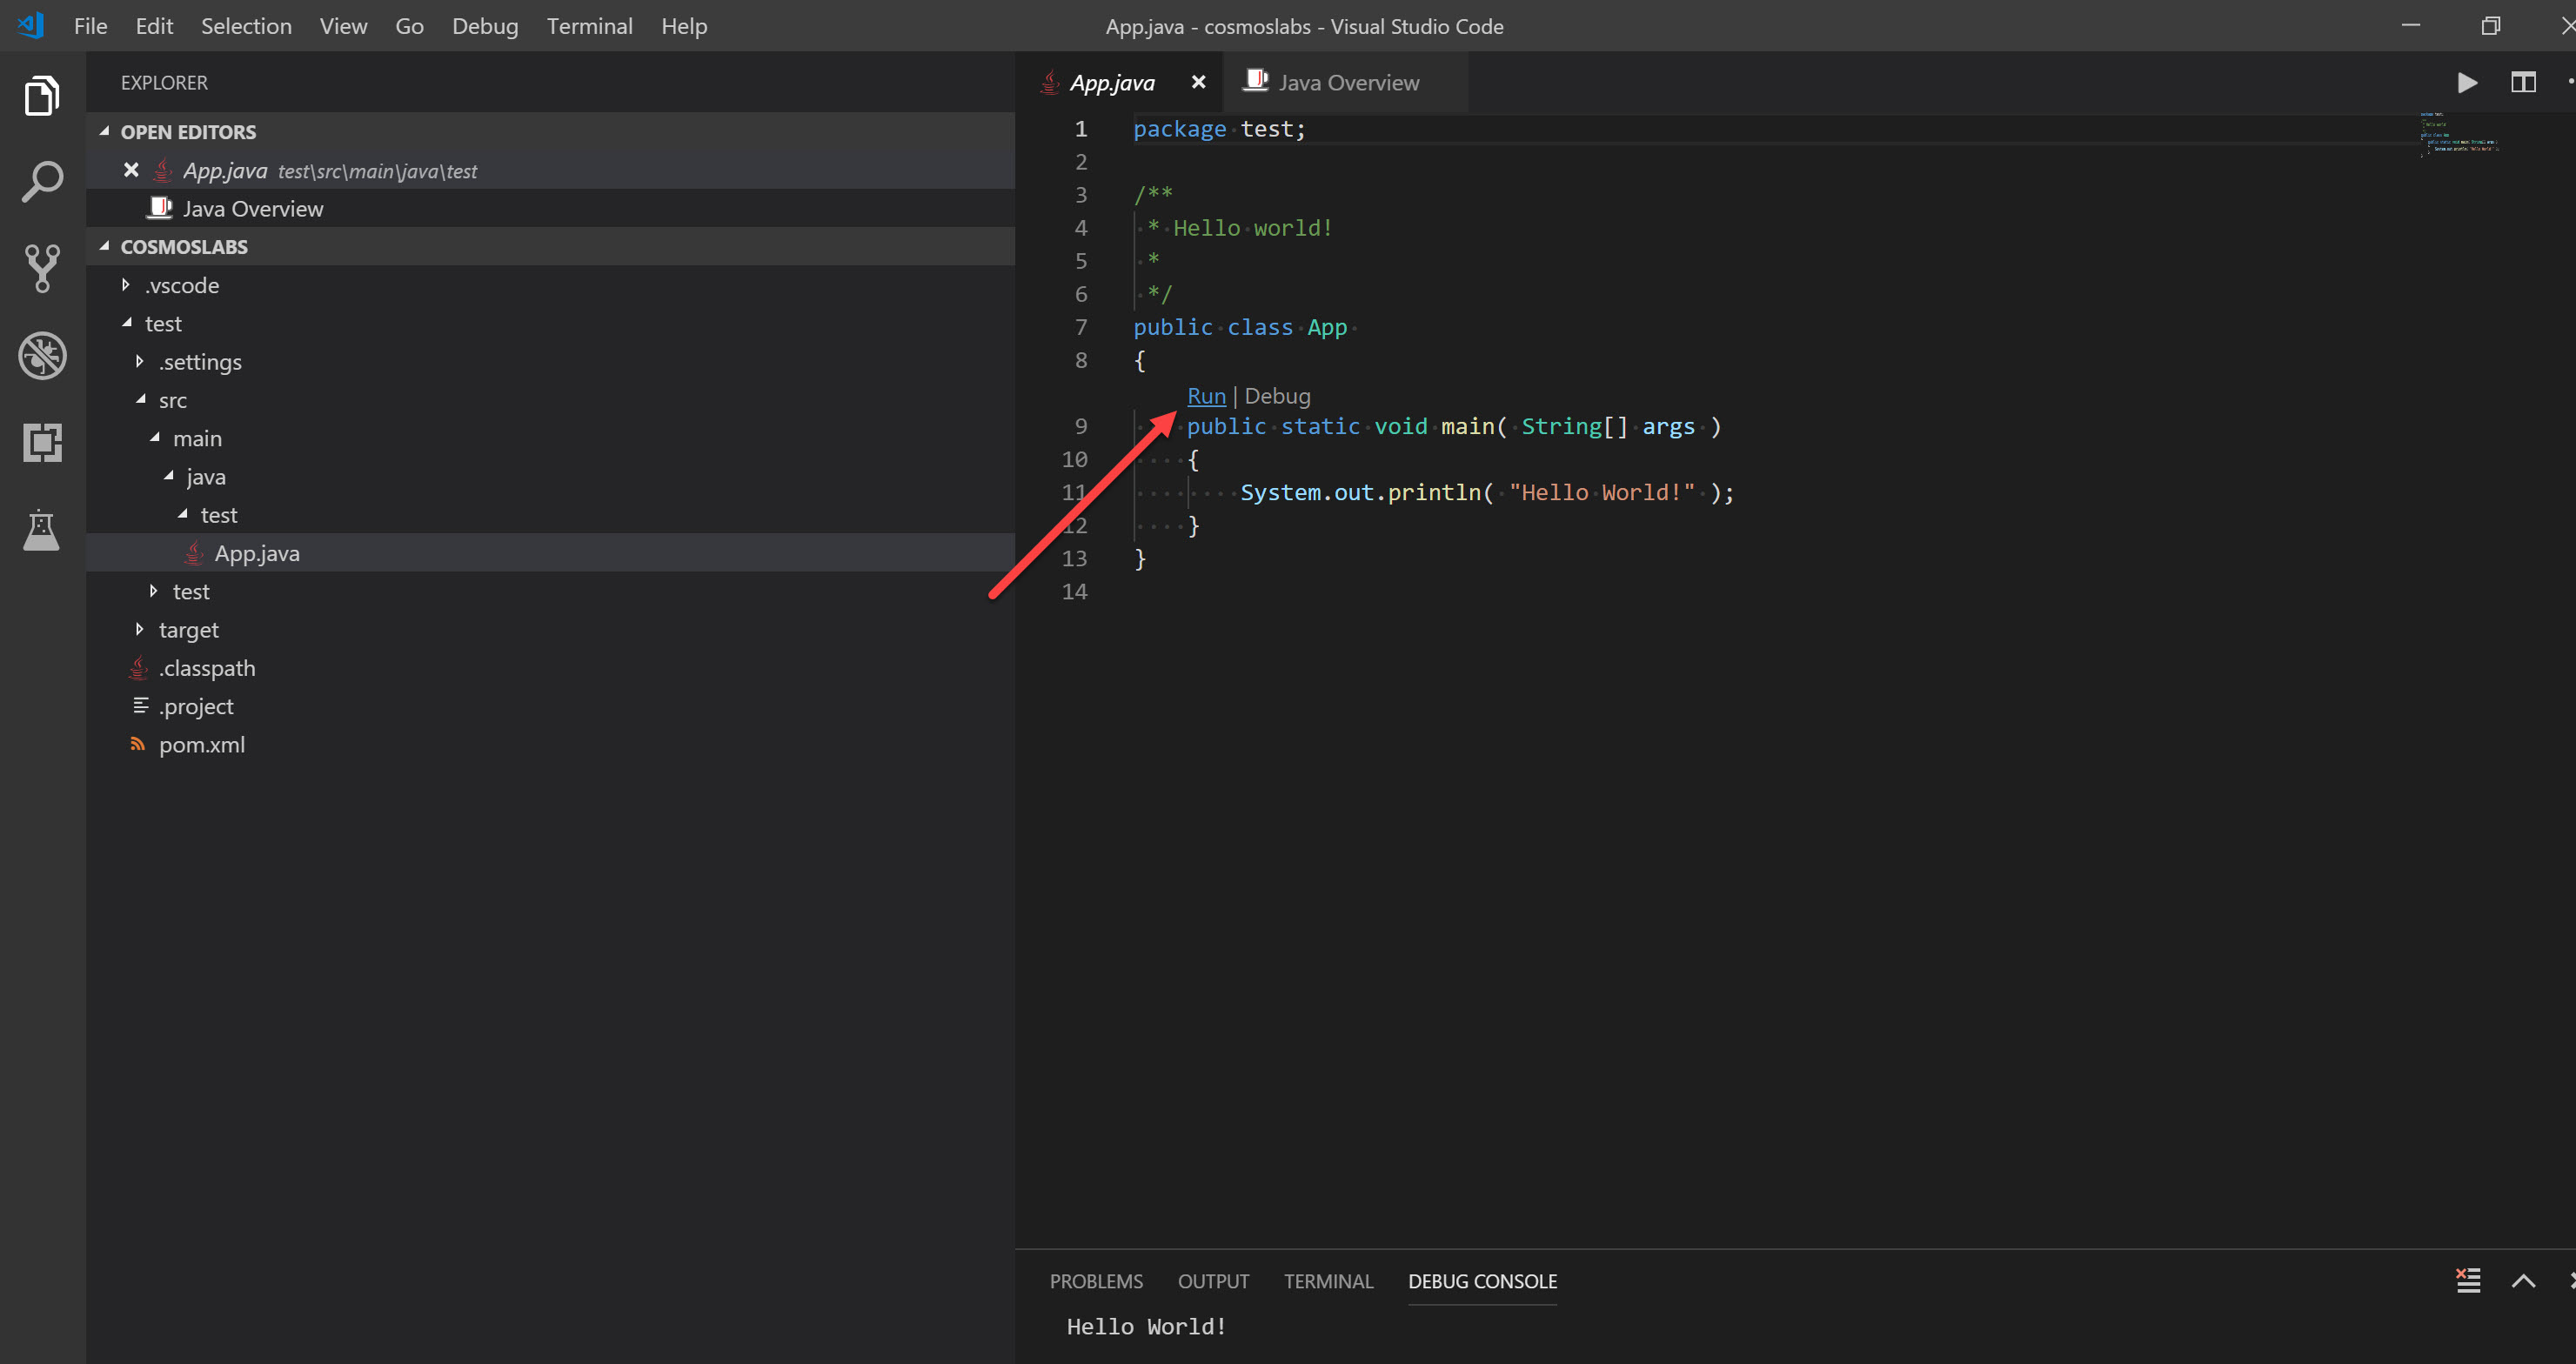
Once confirmed, Maven will create the project, and provide a sample App.java. For any Java class created in the project, VS Code’s Java Extension will provide “run” and “debug” links directly in the code. Clicking “run” will compile and run your Java code:
-
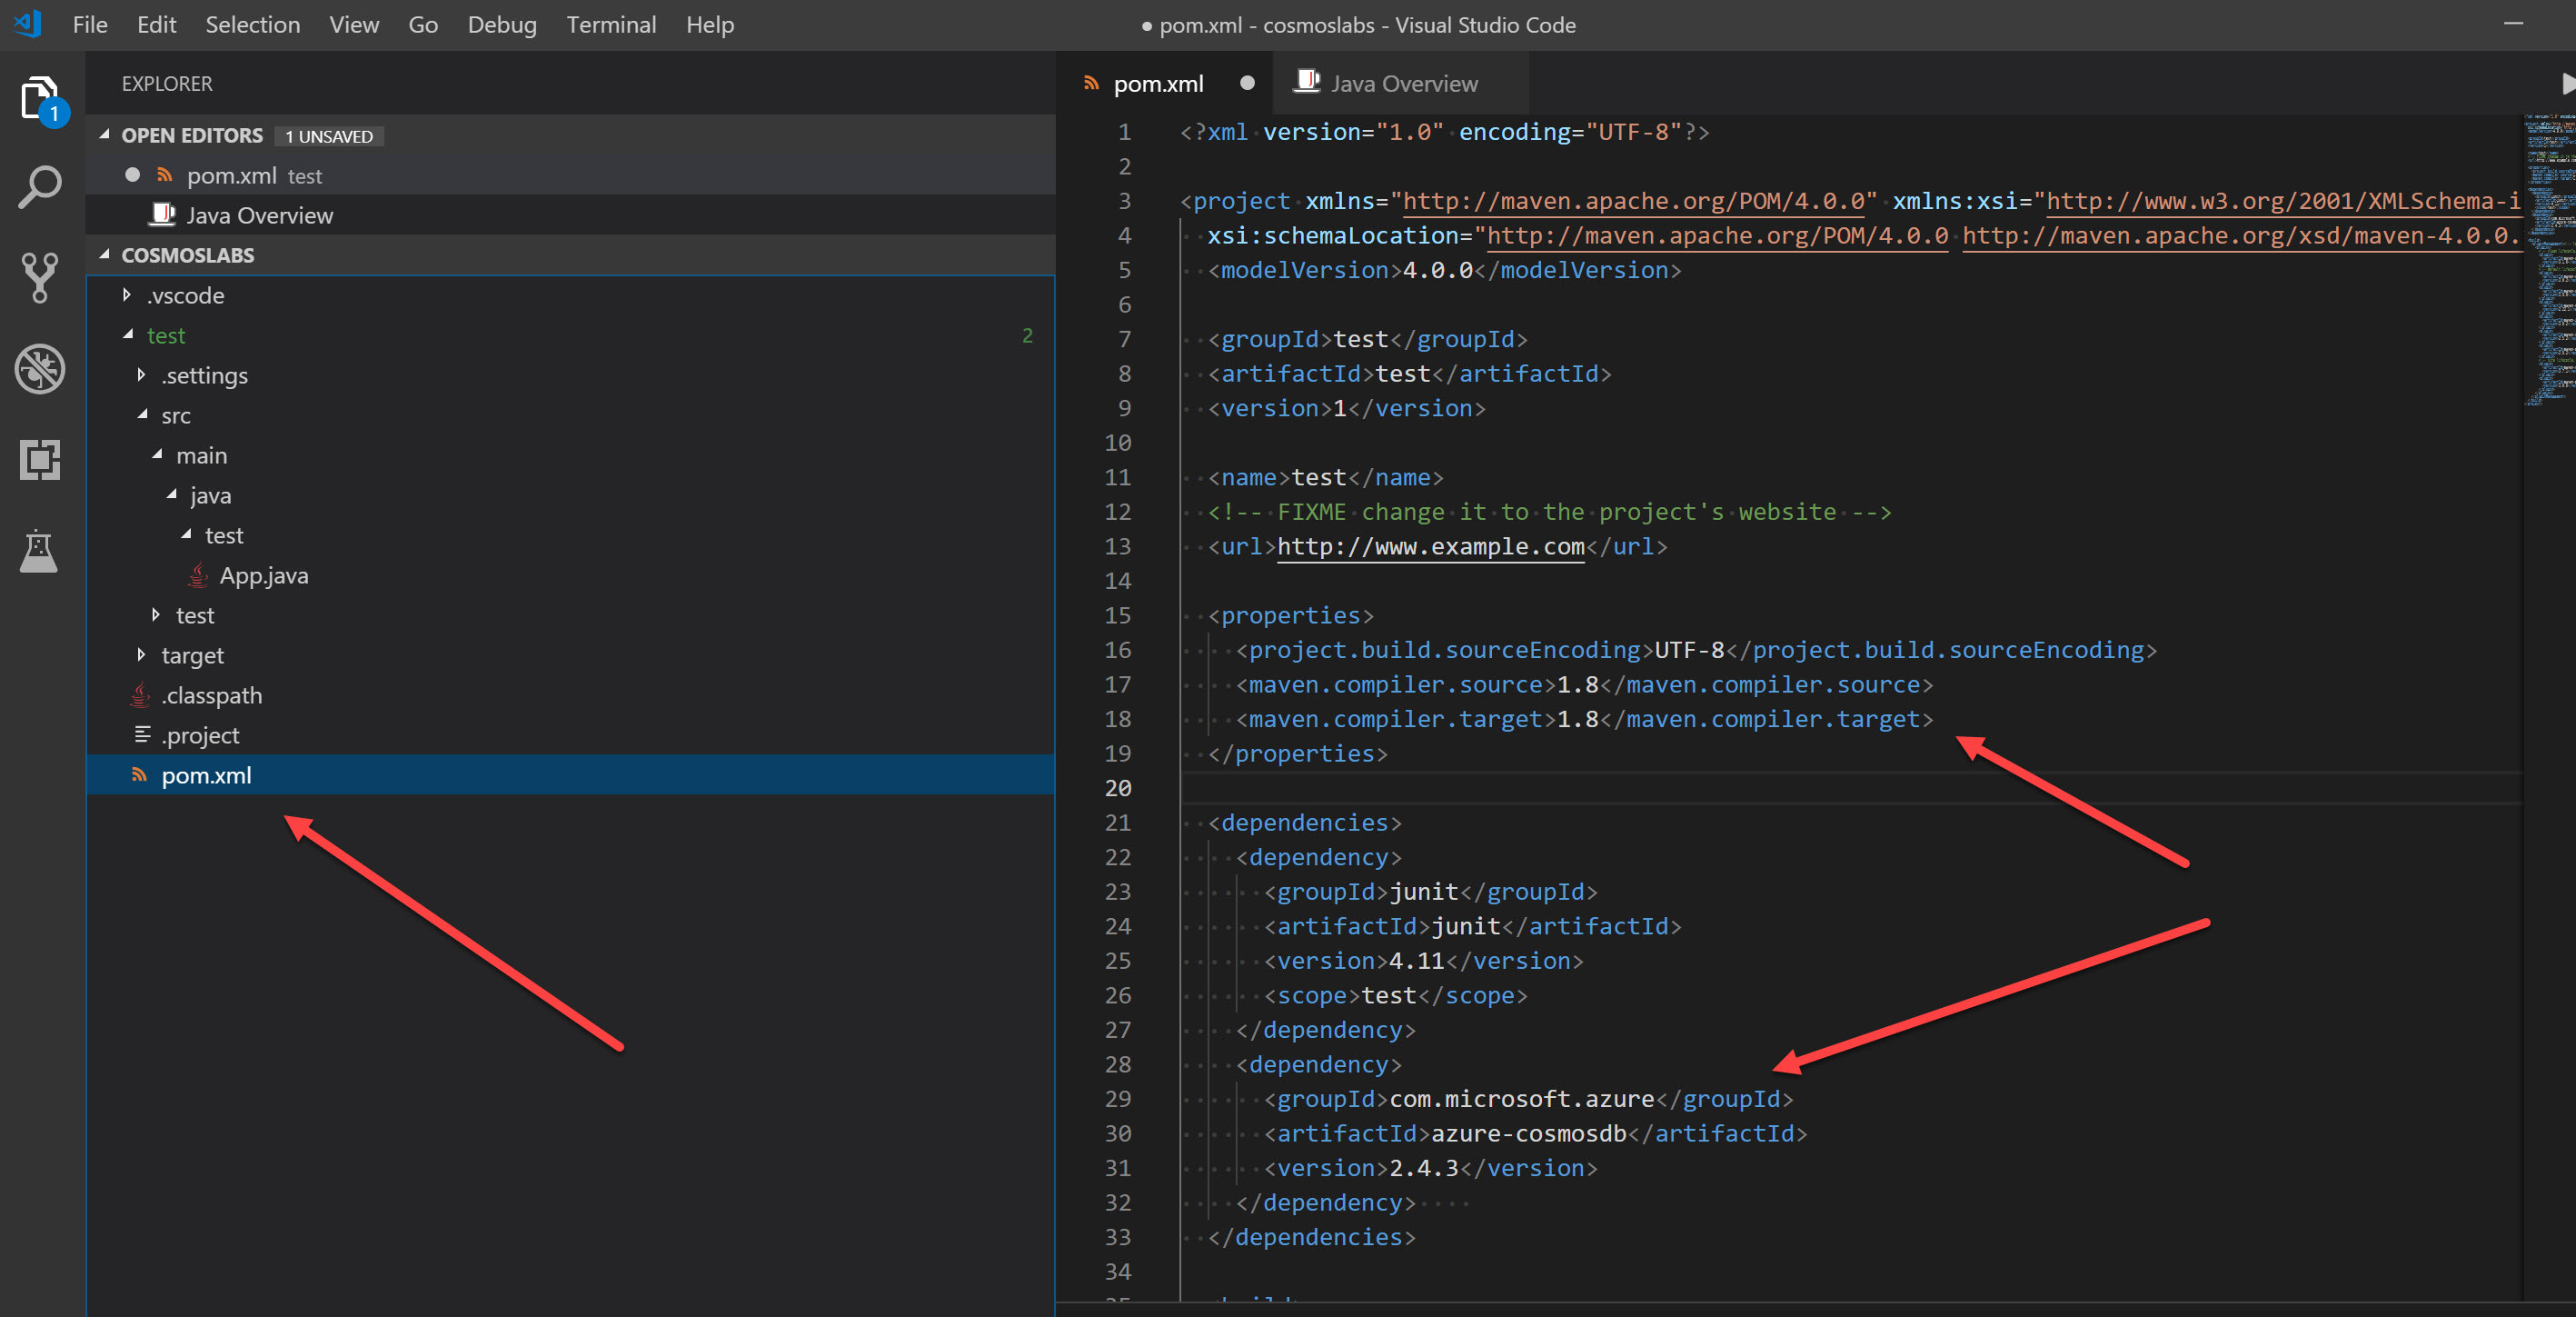
To add the Maven project dependancies required to work with Cosmos DB, you should add the following into the pom.xml file located at the bottom of your project, within the dependancies section:
<dependency> <groupId>com.microsoft.azure</groupId> <artifactId>azure-cosmosdb</artifactId> <version>2.4.3</version> </dependency> -
For this tutorial, you will also need to change the source and target compiler versions to Java 1.8, as we will use some lambda syntax which is only supported from Java 8 onwards. When finished, your pom.xml should look like the below:
-
Once the changes are applied, ensure you click file -> save all. At this point, VS Code will recognise that you modified the pom.xml build file. Ensure that you accept the prompt to sync the dependancies:

Once the dependencies are pulled down, you will be ready to start writing Java code for Cosmos DB.
Create AsyncDocumentClient Instance and Database
The AsyncDocumentClient class is the main “entry point” to using the SQL API in Azure Cosmos DB. We are going to create an instance of the AsyncDocumentClient class by passing in connection metadata as parameters of the class’ constructor. We will then use this class instance throughout the lab.
-
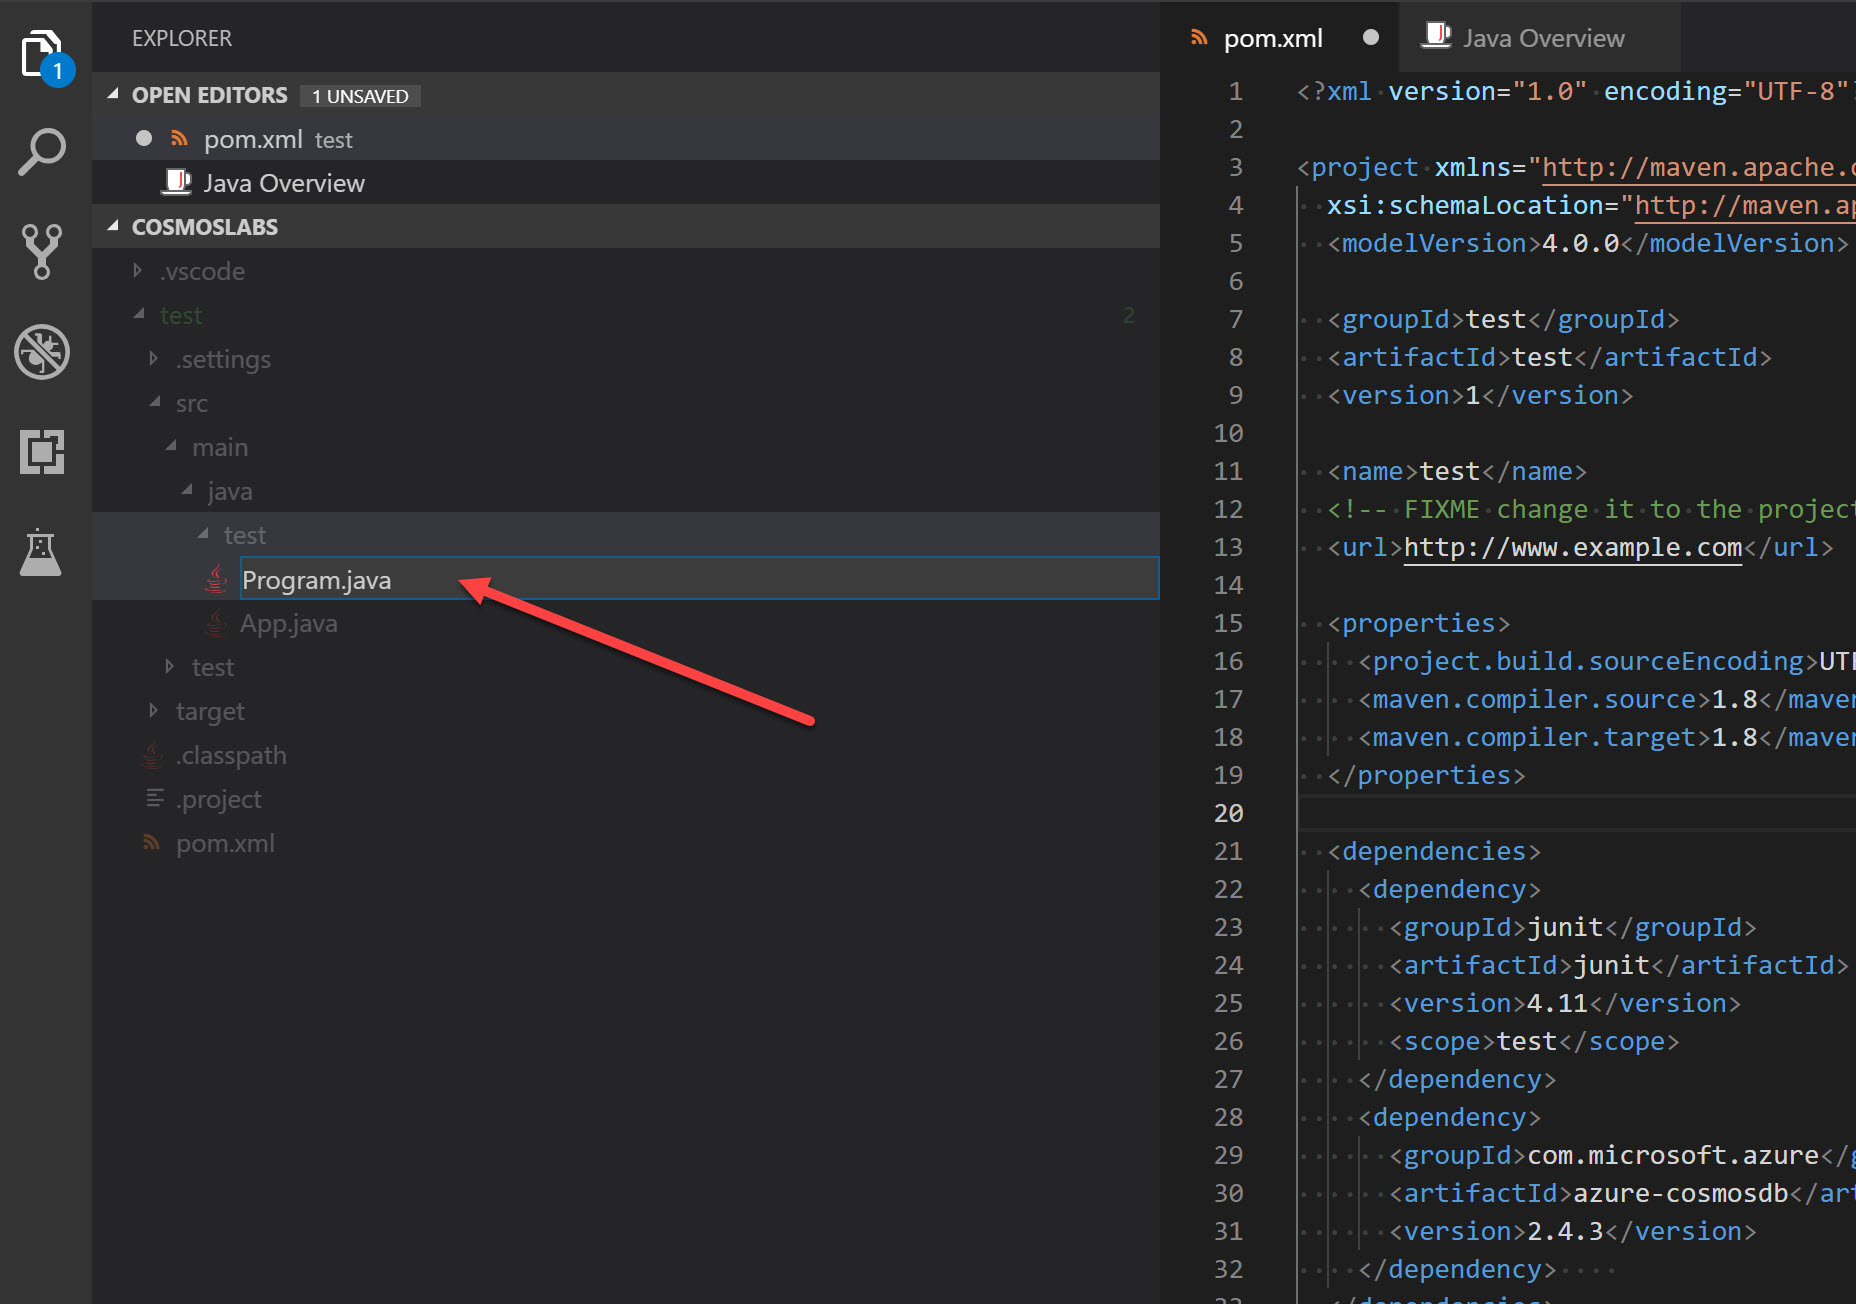
At the same level as the default “App.java” file that already exists, right click and create a new file called “Program.java”:
-
Within the Program.java editor tab, Add the package declaration (which will need to match the path you created for your maven project, if not “test” as in the sample shown here) and the following imports to the top of the editor:
package test; import java.util.ArrayList; import java.util.Collection; import java.util.Collections; import java.util.Iterator; import java.util.List; import java.util.concurrent.CountDownLatch; import java.util.concurrent.ExecutorService; import java.util.concurrent.Executors; import com.microsoft.azure.cosmosdb.ConnectionPolicy; import com.microsoft.azure.cosmosdb.ConsistencyLevel; import com.microsoft.azure.cosmosdb.DataType; import com.microsoft.azure.cosmosdb.Database; import com.microsoft.azure.cosmosdb.Document; import com.microsoft.azure.cosmosdb.DocumentClientException; import com.microsoft.azure.cosmosdb.DocumentCollection; import com.microsoft.azure.cosmosdb.FeedOptions; import com.microsoft.azure.cosmosdb.FeedResponse; import com.microsoft.azure.cosmosdb.IncludedPath; import com.microsoft.azure.cosmosdb.Index; import com.microsoft.azure.cosmosdb.IndexingPolicy; import com.microsoft.azure.cosmosdb.PartitionKeyDefinition; import com.microsoft.azure.cosmosdb.RequestOptions; import com.microsoft.azure.cosmosdb.ResourceResponse; import com.microsoft.azure.cosmosdb.internal.HttpConstants; import com.microsoft.azure.cosmosdb.rx.AsyncDocumentClient; import org.json.JSONArray; import org.json.JSONException; import org.json.JSONObject; import rx.Observable; import rx.Scheduler; import rx.schedulers.Schedulers; -
Create a Program class in the Program.java file as below, with the following class variables, a public constructor and main method:
public class Program { public Program() { //public constructor } public static void main(String[] args) throws InterruptedException, JSONException { } } -
Within the Program class, add the following lines of code to create variables for your connection information:
private final ExecutorService executorService; private final Scheduler scheduler; private AsyncDocumentClient client; private final String databaseName = "UniversityDatabase"; private final String collectionId = "StudentCollection"; -
Locate the Program class constructor:
public Program() { //public constructor } -
Within the constructor, add the following lines of code (replacing “uri” and “key” with the values from your cosmos db account):
     public Program() {
         //public constructor
         executorService = Executors.newFixedThreadPool(100);
         scheduler = Schedulers.from(executorService);
         client = new AsyncDocumentClient.Builder().withServiceEndpoint("uri")
         .withMasterKeyOrResourceToken("key")
         .withConnectionPolicy(ConnectionPolicy.GetDefault()).withConsistencyLevel(ConsistencyLevel.Eventual)
         .build();
     }
We are now going to implement a simple query to make sure our client connection code works.
-
Locate the Main method:
public static void main(String[] args) throws InterruptedException, JSONException { } -
Add the following code within the main method:
FeedOptions options = new FeedOptions(); // as this is a multi collection enable cross partition query options.setEnableCrossPartitionQuery(true); // note that setMaxItemCount sets the number of items to return in a single page // result options.setMaxItemCount(5); String sql = "SELECT TOP 5 s.studentAlias FROM coll s WHERE s.enrollmentYear = 2018 ORDER BY s.studentAlias"; Program p = new Program(); Observable<FeedResponse<Document>> documentQueryObservable = p.client .queryDocuments("dbs/" + p.databaseName + "/colls/" + p.collectionId, sql, options); // observable to an iterator Iterator<FeedResponse<Document>> it = documentQueryObservable.toBlocking().getIterator(); while (it.hasNext()) { FeedResponse<Document> page = it.next(); List<Document> results = page.getResults(); // here we iterate over all the items in the page result for (Object doc : results) { System.out.println(doc); } } -
Your Program class definition now look like this:
public class Program { private final ExecutorService executorService; private final Scheduler scheduler; private AsyncDocumentClient client; private final String databaseName = "UniversityDatabase"; private final String collectionId = "StudentCollection"; private int numberOfDocuments; public Program() { // public constructor executorService = Executors.newFixedThreadPool(100); scheduler = Schedulers.from(executorService); client = new AsyncDocumentClient.Builder().withServiceEndpoint("uri") .withMasterKeyOrResourceToken("key") .withConnectionPolicy(ConnectionPolicy.GetDefault()).withConsistencyLevel(ConsistencyLevel.Eventual) .build(); } public static void main(String[] args) throws InterruptedException, JSONException { FeedOptions options = new FeedOptions(); // as this is a multi collection enable cross partition query options.setEnableCrossPartitionQuery(true); // note that setMaxItemCount sets the number of items to return in a single page // result options.setMaxItemCount(5); String sql = "SELECT TOP 5 s.studentAlias FROM coll s WHERE s.enrollmentYear = 2018 ORDER BY s.studentAlias"; Program p = new Program(); Observable<FeedResponse<Document>> documentQueryObservable = p.client .queryDocuments("dbs/" + p.databaseName + "/colls/" + p.collectionId, sql, options); // observable to an iterator Iterator<FeedResponse<Document>> it = documentQueryObservable.toBlocking().getIterator(); while (it.hasNext()) { FeedResponse<Document> page = it.next(); List<Document> results = page.getResults(); // here we iterate over all the items in the page result for (Object doc : results) { System.out.println(doc); } } } } -
Save all of your open editor tabs and run the code.
-
Observe the results of the console project.
You should see five aliases printed to the console window.
-
Click the 🗙 symbol to close the terminal pane.
-
Close all open editor tabs.
Query Intra-document Array
-
Here you will use org.json to parse JSON in Java, so you will need to add the library as a dependency in your pom.xml file (don’t forget to accept sync prompt) :
<dependency> <groupId>org.json</groupId> <artifactId>json</artifactId> <version>20090211</version> </dependency> -
In the Visual Studio Code window, double-click the Program.java file to open an editor tab for the file.
-
Within the Program.java editor tab, add the following imports at the top, below the package declaration:
import org.json.JSONArray; import org.json.JSONException; import org.json.JSONObject; -
Now locate the Main method.
-
Within the Main method, locate the following line of code:
String sql = "SELECT TOP 5 s.studentAlias FROM coll s WHERE s.enrollmentYear = 2018 ORDER BY s.studentAlias";Replace that line of code with the following code:
String sql = "SELECT s.clubs FROM students s WHERE s.enrollmentYear = 2018";This new query will select the clubs property for each student in the result set. The value of the clubs property is a string array.
-
Locate the following lines of code:
     while (it.hasNext()) {
             FeedResponse<Document> page = it.next();
             List<Document> results = page.getResults();
             // here we iterate over all the items in the page result
             for (Object doc : results) {
                     System.out.println(doc);
             }
     }
Replace them with the following code:
     while (it.hasNext()) {
             FeedResponse<Document> page = it.next();
             List<Document> results = page.getResults();
             for (Document doc : results) {
                     JSONObject obj = new JSONObject(doc.toJson());
                     JSONArray  student = obj.getJSONArray("clubs");
                     for (int i = 0; i < student.length(); i++) {
                             Object club = student.getString(i);
                             System.out.println(club);
                     }

             }
     }
Our new query will need to iterate twice. First, we will iterate the collection of students and then we will iterate the collection of clubs for each student.
-
Finally, within the Main method, locate the following line of code:
options.setMaxItemCount(5); -
As you will be returning many more results, you will want to increase the allowed number of items in each page:
options.setMaxItemCount(5000); -
Save all of your open editor tabs, and click run.
-
Observe the results of the console project.
You should see multiple club names printed to the console window.
-
Click the 🗙 symbol to close the terminal pane.
-
Within the Program.java editor tab, locate the Main method.
-
Within the Main method, locate the following line of code:
String sql = "SELECT s.clubs FROM students s WHERE s.enrollmentYear = 2018";Replace that line of code with the following code:
String sql = "SELECT s.firstName, s.lastName, s.clubs FROM students s WHERE s.enrollmentYear = 2018";We are now including the firstName and lastName fields in our query.
-
Locate the following block of code:
     while (it.hasNext()) {
             FeedResponse<Document> page = it.next();
             List<Document> results = page.getResults();
             for (Document doc : results) {
                     JSONObject obj = new JSONObject(doc.toJson());
                     JSONArray  student = obj.getJSONArray("clubs");
                     for (int i = 0; i < student.length(); i++) {
                             Object club = student.getString(i);
                             System.out.println(club);
                     }

             }
     }
Replace that block of code with the following code:
     while (it.hasNext()) {
             FeedResponse<Document> page = it.next();
             List<Document> results = page.getResults();
             for (Document doc : results) {
                     JSONObject obj = new JSONObject(doc.toJson());
                     JSONArray  student = obj.getJSONArray("clubs");
                     String firstName = obj.getString("firstName");
                     String lastName = obj.getString("lastName");
                     System.out.println("***Student name***");
                     System.out.println(firstName +" "+lastName);
                     System.out.println("*** Clubs***");
                     for (int i = 0; i < student.length(); i++) {
                             Object club = student.getString(i);
                             System.out.println(club);
                     }
                     System.out.println("\n");

             }
     }
This modification simply prints out more information to the console.
-
Save all of your open editor tabs, and click run.
-
Observe the results of the console project.
-
Click the 🗙 symbol to close the terminal pane.
Since we only really care about the list of clubs, we want to peform a self-join that applies a cross product across the club properties of each student in the result set.
-
In the Visual Studio Code window, double-click the Program.java file to open an editor tab for the file.
-
Within the Program.java editor tab, locate the Main method.
-
Within the Main method, locate the following line of code:
String sql = "SELECT s.firstName, s.lastName, s.clubs FROM students s WHERE s.enrollmentYear = 2018";Replace that line of code with the following code:
String sql = "SELECT activity FROM students s JOIN activity IN s.clubs WHERE s.enrollmentYear = 2018";Here we are performing an intra-document JOIN to get a projection of all clubs across all matching students.
-
Locate the following line of code:
     while (it.hasNext()) {
             FeedResponse<Document> page = it.next();
             List<Document> results = page.getResults();
             for (Document doc : results) {
                     JSONObject obj = new JSONObject(doc.toJson());
                     JSONArray  student = obj.getJSONArray("clubs");
                     String firstName = obj.getString("firstName");
                     String lastName = obj.getString("lastName");
                     System.out.println("***Student name***");
                     System.out.println(firstName +" "+lastName);
                     System.out.println("***Student name***");
                     for (int i = 0; i < student.length(); i++) {
                             Object club = student.getString(i);
                             System.out.println(club);
                     }

             }
     }
Replace that line of code with the following code:
while (it.hasNext()) { FeedResponse<Document> page = it.next(); List<Document> results = page.getResults(); for (Document doc : results) { JSONObject obj = new JSONObject(doc.toJson()); String activity = obj.getString("activity"); System.out.println(activity); } } -
Save all of your open editor tabs, and click run.
-
Observe the results of the console project.
You should see multiple club names printed to the console window.
-
Click the 🗙 symbol to close the terminal pane.
Projecting Query Results
-
In the Visual Studio Code window, double-click the Program.java file to open an editor tab for the file.
-
Within the Program.java editor tab, locate the Main method.
-
Within the Main method, locate the following line of code:
String sql = "SELECT VALUE activity FROM students s JOIN activity IN s.clubs WHERE s.enrollmentYear = 2018";Replace that line of code with the following code:
String sql = "SELECT VALUE { 'id': s.id, 'name': CONCAT(s.firstName, ' ', s.lastName), 'email': { 'home': s.homeEmailAddress, 'school': CONCAT(s.studentAlias, '@contoso.edu') } } FROM students s WHERE s.enrollmentYear = 2018";This query will get relevant information about a student and format it to a specific JSON structure that our application expects. For your information, here’s the query that we are using:
SELECT VALUE { "id": s.id, "name": CONCAT(s.firstName, " ", s.lastName), "email": { "home": s.homeEmailAddress, "school": CONCAT(s.studentAlias, '@contoso.edu') } } FROM students s WHERE s.enrollmentYear = 2018 -
Locate the following lines of code:
     while (it.hasNext()) {
             FeedResponse<Document> page = it.next();
             List<Document> results = page.getResults();
             for (Document doc : results) {
                     JSONObject obj = new JSONObject(doc.toJson());
                     String activity = obj.getString("activity");
                     System.out.println(activity);
             }
      }
Replace that code with the following code:
while (it.hasNext()) { FeedResponse<Document> page = it.next(); List<Document> results = page.getResults(); for (Document doc : results) { JSONObject obj = new JSONObject(doc.toJson()); String id = obj.getString("id"); String name = obj.getString("name"); String mail = obj.getString("email"); JSONObject email = new JSONObject(mail); System.out.println("id: "+id); System.out.println("name: "+name); System.out.println("school: "+email.getString("school")); System.out.println("home: "+email.getString("home")); } } -
Save all of your open editor tabs, and click run.
-
Observe the results of the execution.
-
Click the 🗙 symbol to close the terminal pane.
-
Close all open editor tabs.
Implementing Pagination
The approach taken in all the examples above allows you to implement pagination in your application. The toBlocking().getIterator() chained methods return an iterator over the Observable FeedResponse - this iterates over all pages brought back by the query. With options.setMaxItemCount(), you can set the maximum number of records (items) to return per page
Implement Cross-Partition Queries
With an unlimited container, you may wish to perform queries that are filtered to a partition key or perform queries across multiple partition keys. You will now implement both types of queries using the various options available in the FeedOptions class.
Execute Single-Partition Query
-
Within the Program.java editor tab, locate the Main method and delete any existing code:
public static void main(String[] args) throws InterruptedException, JSONException { { } -
Within the Main method, add the following lines of code:
FeedOptions options = new FeedOptions(); PartitionKey partitionKey = new PartitionKey(2016); options.setPartitionKey(partitionKey); // as this is a multi collection enable cross partition query options.setEnableCrossPartitionQuery(true); // note that setMaxItemCount sets the number of items to return in a single page result options.setMaxItemCount(5000); String sql = "select * from s where s.projectedGraduationYear = 2020 "; Program p = new Program(); Observable<FeedResponse<Document>> documentQueryObservable = p.client .queryDocuments("dbs/" + p.databaseName + "/colls/" + p.collectionId, sql, options); // observable to an iterator Iterator<FeedResponse<Document>> it = documentQueryObservable.toBlocking().getIterator(); while (it.hasNext()) { FeedResponse<Document> page = it.next(); Object results = page.getRequestCharge(); System.out.println("results: "+results.toString()); }- Observe the following lines of code in particular:
     FeedOptions options = new FeedOptions();
     PartitionKey partitionKey = new PartitionKey(2016);
     options.setPartitionKey(partitionKey);
First we will restrict our query to a single partition key using the
setPartitionKeyproperty of theFeedOptionsclass. One of our partition key values for the/enrollmentYearpath is2016. We will filter our query to only return documents that uses this partition key. Remember, partition key paths are case sensitive. Since our property is namedenrollmentYear, it will match on the partition key path of/enrollmentYear. -
Save all of your open editor tabs, and click run.
-
Observe the results of the execution.
The query will return a numeric value which represents the RU charge incurred for the query
-
Click the 🗙 symbol to close the terminal pane.
Execute Cross-Partition Query
-
Within the Main method, locate the following line of code:
     PartitionKey partitionKey = new PartitionKey(2016);
     options.setPartitionKey(partitionKey);
Remove these lines of code.
Cross-partition queries are already enabled using the
setEnableCrossPartitionQueryproperty of theFeedOptionsclass. You must explicitly opt-in using the SDK classes if you wish to perform a cross-partition query from the SDK. By removing the code that specifies the partition key, the query will scan across all partitions. -
Save all of your open editor tabs, and click run.
-
Observe the results of the execution.
You will notice that the RU charge is significantly higher, as results are coming from more than one partition.
-
Click the 🗙 symbol to close the terminal pane.
Implement Continuation Token
-
Locate the Main method and delete any existing code:
public static void main(String[] args) throws InterruptedException, JSONException { { } -
Replace the Main method with the following implementation:
     public static void main(String[] args) throws InterruptedException, JSONException {
             FeedOptions options = new FeedOptions();
             // as this is a multi collection enable cross partition query
             options.setEnableCrossPartitionQuery(true);
             // note that setMaxItemCount sets the number of items to return in a single page result
             options.setMaxItemCount(2000);
             String continuationToken = "";
             options.setRequestContinuation(continuationToken);
             String sql = "SELECT * FROM s where s.age < 18";
             Program p = new Program();
             Observable<FeedResponse<Document>> documentQueryObservable = p.client
                             .queryDocuments("dbs/" + p.databaseName + "/colls/" + p.collectionId, sql, options);
             // observable to an iterator
             Iterator<FeedResponse<Document>> it = documentQueryObservable.toBlocking().getIterator();

             System.out.println("continuationToken: "+continuationToken);
             do  {
                     FeedResponse<Document> page = it.next();
                     List<Document> results = page.getResults();
                     for (Document doc : results) {
                             JSONObject obj = new JSONObject(doc.toJson());
                             String age = obj.getString("age");
                             System.out.println("age: "+age);

                     }
                     continuationToken = page.getResponseContinuation();
             }
             while (continuationToken != null);
             System.out.println("continuationToken: "+continuationToken);
             System.out.println("finished");
     }
A continuation token allows us to resume a paginated query either immediately or later. When creating a query, the results are automatically paged. If there are more results, the returned page of results will also include a continuation token. This token should be passed back in. This implementation creates a do-while loop that will continue to get pages of results as long as the continuation token is not null.
-
Save all of your open editor tabs, and click run.
-
Observe the output of the console application.
You should see a list of documents grouped by “pages” of results. You should also see a continuation token associated with each page of results. This token can be used if you are in a client-server scenario where you need to continue a query that was executed earlier.
-
Click the 🗙 symbol to close the terminal pane.
Observe How Partitions Are Accessed in a Cross-Partition Query
-
In the Visual Studio Code window, double-click the Program.java file to open an editor tab for the file.
-
Locate the Main method and delete any existing code:
public static void main(String[] args) throws InterruptedException, JSONException { { } -
Replace the Main method with the following implementation:
     public static void main(String[] args) throws InterruptedException, JSONException {
             FeedOptions options = new FeedOptions();
             // as this is a multi collection enable cross partition query
             options.setEnableCrossPartitionQuery(true);
             // note that setMaxItemCount sets the number of items to return in a single page result
             options.setMaxItemCount(1);
             String continuationToken = "";
             options.setRequestContinuation(continuationToken);
             String sql = "SELECT * FROM students s WHERE s.academicStatus.suspension = true";
             Program p = new Program();
             Observable<FeedResponse<Document>> documentQueryObservable = p.client
                             .queryDocuments("dbs/" + p.databaseName + "/colls/" + p.collectionId, sql, options);
             // observable to an iterator
             Iterator<FeedResponse<Document>> it = documentQueryObservable.toBlocking().getIterator();

             System.out.println("continuationToken: "+continuationToken);
             int pageCount = 0;
             do  {
                     FeedResponse<Document> page = it.next();
                     List<Document> results = page.getResults();
                     pageCount++;
                     System.out.println("---Page #"+pageCount+"------");
                     for (Document doc : results) {
                             JSONObject obj = new JSONObject(doc.toJson());
                             String enrollmentYear = obj.getString("enrollmentYear");
                             String financialData = obj.getString("financialData");
                             JSONObject financialDataObj = new JSONObject(financialData);
                             String studentAlias = obj.getString("studentAlias");
                             System.out.println("Enrollment: "+enrollmentYear+", Balance: "+financialDataObj.getString("tuitionBalance")+", "+studentAlias+"@consoto.edu");

                     }
                     continuationToken = page.getResponseContinuation();
             }
             while (continuationToken != null);
             System.out.println("continuationToken: "+continuationToken);
             System.out.println("finished");
     }
We are creating a cross-partition query here that may (or may not) have results for each partition key. Since this is a server-side fan-out and we are not filtering on a partition key, the search will be forced to check each partition. You can potentially have pages returned that have no results for partition keys that do not have any matching data.
-
Save all of your open editor tabs, and click run.
-
Observe the output of the application.
You should see a list of documents grouped by “pages” of results. Scroll up and look at the results for every page. You should also notice that there is at least one page that does not have any results. This page occurs because the server-side fan-out is forced to check every partition since you are not filtering by partition keys. The next few examples will illustrate this even more.
-
Click the 🗙 symbol to close the terminal pane.
-
Within the Main method, locate the following line of code:
String sql = "SELECT * FROM students s WHERE s.academicStatus.suspension = true";Replace that code with the following code:
String sql = "SELECT * FROM students s WHERE s.financialData.tuitionBalance > 14000";This new query should return results for most partition keys.
-
Save all of your open editor tabs, and click run.
-
Observe the results of the execution.
You will notice in the results that one page exists that does not have any relevant data. This occurs because there’s at least one partition that does not have any data that matches the query specified above. Since we are not filtering on partition keys, all partitions much be checked as part of the server-side fan-out.
-
Click the 🗙 symbol to close the terminal pane.
-
Within the Main method, locate the following line of code:
String sql = "SELECT * FROM students s WHERE s.financialData.tuitionBalance > 14000";Replace that code with the following code:
String sql = "SELECT * FROM students s WHERE s.financialData.tuitionBalance > 14950";This new query should return results for most partition keys.
-
Save all of your open editor tabs, and click run.
-
Observe the results of the execution.
Now only 54 records will match your query. They are pretty evenly distributed across the partition keys, so you will only see one page without results.
-
Click the 🗙 symbol to close the terminal pane.
-
Within the Main method, locate the following line of code:
String sql = "SELECT * FROM students s WHERE s.financialData.tuitionBalance > 14950";Replace that code with the following code:
String sql = "SELECT * FROM students s WHERE s.financialData.tuitionBalance > 14996";This new query should return results for most partition keys.
-
Save all of your open editor tabs, and click run.
-
Observe the results of the execution.
Only 3 records match this query. You should see more empty pages.
-
Click the 🗙 symbol to close the terminal pane.
-
Within the Main method, locate the following line of code:
String sql = "SELECT * FROM students s WHERE s.financialData.tuitionBalance > 14996";Replace that code with the following code:
String sql = "SELECT * FROM students s WHERE s.financialData.tuitionBalance > 14998";This new query should return results for most partition keys.
-
Save all of your open editor tabs, and click run.
-
Observe the results of the execution.
Only 1 record matches this query. You should see every multiple empty pages.
-
Click the 🗙 symbol to close the terminal pane.
-
Close all open editor tabs.
-
Close the Visual Studio Code application.
-
Close your browser application.